
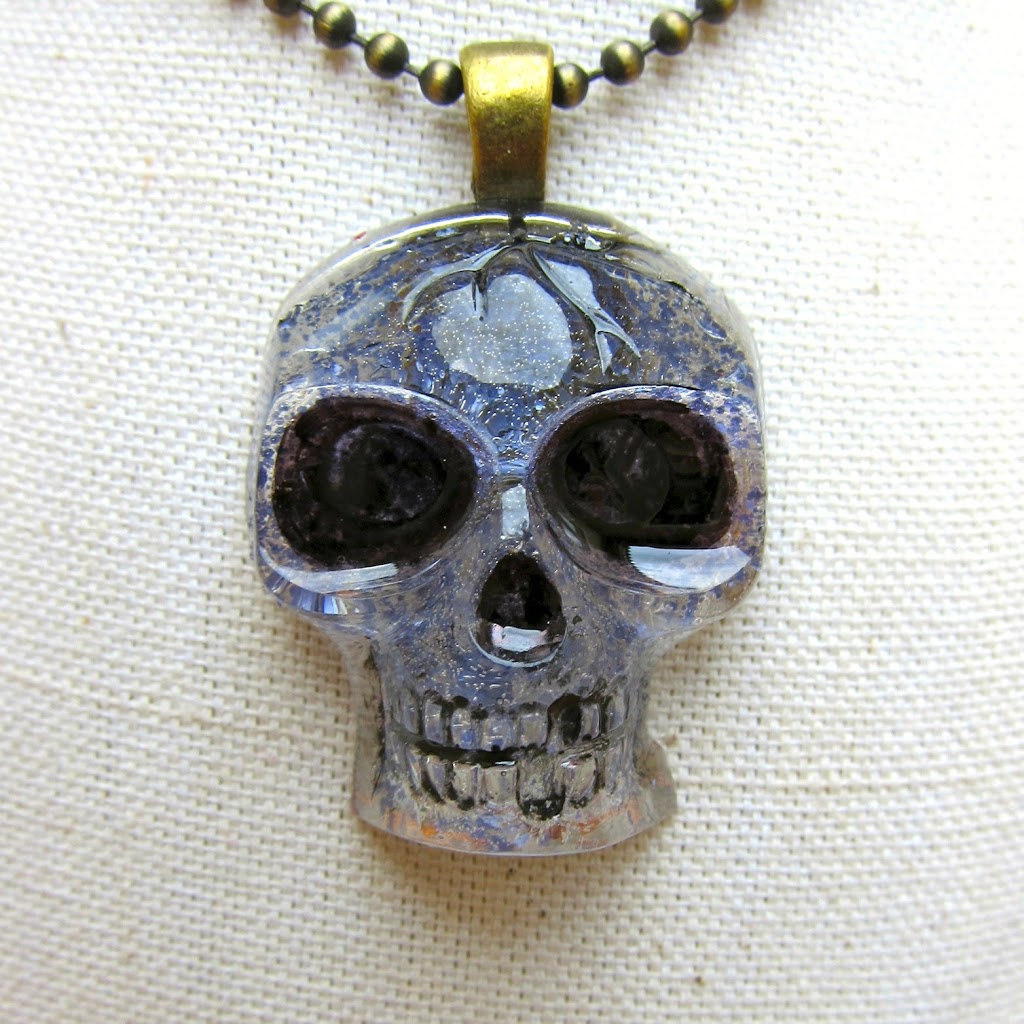
The skull ice cube trays at the Dollar Tree have been featured in several projects at Dollar Store Crafts, and here is another fun idea for them. You can use them to create spooky cool pendants to wear!
Supplies:
- Skull Ice Cube Tray
- Resin
- Glitter
- Black Paint
- Bail
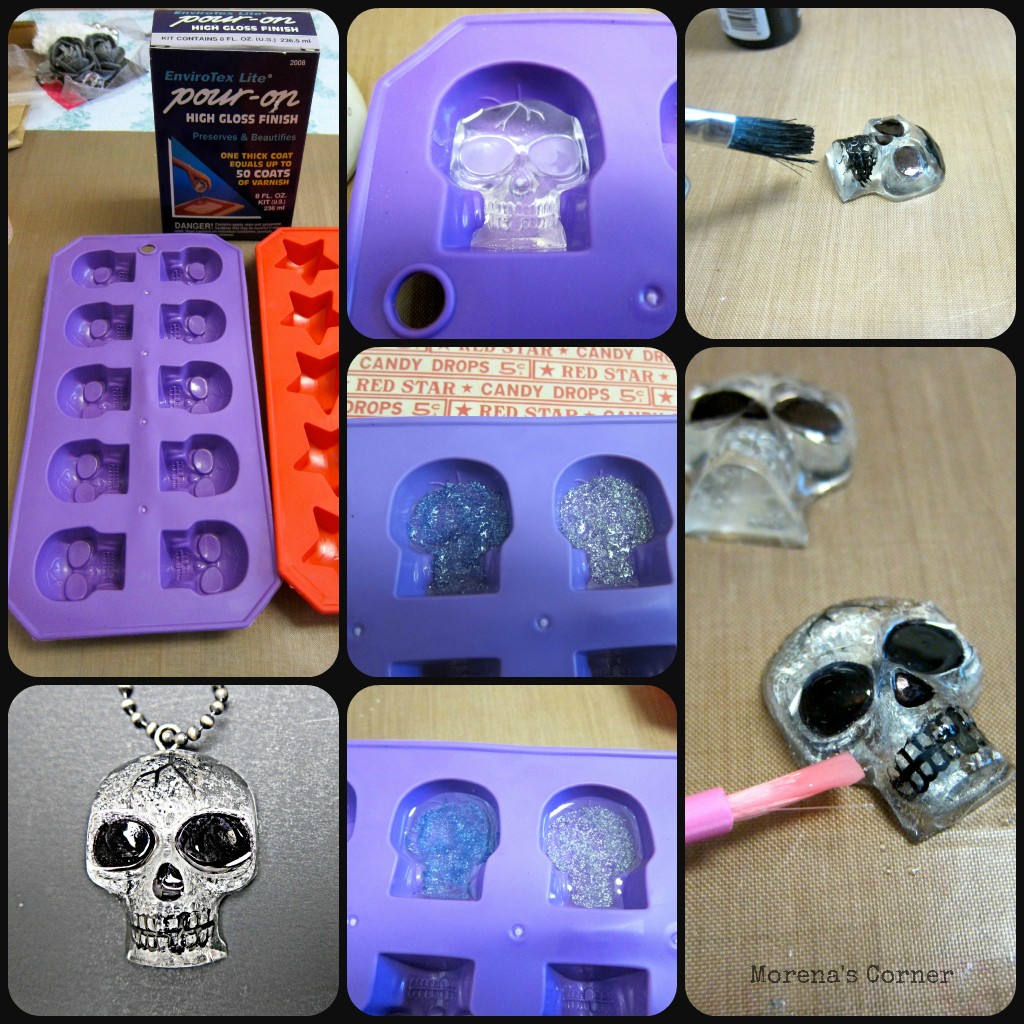
1. Pour-on resin can be found at craft stores, and with a coupon you can get it for around $5. I used Envirotex Resin. Read the instructions before using! I use a disposable cup to mix one plastic spoonful of each of the solutions together. Pour a small amount into the ice cube tray. If there are a lot of bubbles in your resin, blast it very briefly and carefully with heat from an embossing gun. The bubbles will rise to the surface and pop. Let it cure overnight.
2. Mix glitter and glue (or use Stickles) and brush a layer o to the dried resin in the tray. Let dry.
3. Mix another batch of resin and pour it into the mold, over the dried glitter. Cure 24 hours.
4. Pop the skulls out of the silicone ice cube tray. Don’t worry if they have a dull finish…we’ll fix that at the end!
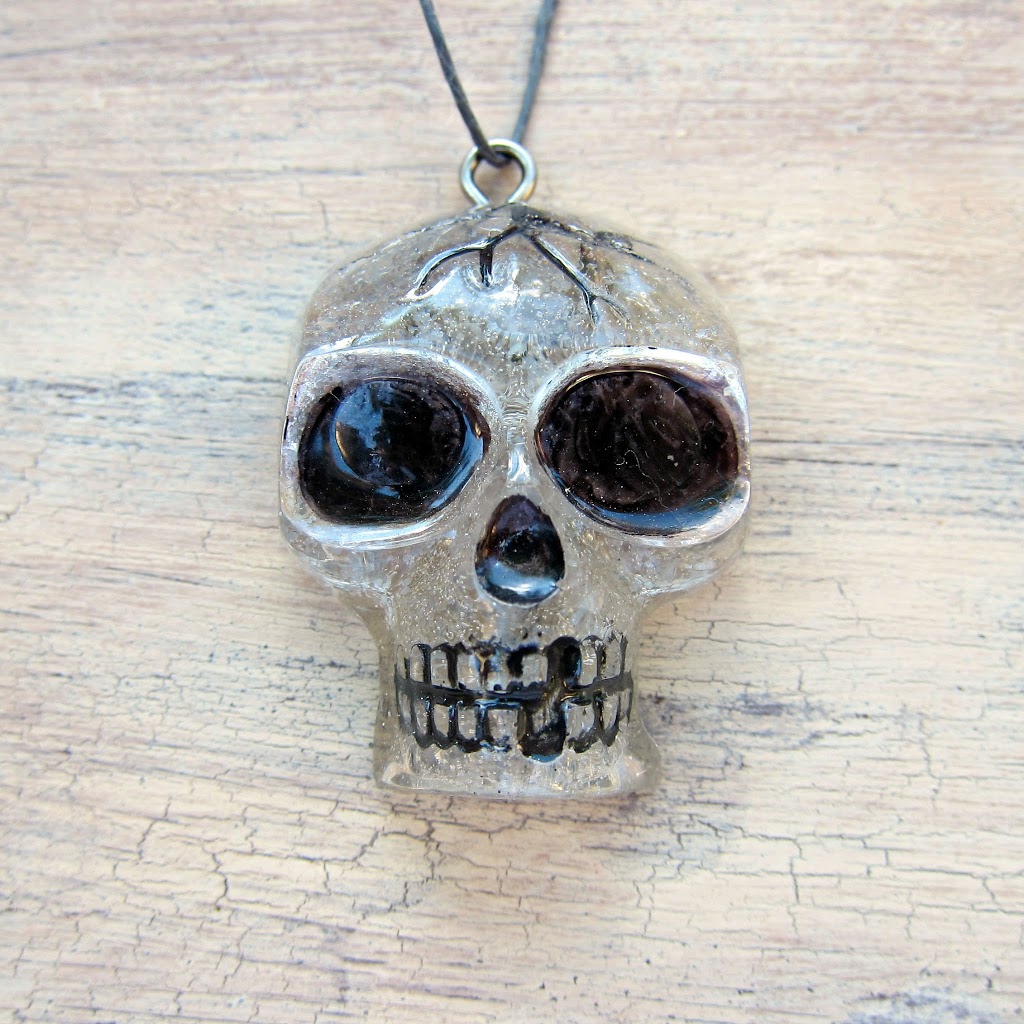
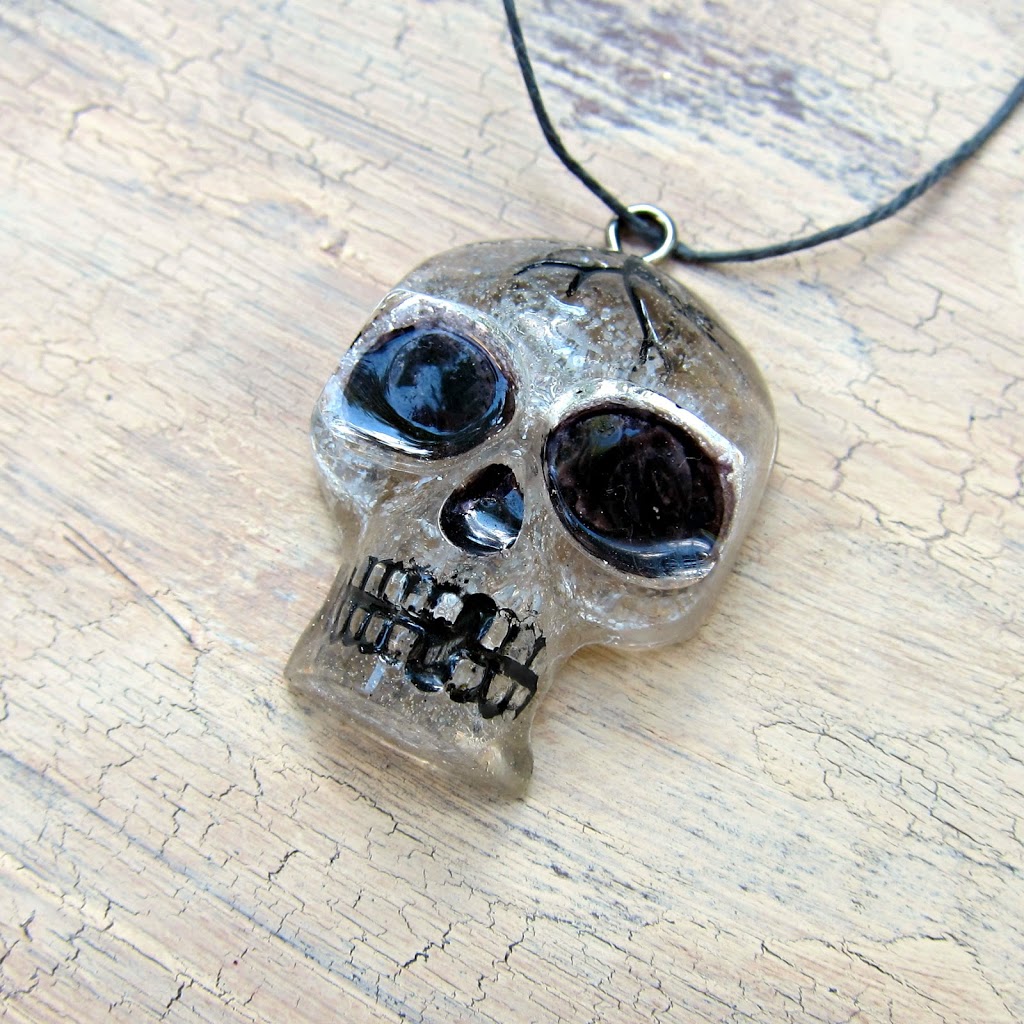
5. Brush black paint over the mouth and crack in the skull, then rub the excess off with a towel. Paint should remain in the details. You can paint the eyes and nose or fill them in with a Sharpie pen.
6. Brush a light layer of resin over the painted skull face. This seals the paint and gives the finished product an incredible shine.
7. Use E-6000 glue to adhere a bail to the back of the pendant (I used a bail and a jump ring I saved from broken jewelry).
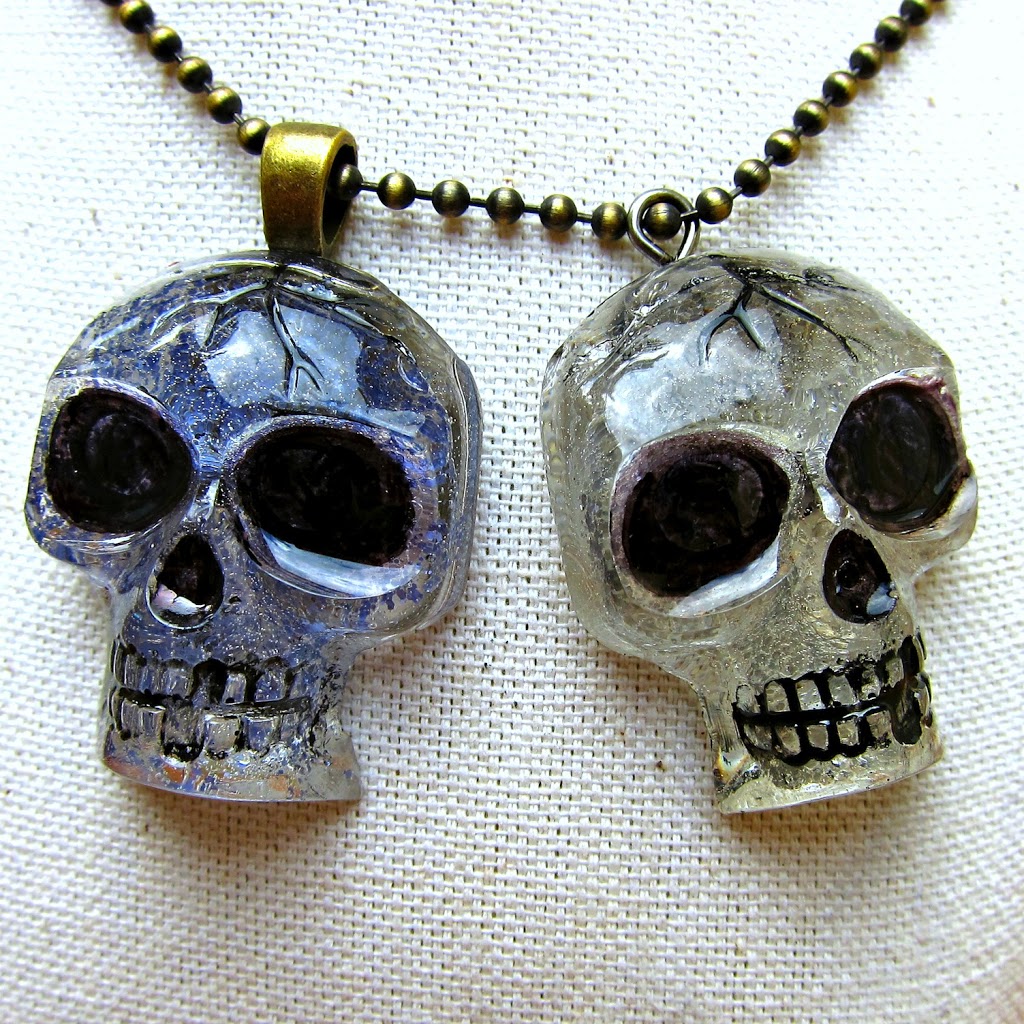
My two older boys were so excited to see this finished project! This skull pendant would work all year round, not just for Halloween. You could change the color of the glitter and the paint to customize your pendant, too. There are so many fun possibilities!
Leave a Reply