
Make a chair shelf by repurposing a Goodwill San Antonio find into a piece of bathroom decor! This is a sponsored post but all ideas and opinions are my own.
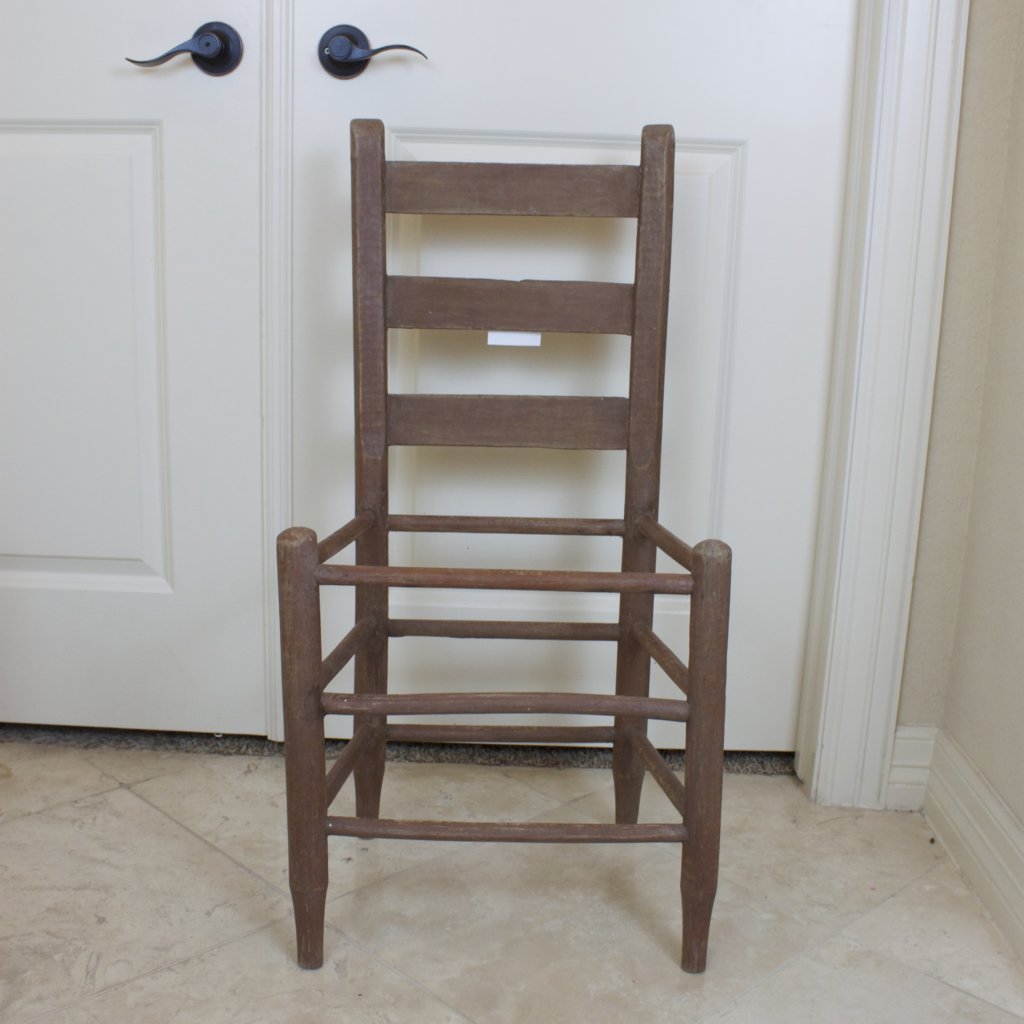
I recently found four wood chairs with broken wicker seats at the San Pedro Goodwill San Antonio store. At just $10 each, they were a bargain! Other people might look at chairs with a broken seating area as junk, but these chairs are perfect for creating rustic home decor. Let me show you how you can turn a thrifted chair into a beautiful shelf for your home.
Supplies to Make the Chair Shelf: (affiliate links)
- Solid Wood Chair with the Seat Removed (from Goodwill San Antonio)
- Decoart Vintage Effect Wash 8oz Turquoise
- Wood board
- Wood Glue
- D-rings
- Drill
- Sandpaper
- Damp cloth
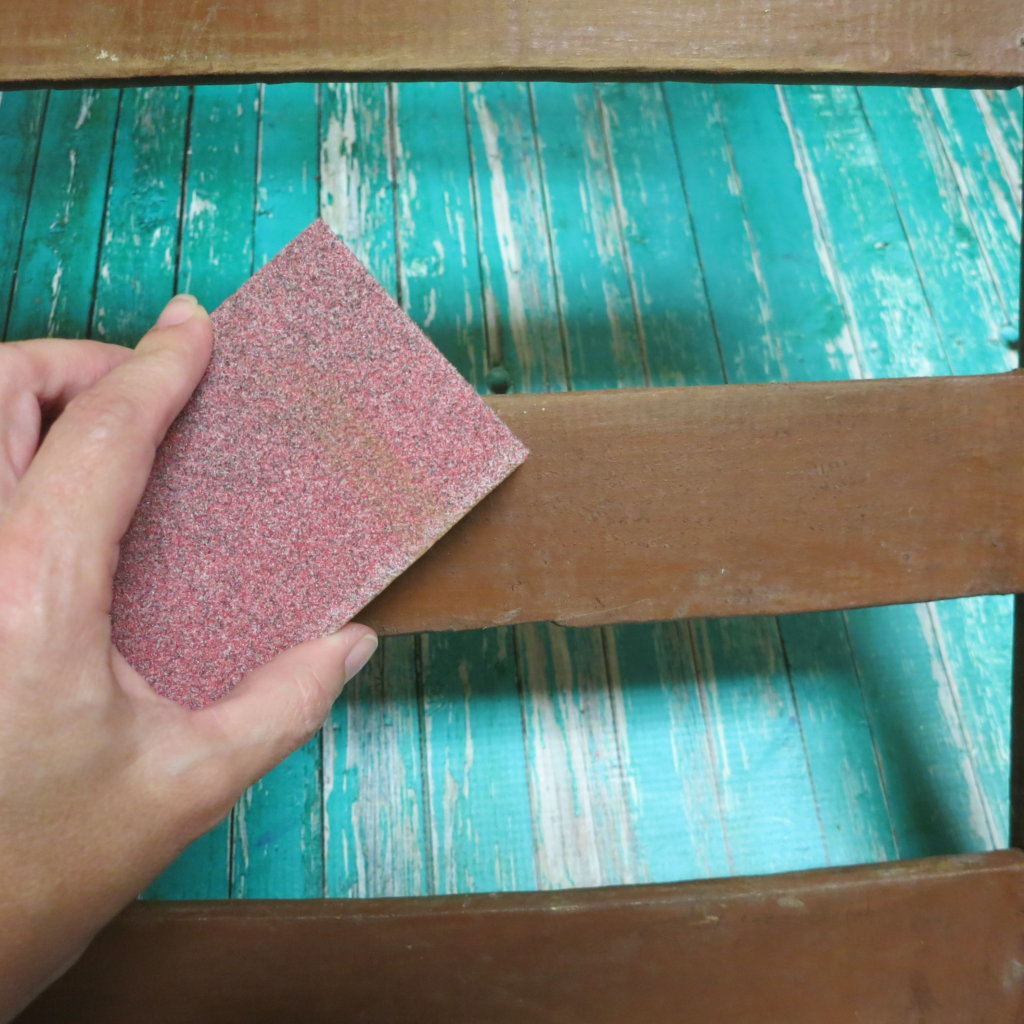
Step one: Gently send the chair to remove some of the stain. Wipe the chair clean to remove all the dust.
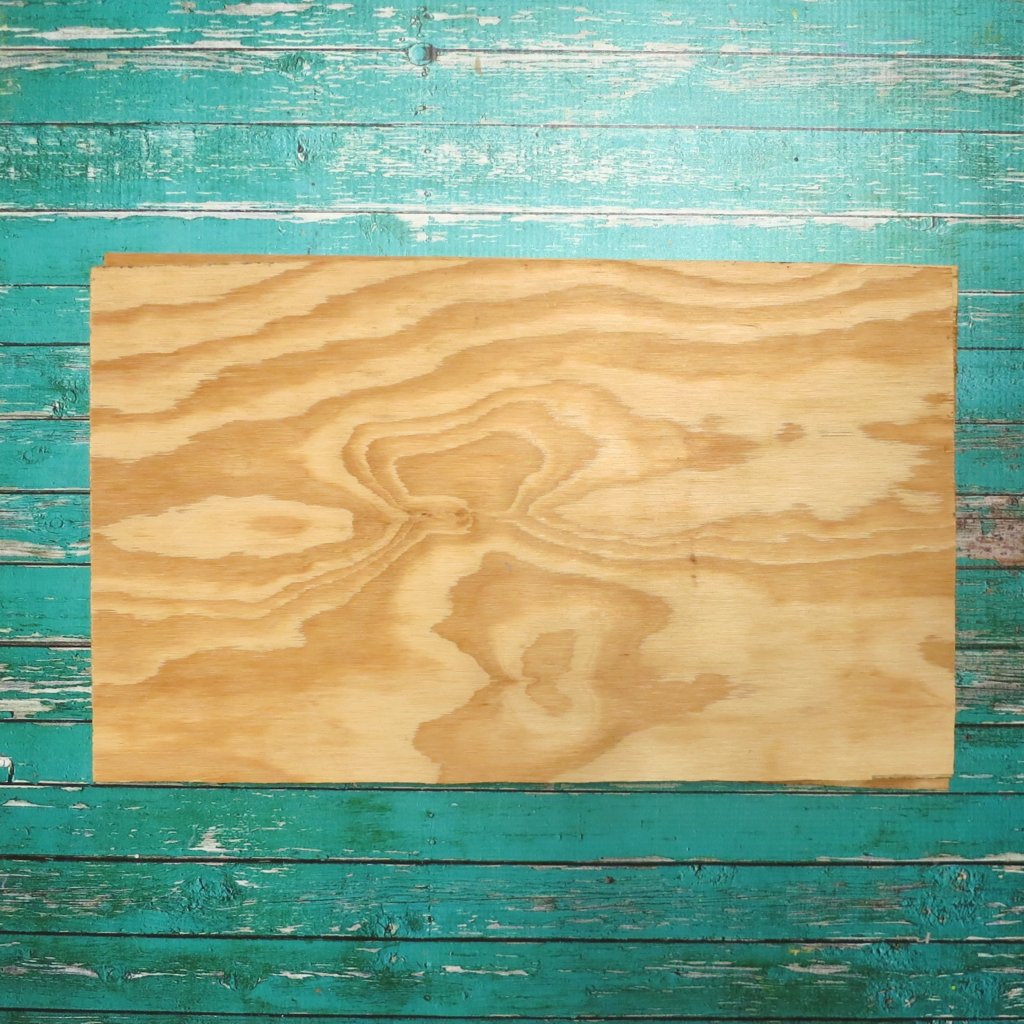
Step two: Measure and cut two wood boards to fit under where the seat would be. These will be our shelves later!
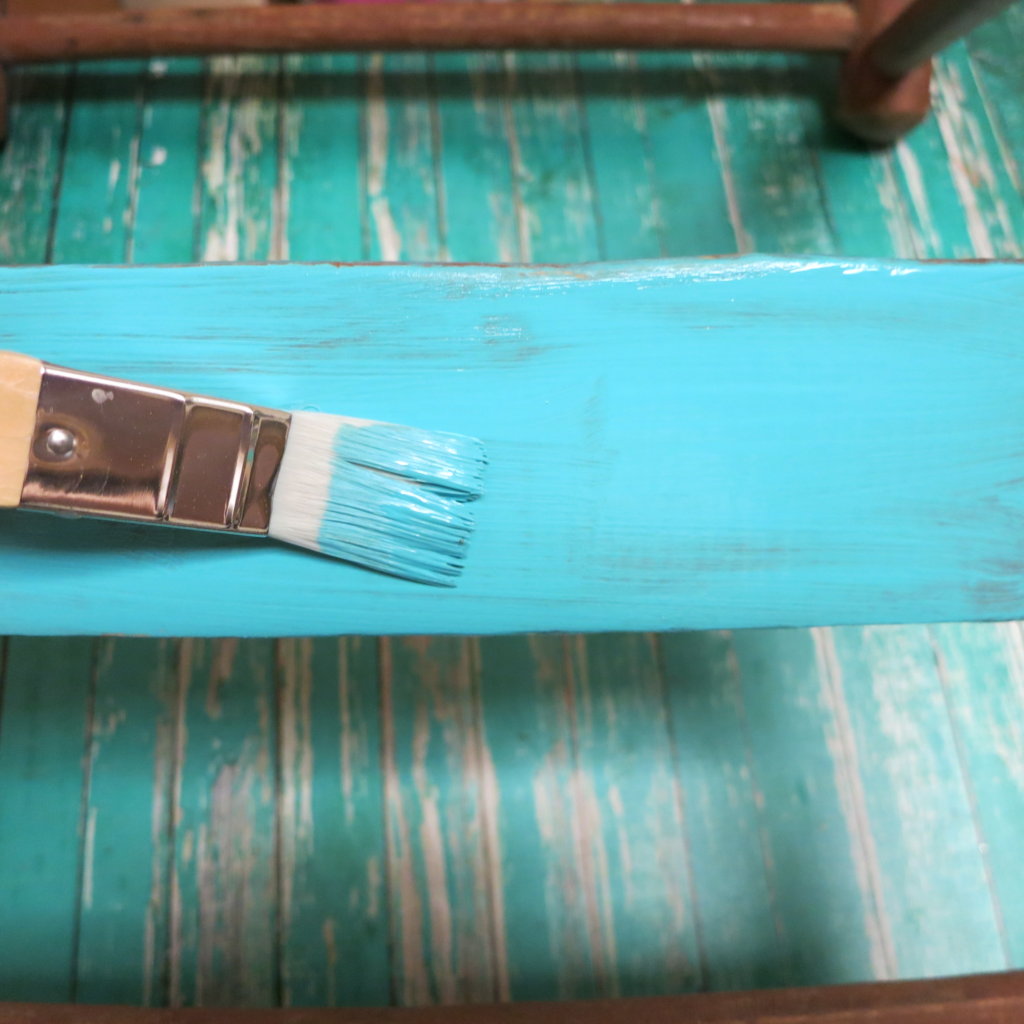
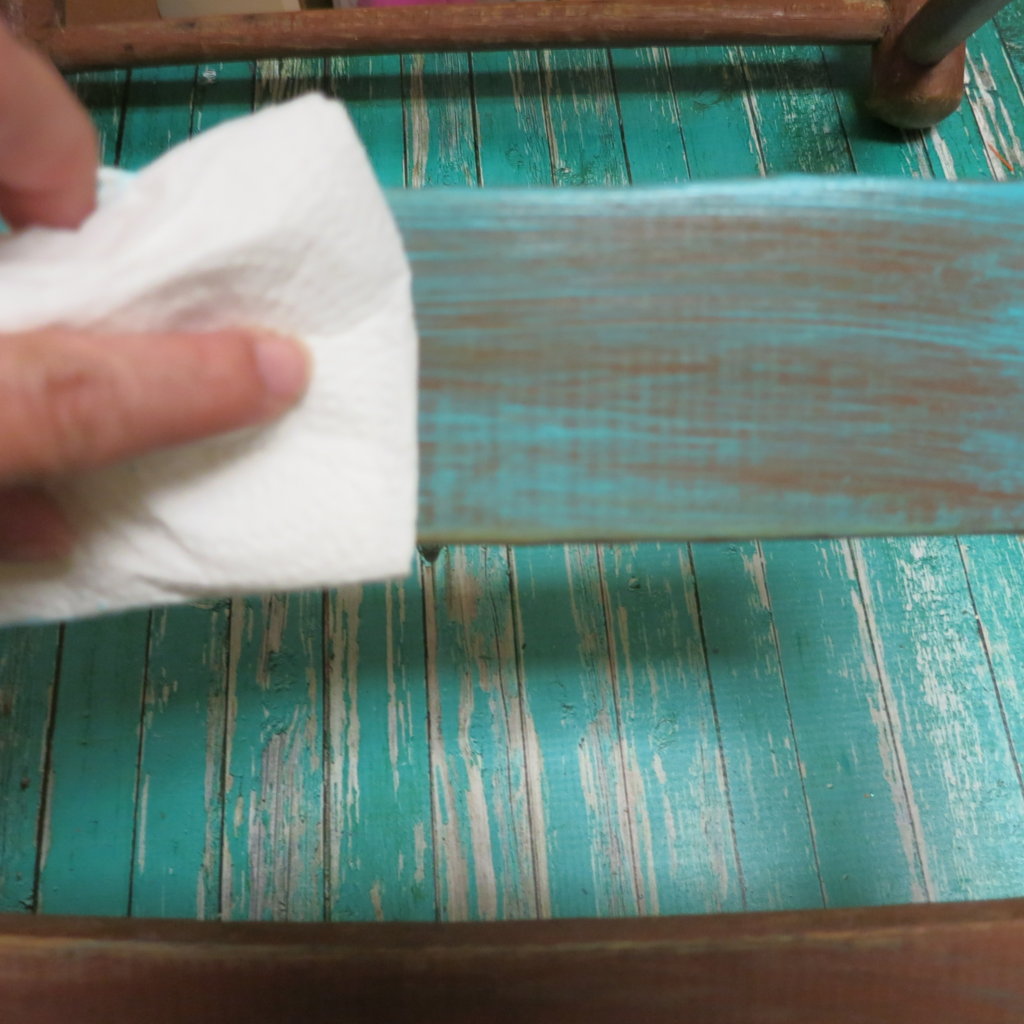
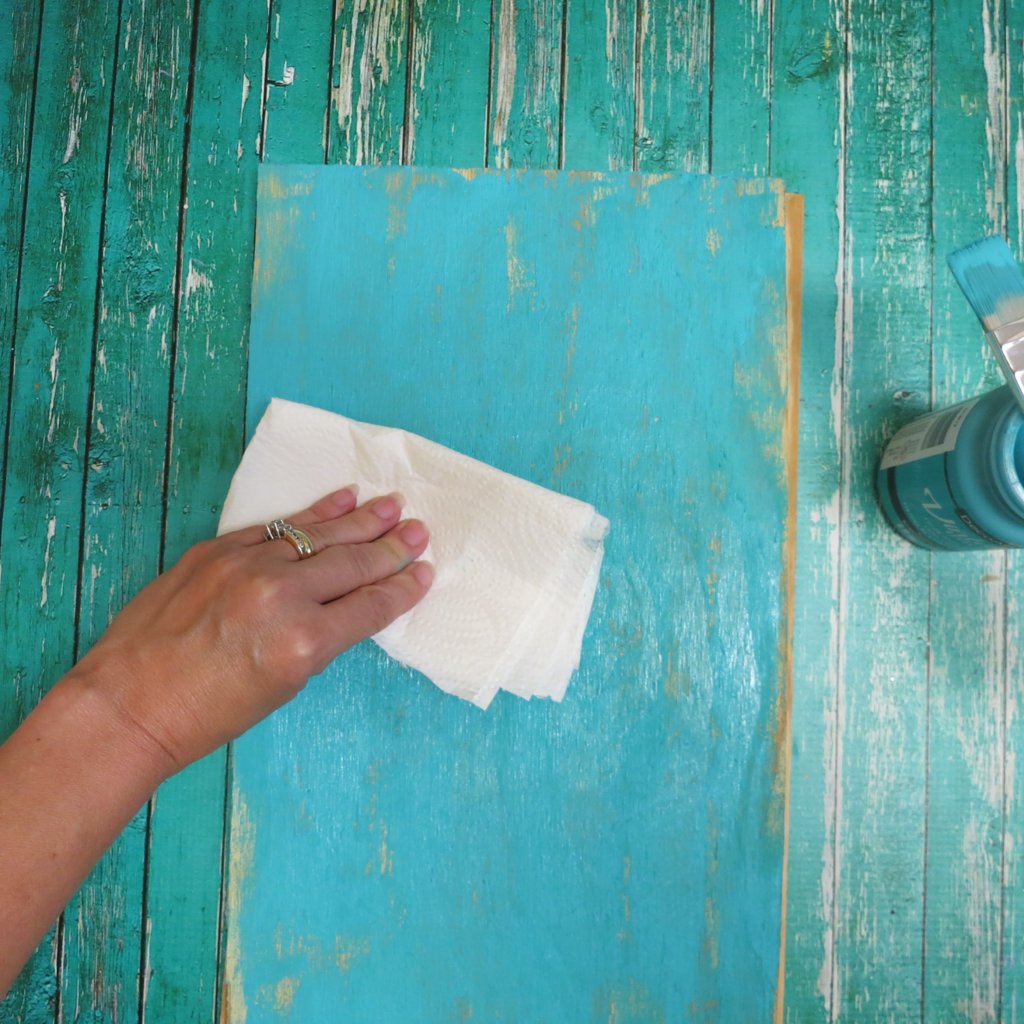
Step three: Brush Vintage Stain on the wood. Use a damp towel to gently wipe back some of the paint. Work on one section at a time, painting and wiping until the chair is covered. You can wipe off as much or as little as you like to create the aged finish that suits your style.
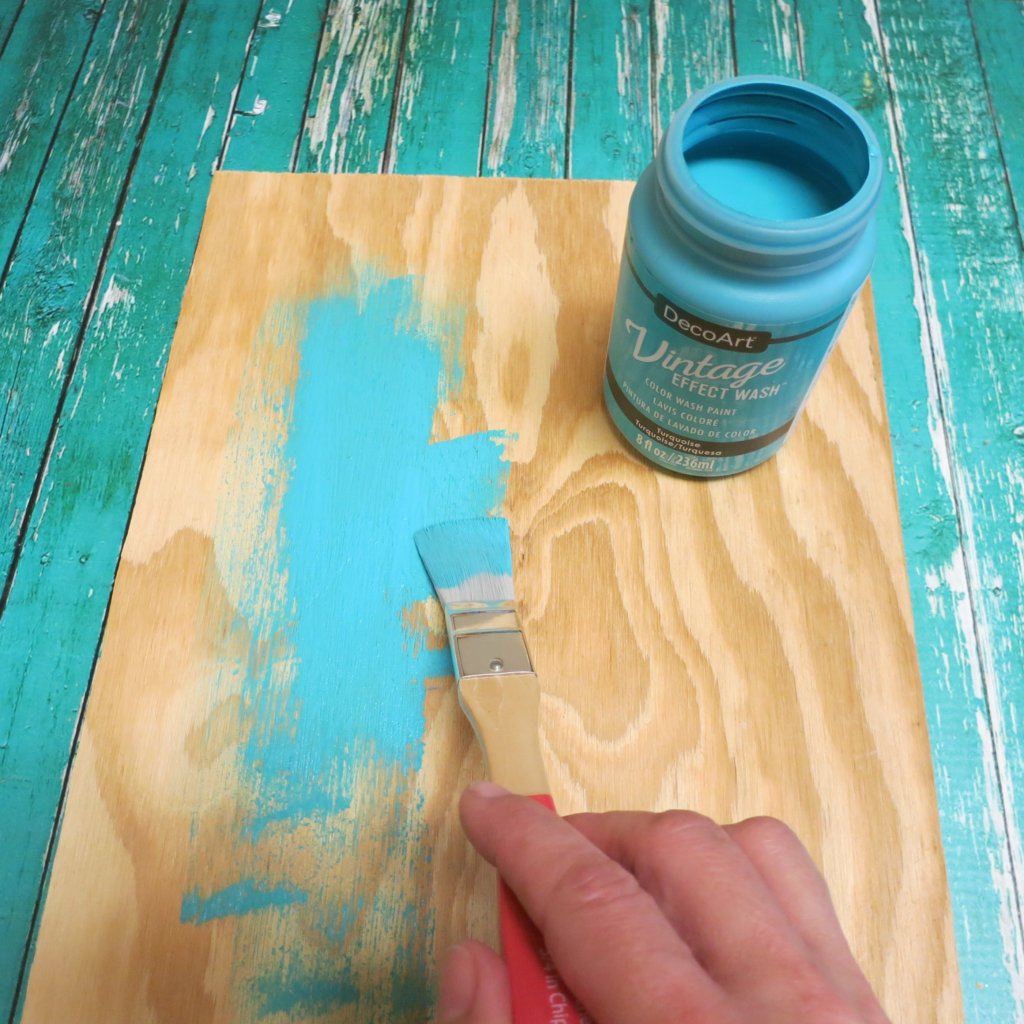
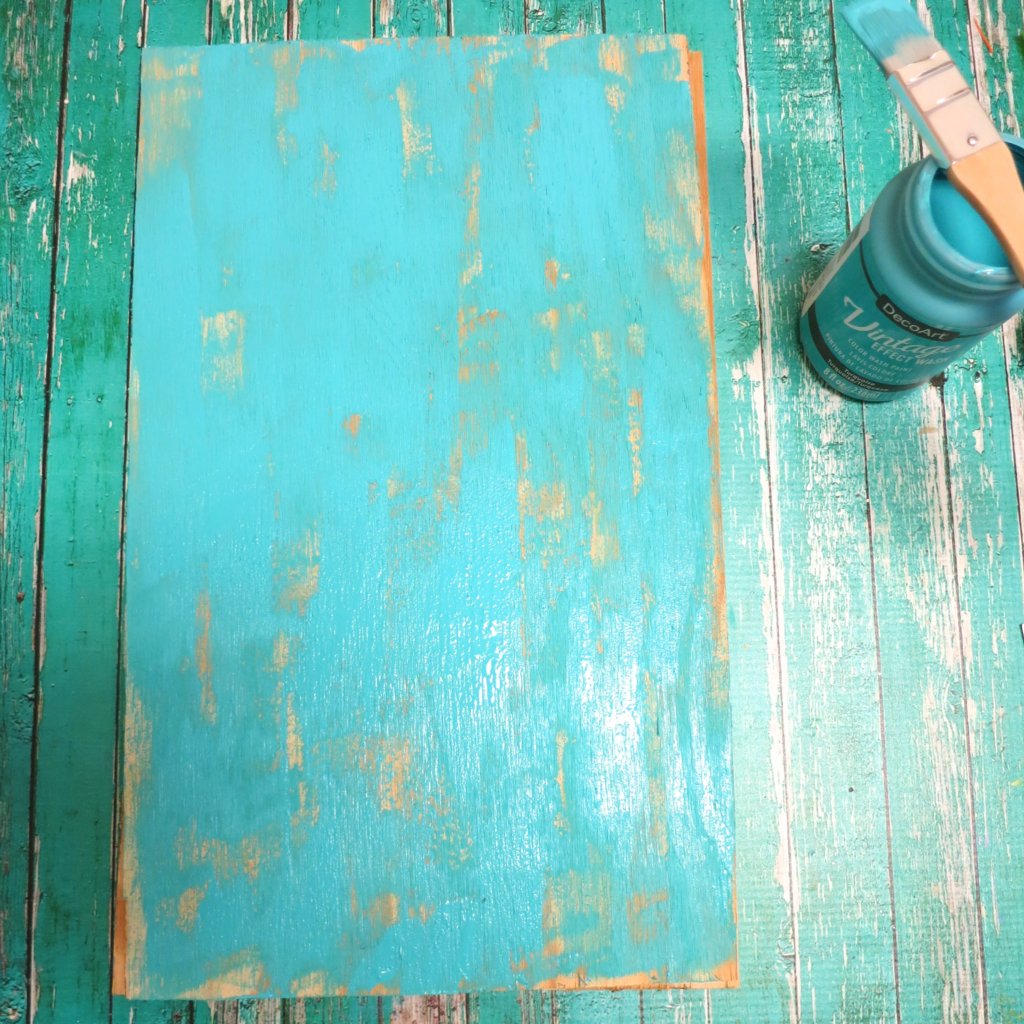
Step four: Paint the cut wood pieces with Vintage Stain. Repeat the process above, painting and then wiping back the paint with a damp towel or cloth.
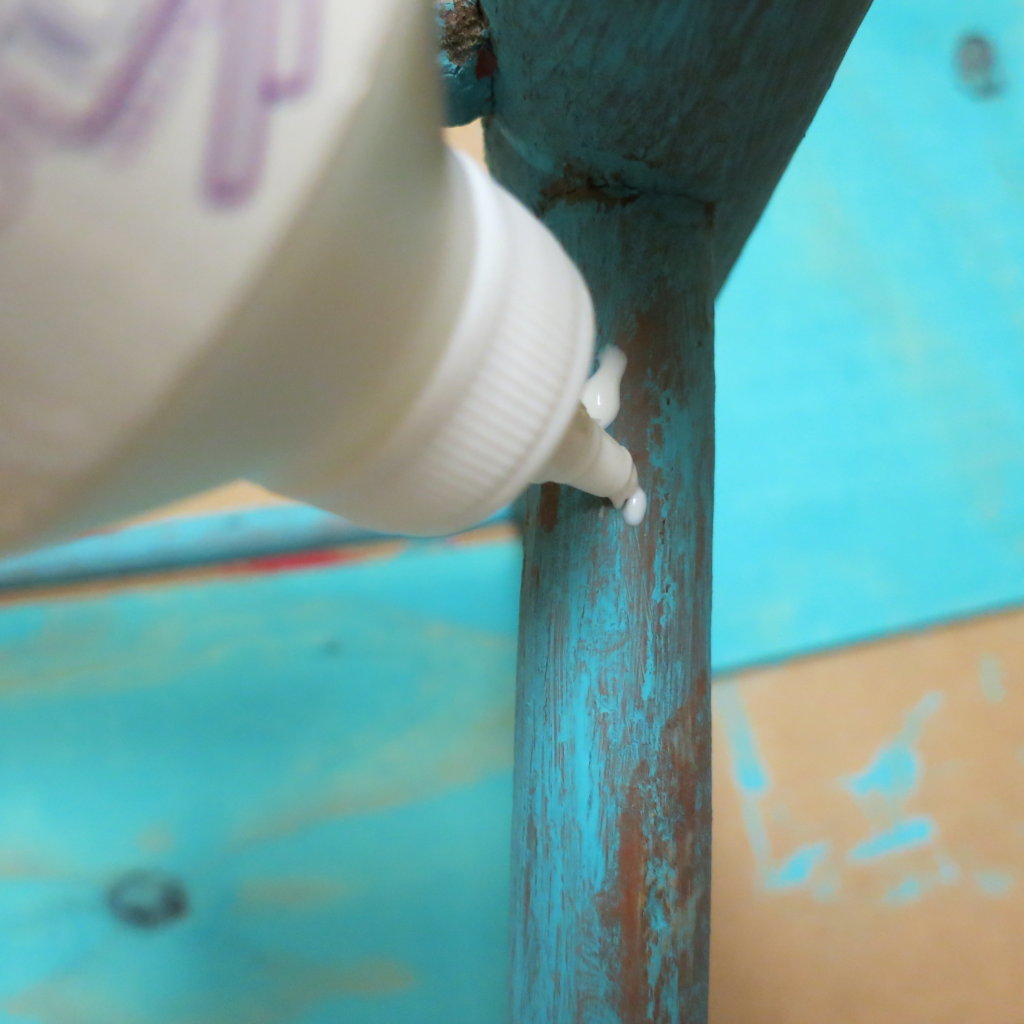
Step five: Use wood glue to attach the wood shelves to the chair rungs.
Step six: Attach the D-rings to the front chair legs. Use a drill to screw the hangers in place.

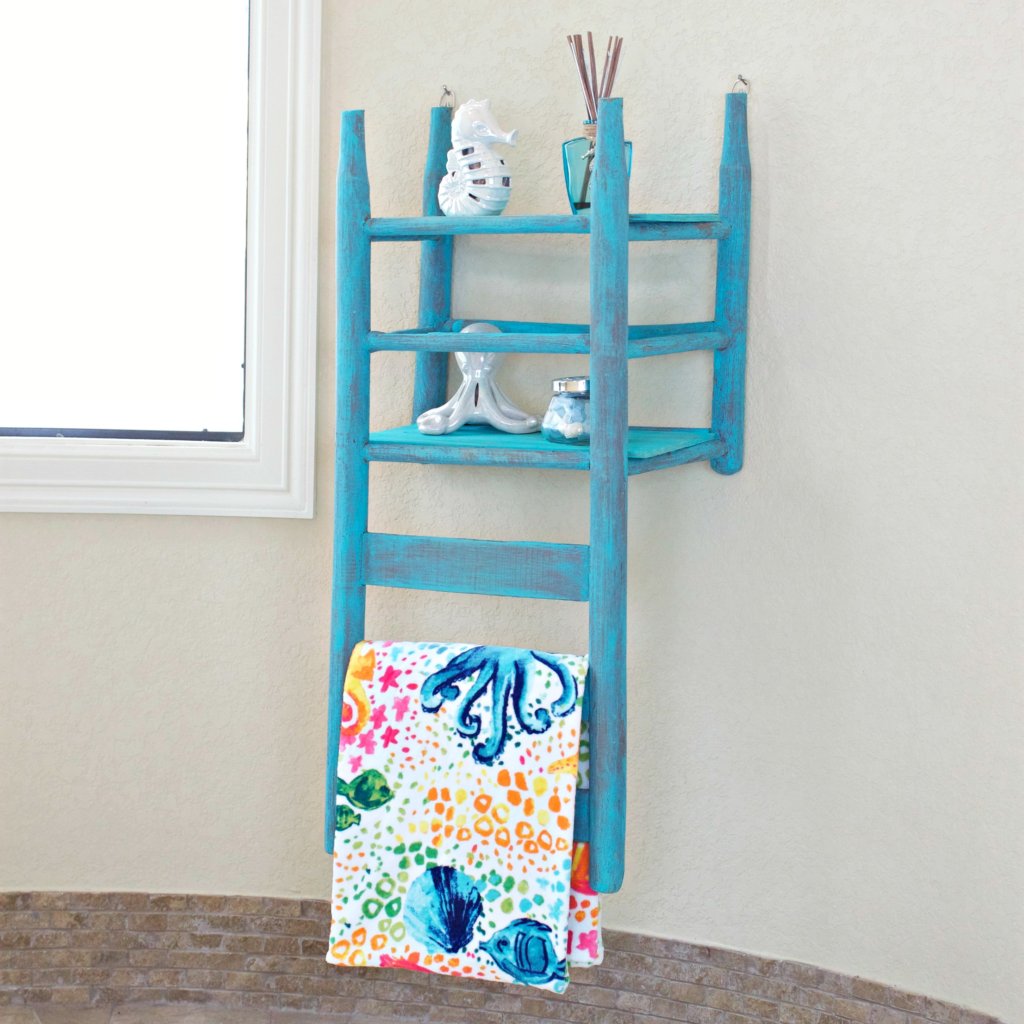
This chair is pretty light, but I still used wall anchors to help hold them it up. You’ll especially want to do this if kids will be pulling on the towel!
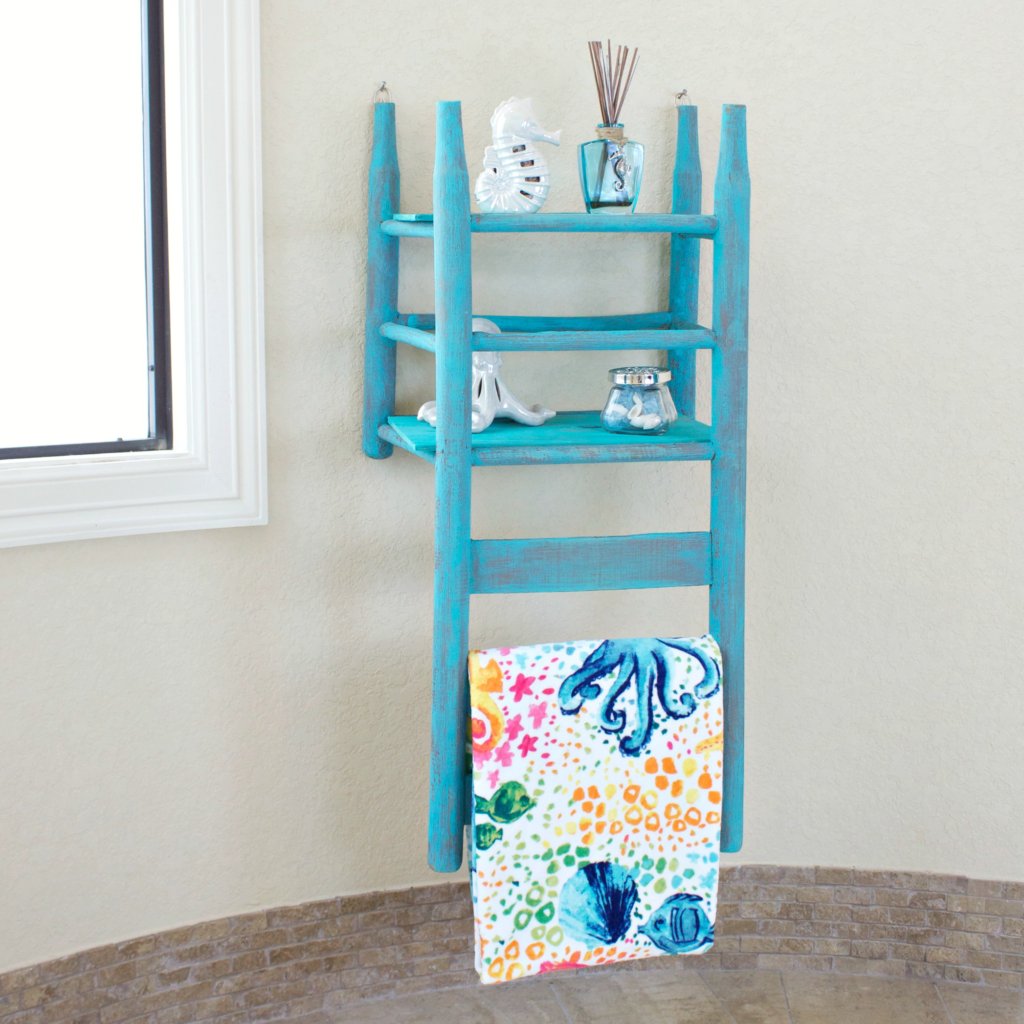
I’m using my shelf as a purely decorative piece, and I hung it on the wall behind my tub. I added some pretty beach themed decor and an ocean themed towel to the chair. I love the pop of color that it adds to my bathroom!
Here’s another repurposed chair idea you might enjoy:

Leave a Reply