This post on how to decorate clear bags is sponsored by StyleTech Craft. All opinions (and glitter obsessions) are 100% my own.
Y’all, it’s that time of year again — pencils are sharpened, cleats are laced up, and every school and stadium within a hundred miles has suddenly decided that clear bags only is the rule of the land. If you’ve ever shown up to a game or a school event with your favorite bag only to get turned away at the gate, you know exactly the panic I’m talking about.
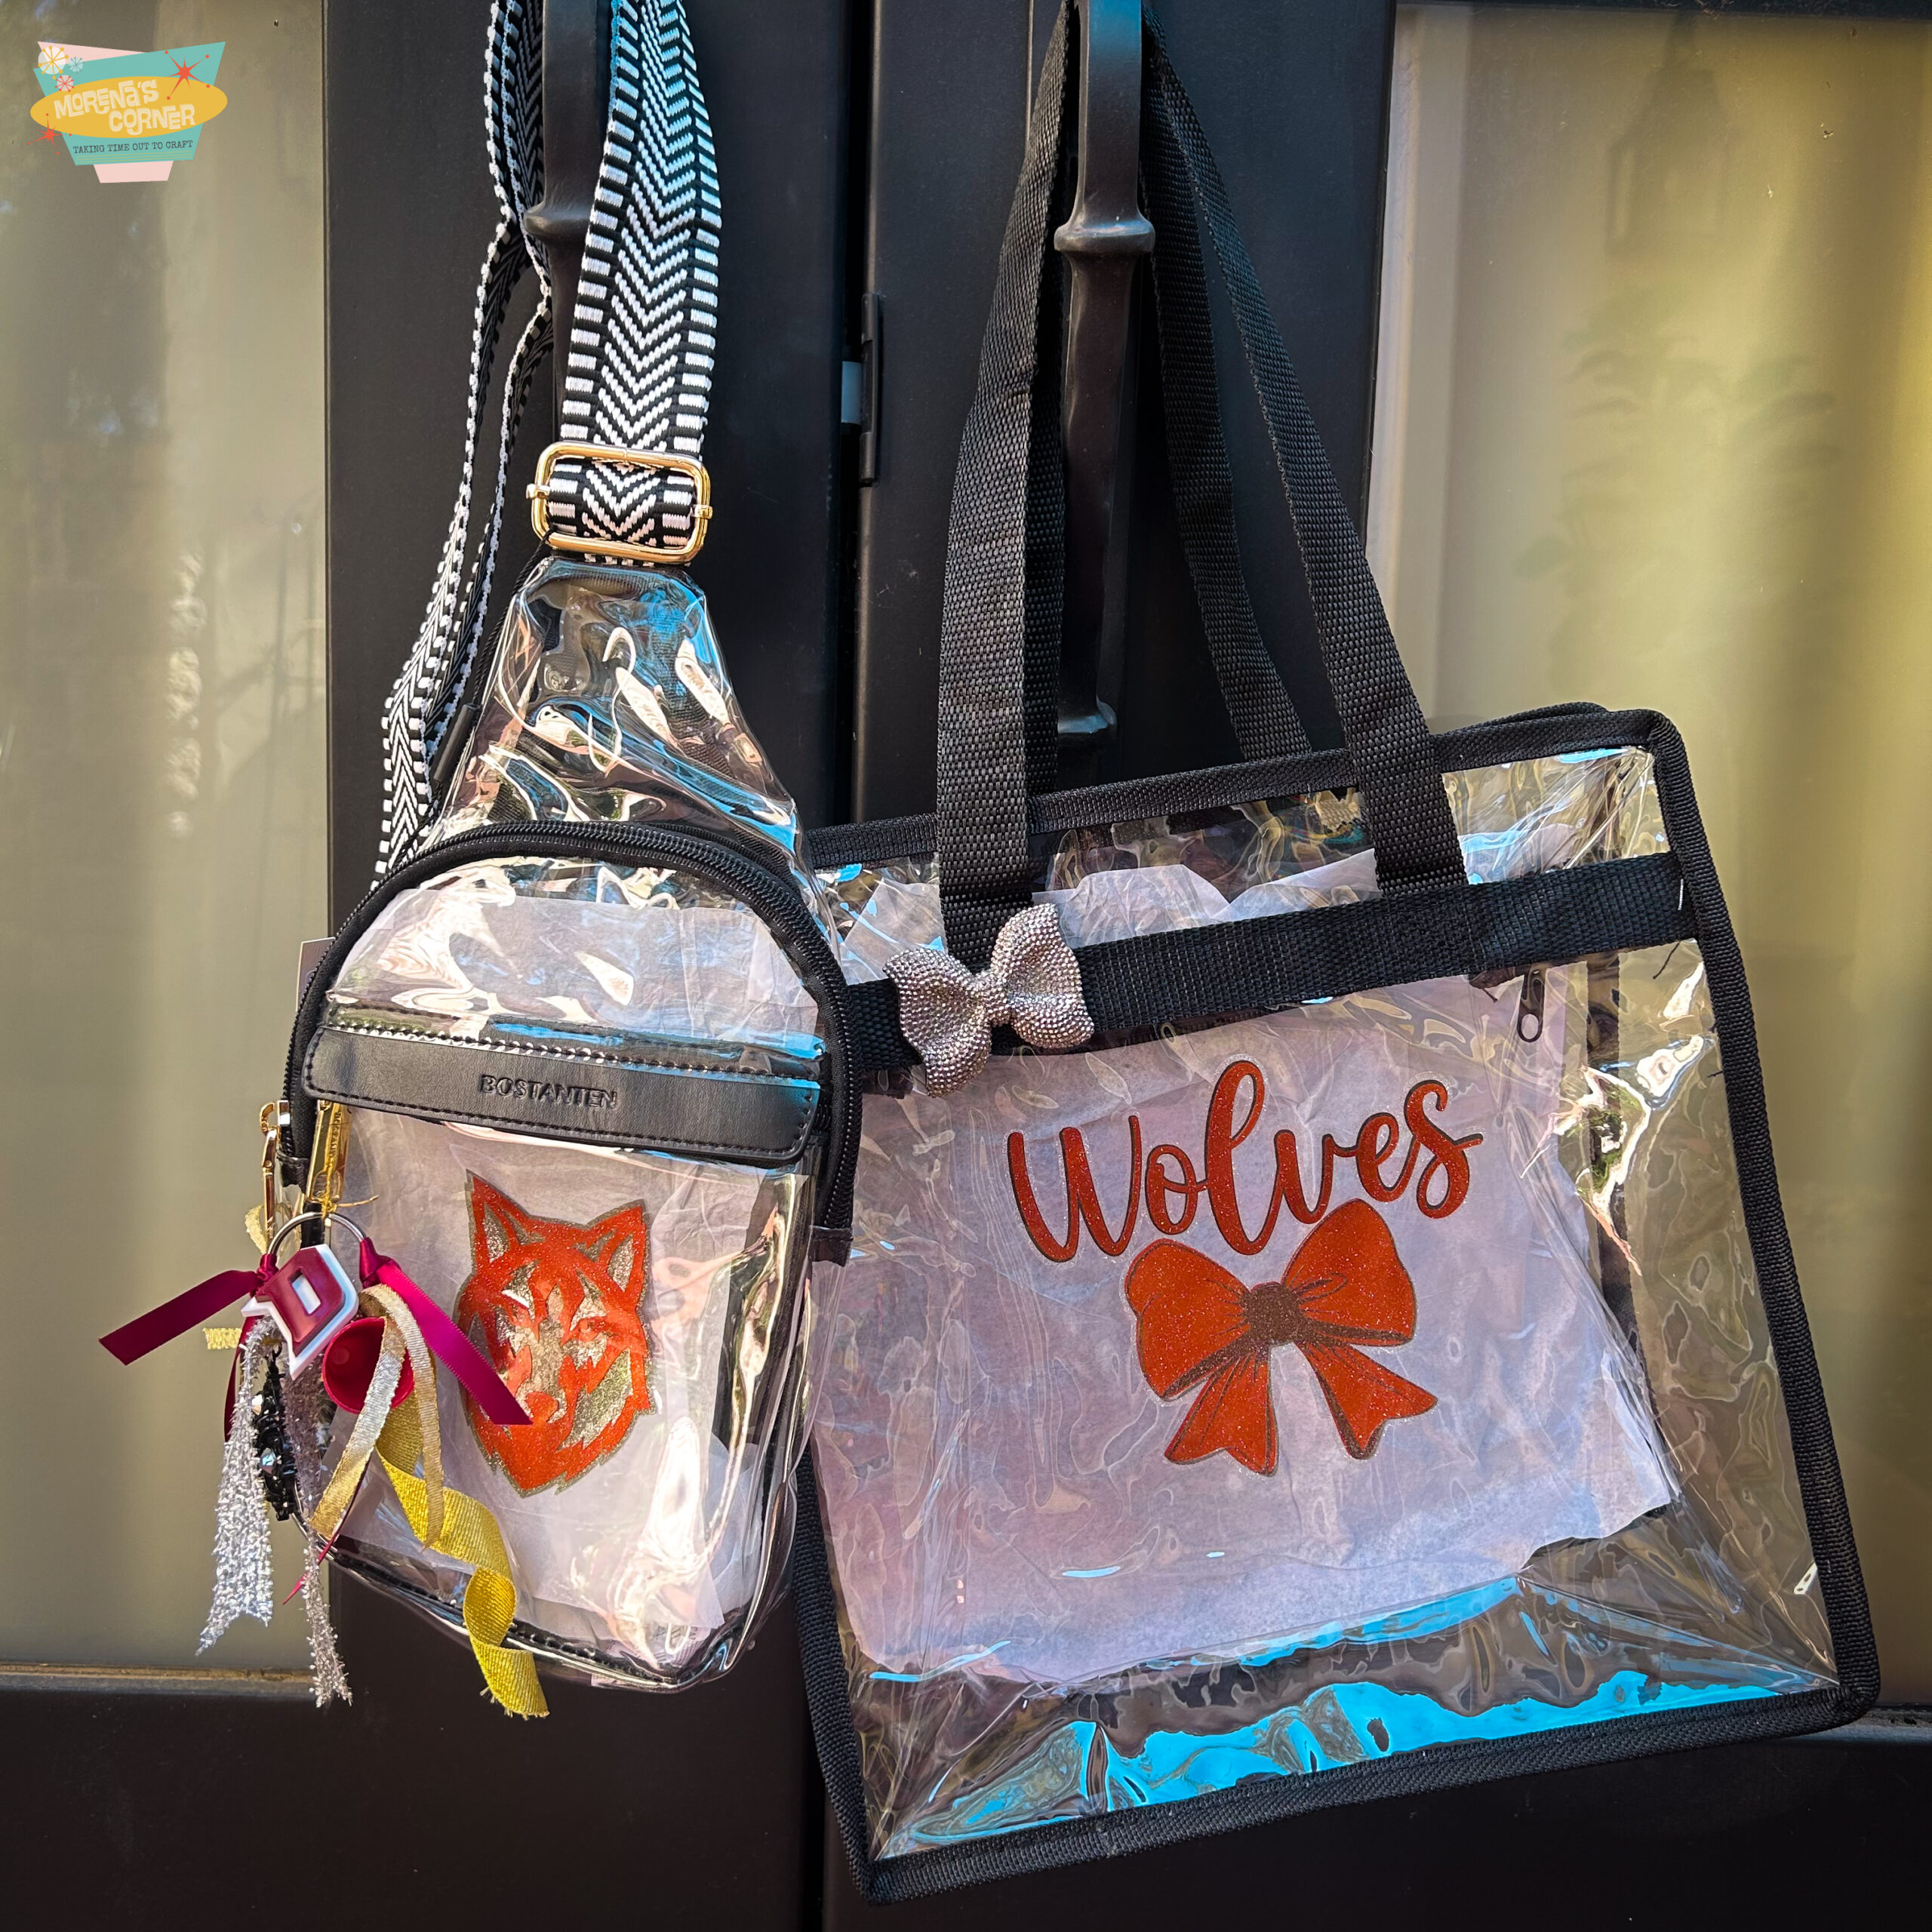
So this year, instead of fighting the clear bag policy, I decided to have some fun with it. I grabbed my StyleTech Craft transparent glitter and a stack of glitter vinyl in my school colors, and I turned two plain clear bags into something that actually looks like me — sparkly, a little extra, and unmistakably game-day ready.
Today I’m walking you through how I used layered transparent glitter vinyl to add a mascot, school name, and some fun decorative flair to both a clear cross body bag and a clear tote bag. Same techniques, two totally different vibes — let’s get into it.
Why Transparent Glitter Vinyl Is a Game Changer To Decorate Clear Bags
Here’s the thing about clear bags: most decorating methods either aren’t durable enough to survive a season of games, or they cover up the “clear” part entirely, which usually isn’t allowed. That’s what makes StyleTech Craft’s transparent glitter vinyl such a perfect match for this project.
- It stays see-through. The glitter catches the light without turning your bag opaque, so you’re still within most stadium and school clear-bag guidelines.
- It layers beautifully. Because it’s transparent, you can stack colors and cut pieces on top of each other to build real depth — think a glittery mascot silhouette with a second layer of school-color glitter peeking through.
- It’s tough enough for real life. These bags are getting tossed in bleachers, backpacks, and car floorboards all season, and the vinyl holds up.
What You’ll Need to decorate clear bags
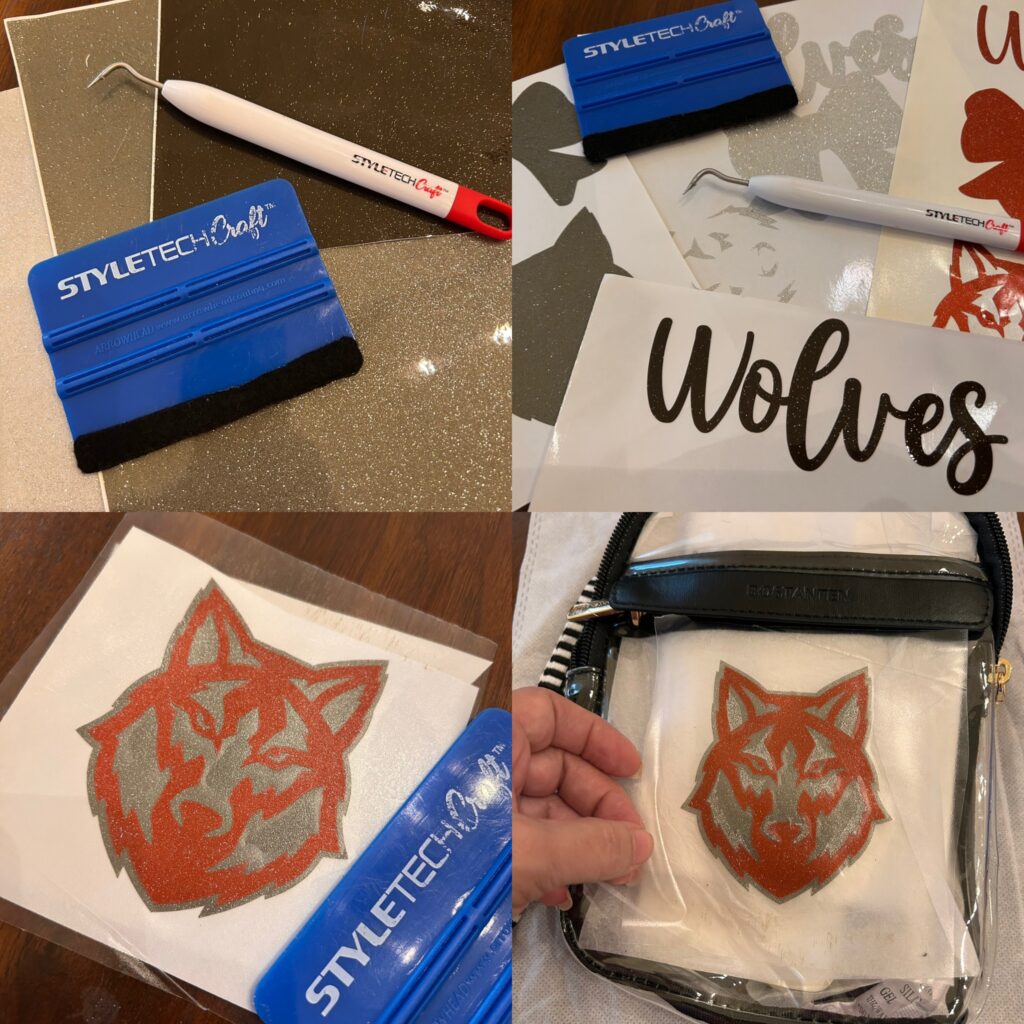
- Clear cross body bag
- Clear tote bag
- StyleTech Craft transparent glitter vinyl (in your school colors)
- Cutting machine (I used mine to cut mascot and lettering designs, but you can also hand-cut simple shapes)
- Weeding tool
- Transfer tape
- Scraper or burnishing tool
- Your school’s mascot design or lettering file
Layering the Vinyl: The Technique
The magic of this project is all in the layering, so here’s the method I used on both bags:
- Start with your base layer. For the mascot design, I cut the largest, simplest shape first — usually the outline or the biggest color block — in one glitter color. This becomes the foundation everything else sits on top of.
- Cut your detail layers separately. Any additional colors or fine details get cut as their own layers.
- Weed carefully. A weeding tool with a fine point makes quick work of small letters and mascot details.
- Transfer and layer in order. Start with your top layer and use transfer tape to attach it to the second layer. Lift both up with transfer tape and burnish them onto the next layer. Continue until the bottom layer, then transfer the entire thing like a sticker to the bag.
- Burnish, burnish, burnish. Because you’re working on a slightly flexible, curved clear surface instead of flat cardstock, really take the time to press out every bit of air and make sure the edges are sealed down. I filled the bags with hardcover books so that I had a smooth, even surface to work on.
Clear Cross Body Bag: Mascot Front and Center
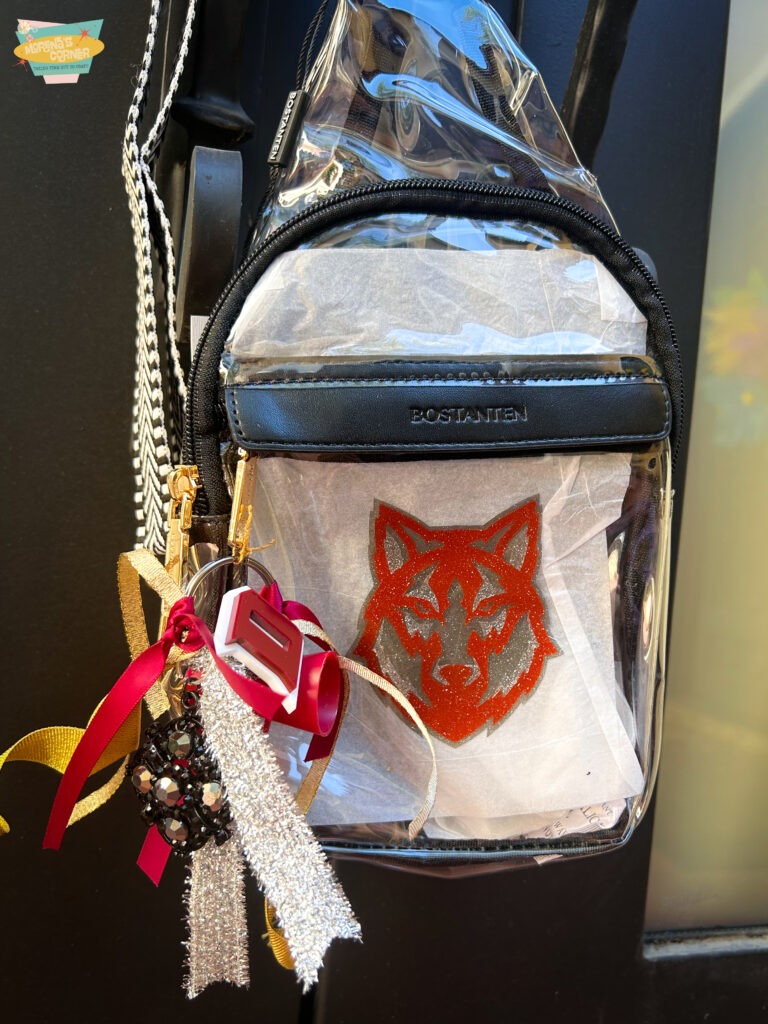
For the cross body bag, I kept it simple and bold: a layered mascot design centered on the front flap. Then I used ribbon and charms to add a little “bling” to the zipper pull on the pocket. The result is a bag that reads clearly as “team spirit” from ten feet away, but still meets every clear-bag requirement at the gate.
Clear Tote Bag: School Name and Fun Accents
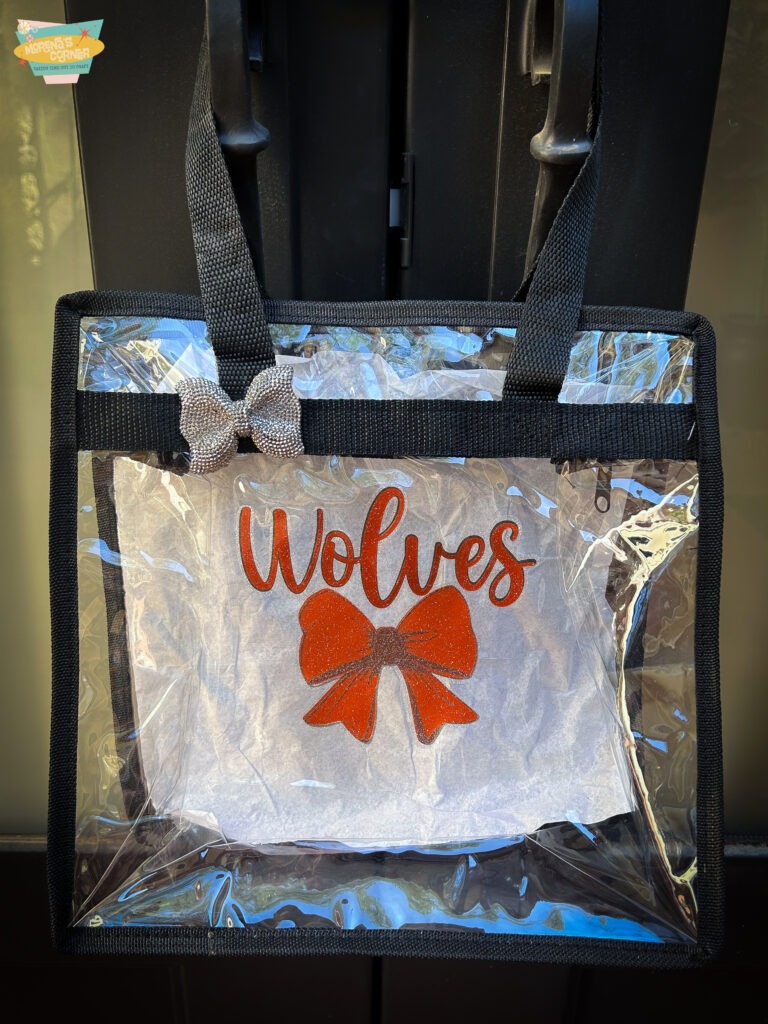
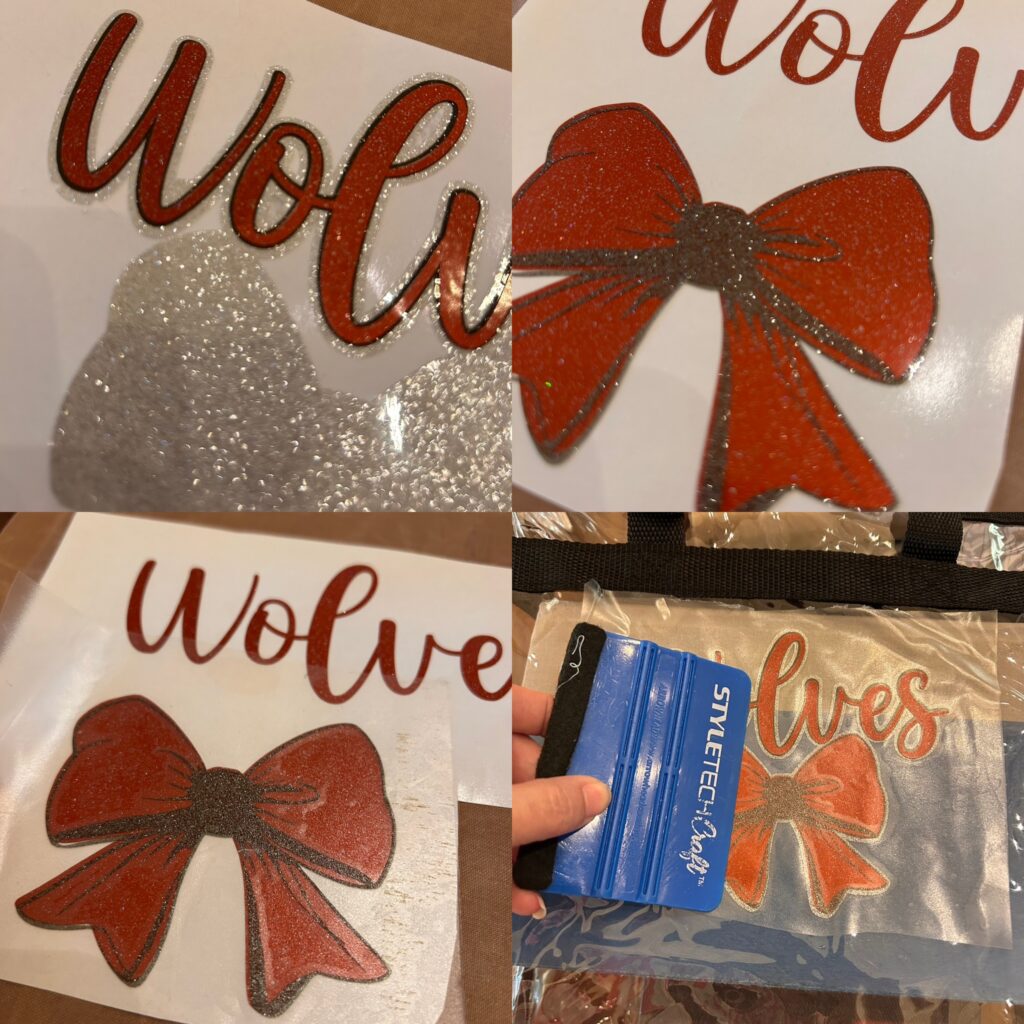
The tote bag gave me more room to play, so I went a little bigger with the design. I centered our school name in glitter vinyl lettering across the front, then added a bold bow in school colors as the focal point. I layered a couple of glitter colors so the whole design has some sparkle variation instead of being one flat color. Then I glued a sparkly bow to the strap to keep the glitter girl theme going.
Made It Your Own
That’s really what this project is about — taking a bag style you’re required to carry anyway and making it feel like something you’d actually choose. Whether it’s game day, back-to-school night, or any event on that clear-bag list, these totes and cross body bags are proof that “clear” doesn’t have to mean “boring.” If you make your own version, I’d love to see it — tag me so I can cheer you on from here!

Vinyls for this project were provided by StyleTech Craft.
Leave a Reply