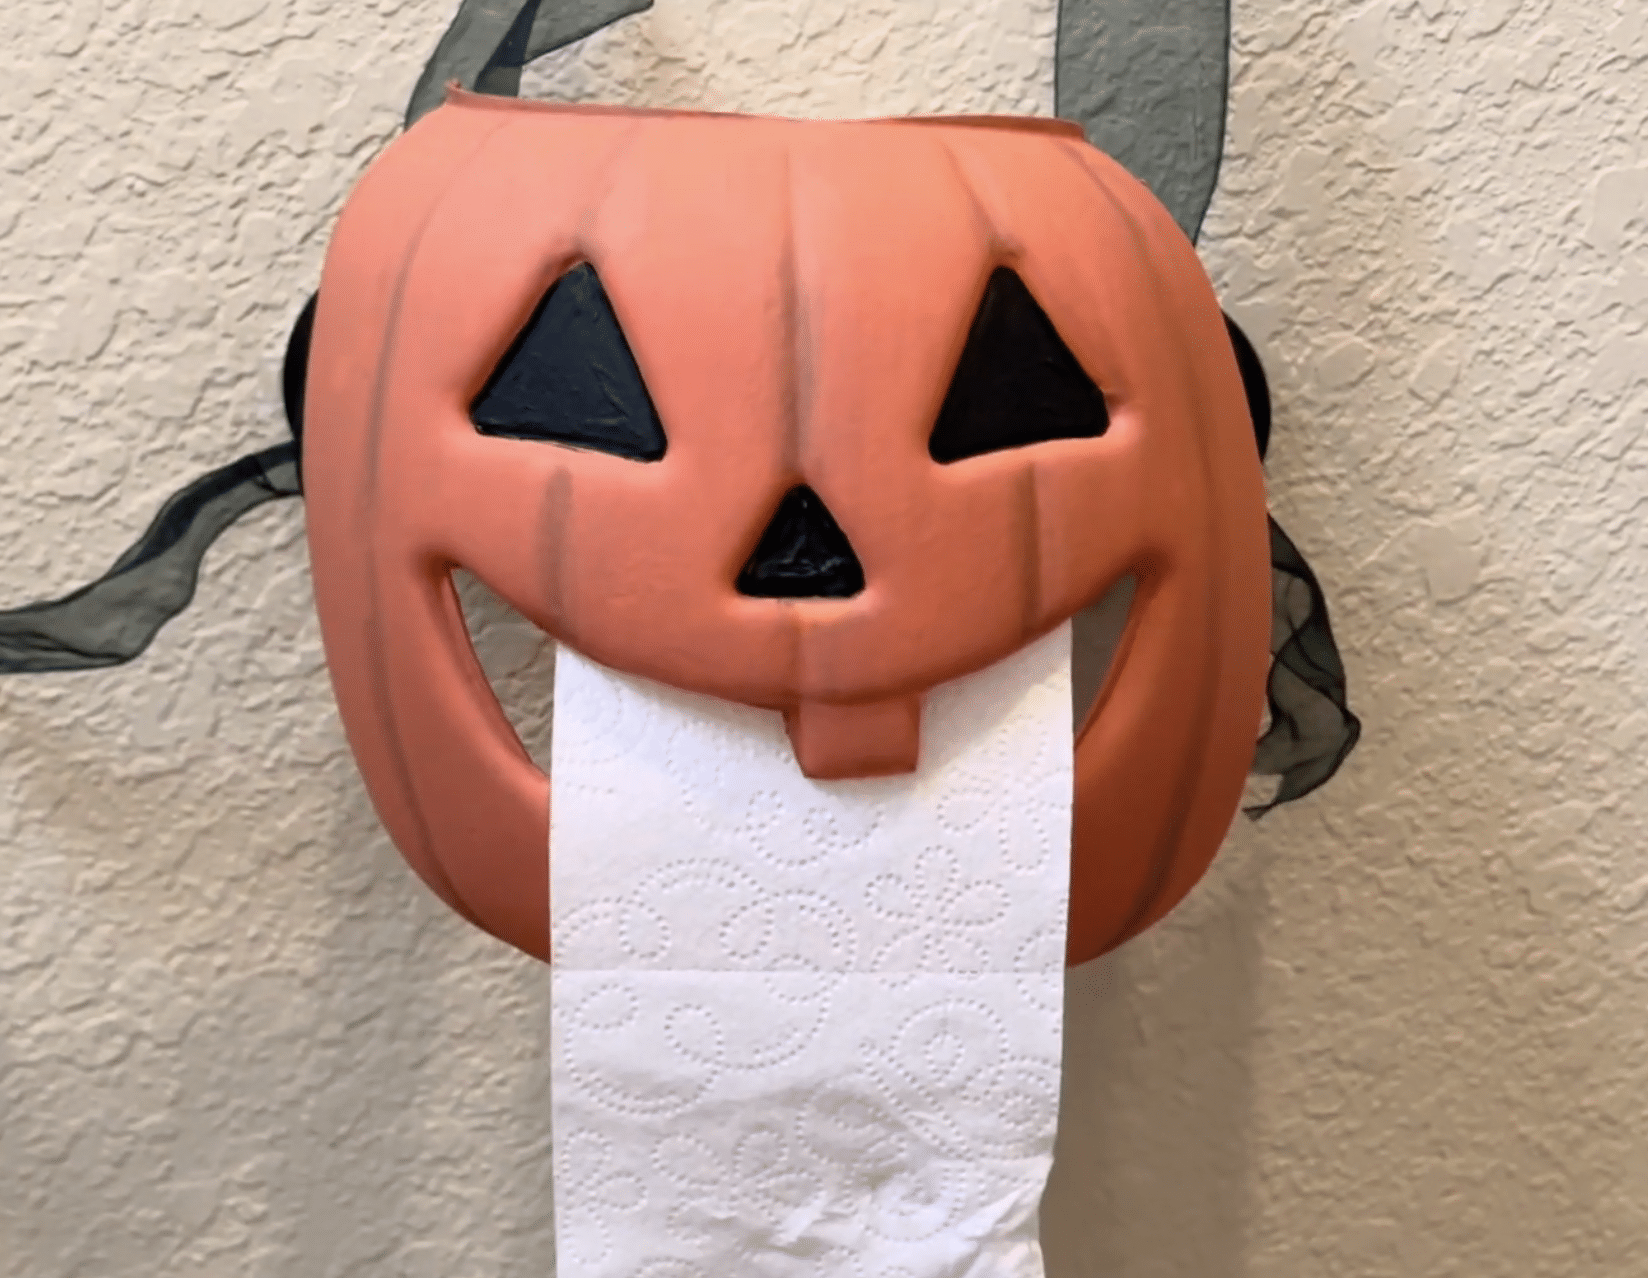
Let’s create a pumpkin pail toilet paper dispenser! This is such a fun and unexpected bit of Halloween decor for the most used room of the house. Here’s what I started with: a classic plastic pumpkin pail from Walmart for just $1.98. It’s a childhood Halloween staple and a crafter’s supply closet favorite, and I’m giving it a very different job this year.
Watch the full tutorial here:
Pumpkin Pail Toilet Paper Holder Supplies
- Plastic pumpkin pail
- Craft knife
- Heat tool with a knife-edge tip (I used a wood engraving tool)
- Crop-A-Dile (or another hole punch that works on plastic)
- Chalk paint in a muted orange
- Brown matte paint
- Black matte paint
- Paintbrushes
- Green ribbon
Instructions
1. Cut the pail in half
Follow the seam on the side of the pail and cut it in half. I started with my craft knife because I can’t stand the smell of melted plastic. The bottom half was too thick, though, so I finished the cut with my heat tool’s knife edge, then went back to the craft knife.
2. Cut out the mouth
Using the craft knife, carefully cut out the pumpkin’s mouth, snaggle teeth and all. Go slowly and watch your fingers. For the smaller sections, it’s easier to lift up the cut piece, remove it, and move on to the next one. When you’re done, you’ll have an opening you can pull something out of. Any guesses yet?
3. Punch the ribbon holes
Use a Crop-A-Dile to punch two holes on each side of the pumpkin head. These are for the ribbon at the end.
4. Paint with chalk paint
Plastic pumpkins can look a little too shiny and modern, so I used chalk paint for a rustic, vintage finish. My muted orange is perfect for that. Cover everything except the eyes and nose, including the top and bottom. Let the first coat dry, then add a second coat so the bright orange plastic doesn’t show through.
5. Add dimension
Chalk paint can make a pumpkin look flat, so I mixed three parts orange paint with one part brown matte paint for a slightly darker shade. While the second coat is still wet, paint along the creases that are already in the plastic. It’s like coloring by numbers, and painting into the wet layer blends the edges nicely.
6. Fill in the eyes and nose
Once the crease lines are dry, fill in the eyes and nose with black matte paint. I was impatient and started while the orange was still wet, which meant extra care to keep orange out of the black. Learn from my mistake and let it dry first. It makes this step faster and easier.
Then set it aside to dry overnight.
7. Add the ribbon
Thread green ribbon through the holes on both sides of the pumpkin head. It looks like the vines you’d find in a pumpkin patch, and you’ll use it to tie the pumpkin onto something.
The big reveal
It’s the happiest little toilet paper dispenser you’ve ever seen!
My kids are going to get a kick out of this one. It’s going in our guest bathroom, so anyone who visits will have to retrieve their toilet paper from the pumpkin’s mouth. It’s a fun way to decorate a part of the house that most people skip at Halloween.
This project is quick and easy, and the chalk paint gives that cheap plastic pail a charming vintage look.
Let’s chat!
Did you guess it before the reveal? Have you ever made a project from a Halloween pail cut in half? I’d love to hear what you made, so tell me in the comments! Have fun crafting and creating!

Leave a Reply