This post is sponsored by StyleTech Craft. They provided the vinyl and tools, and all opinions and spooky obsessions are my own.
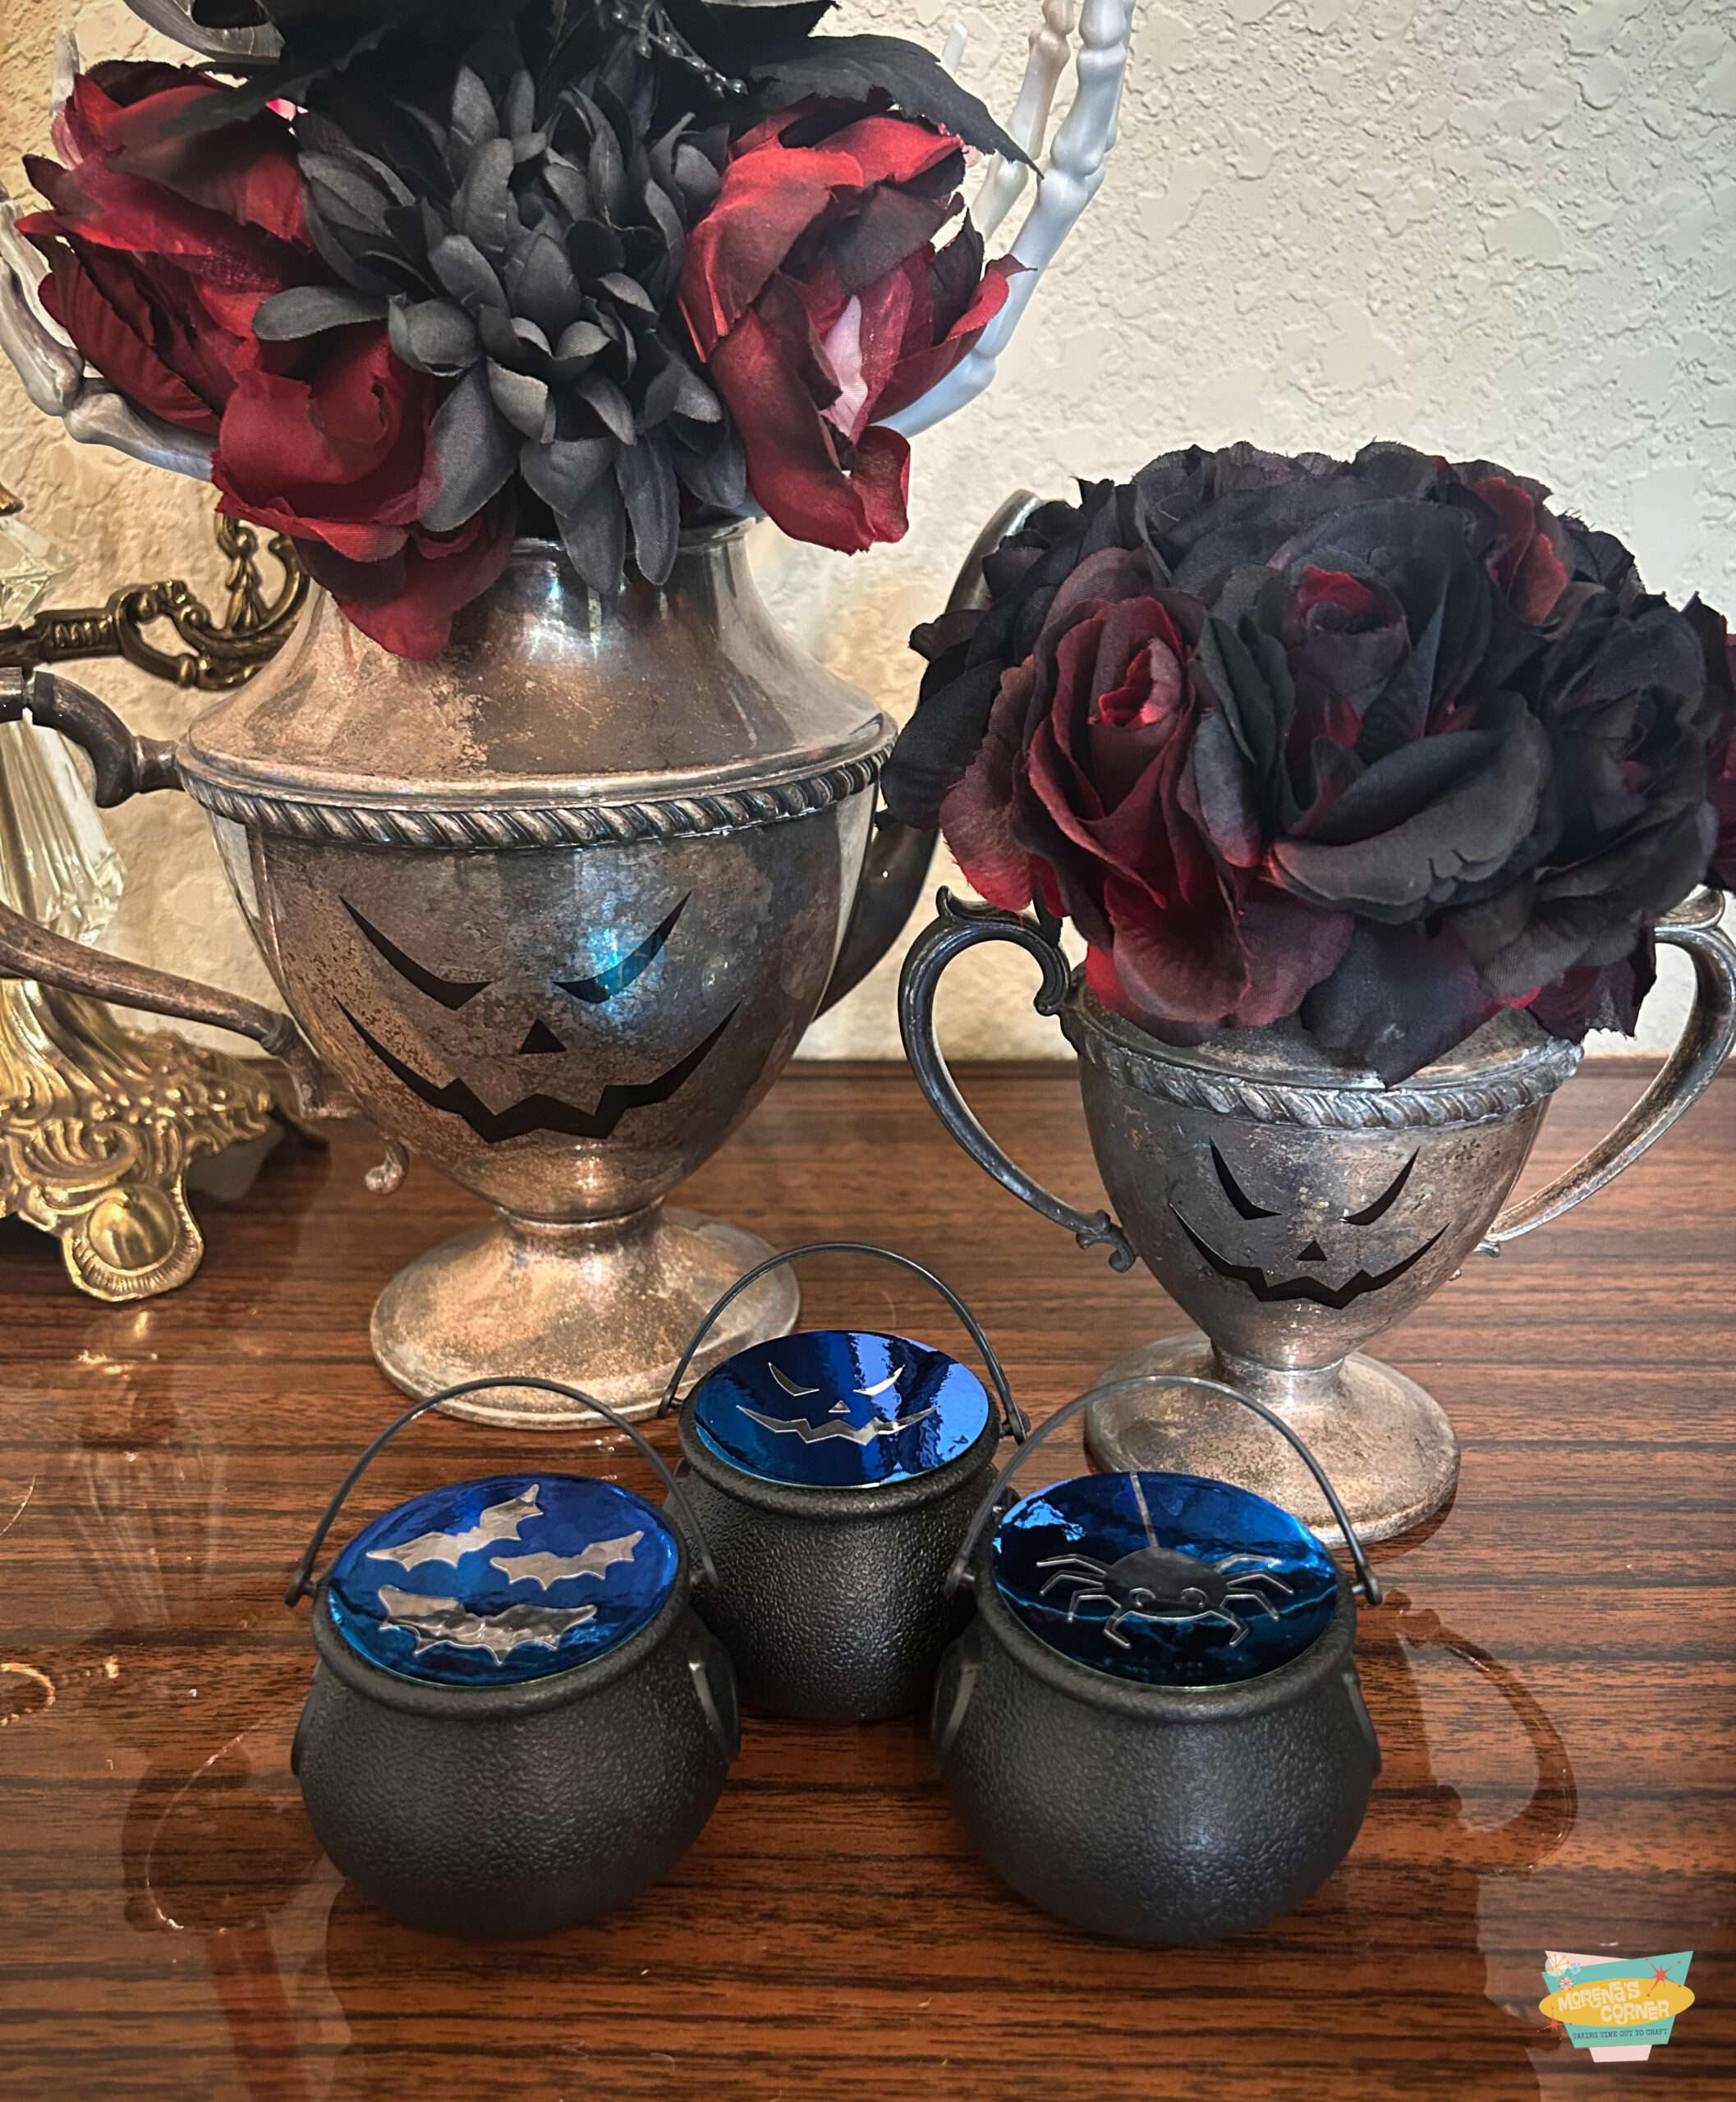
Friends, I have been waiting all year to say this: it is officially Halloween crafting season, and I came ready to play. This time I raided the thrift store for tarnished spooky silver and pulled out StyleTech Craft’s metallic and opal vinyl lines to make decor and party favors that look far fancier than they were to make.
The best part is that you don’t need a fancy setup. If you can weed a little vinyl, you can make all of this.
What I Made
1. Jack-o’-lantern silver for spooky florals
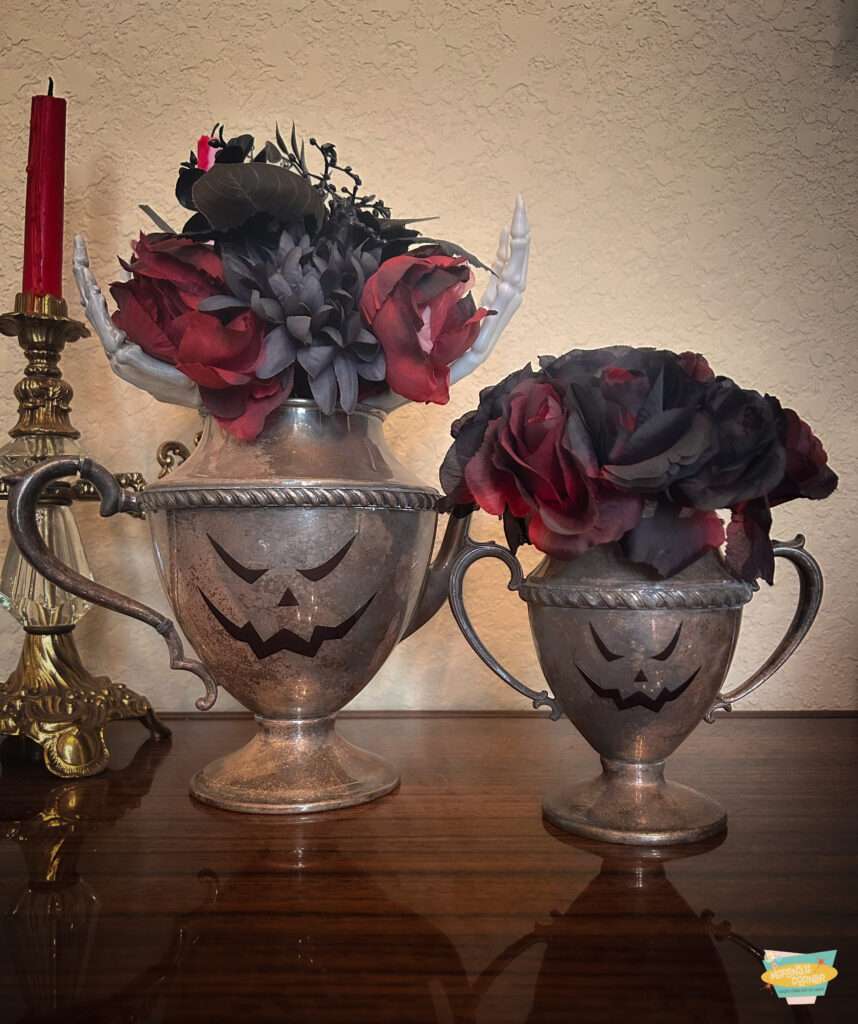
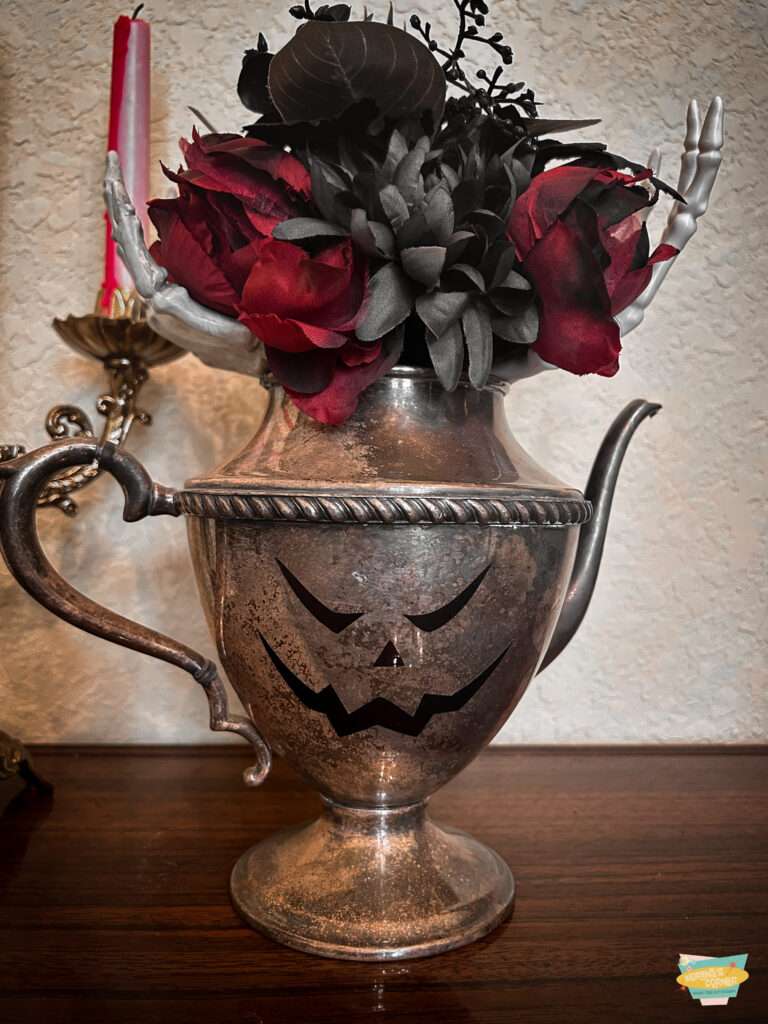
Thrifted silverware (a teapot-style pitcher and a little trophy cup) is already moody. Add a grinning jack-o’-lantern face in metallic black vinyl and fill it with dark red and black roses, and it looks like it came straight out of a haunted manor. The tarnish makes it feel perfectly aged, so I left it alone and didn’t polish a thing.
2. Mini cauldron party favors
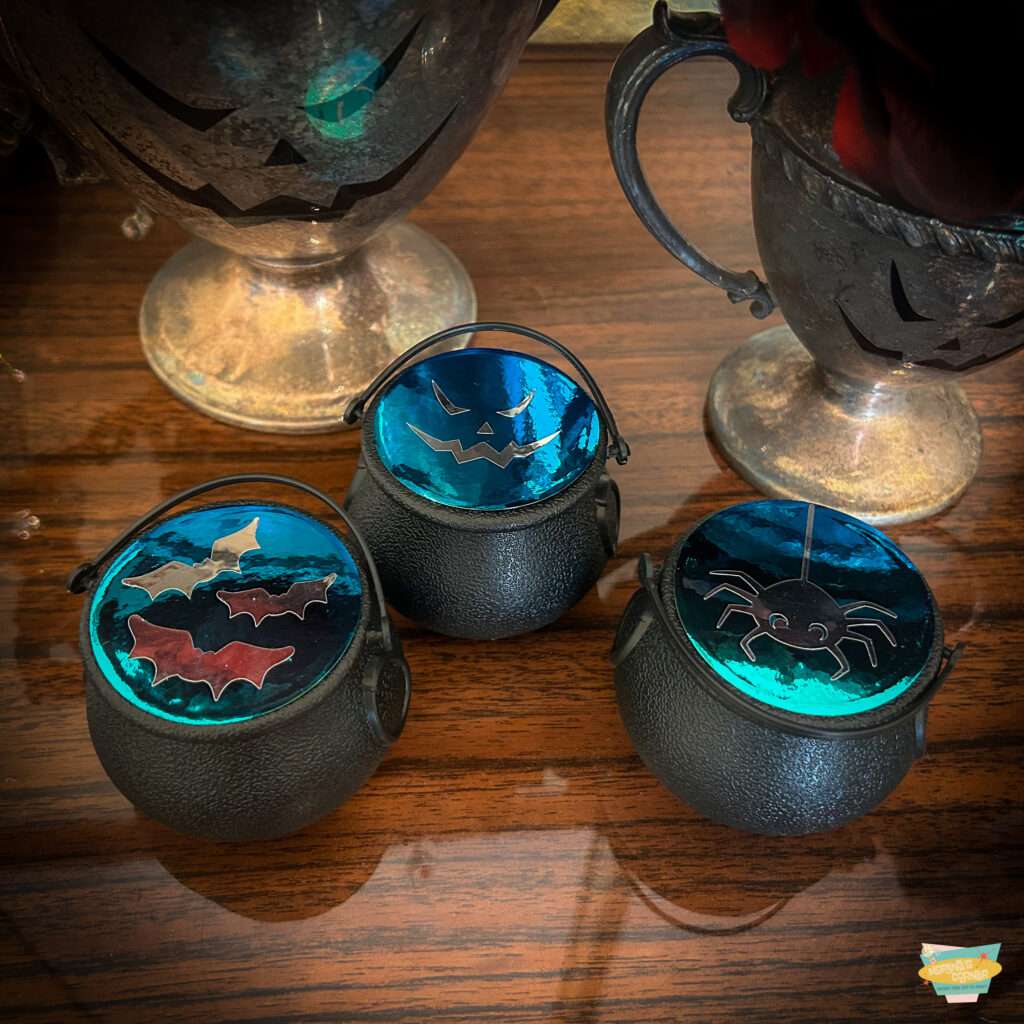
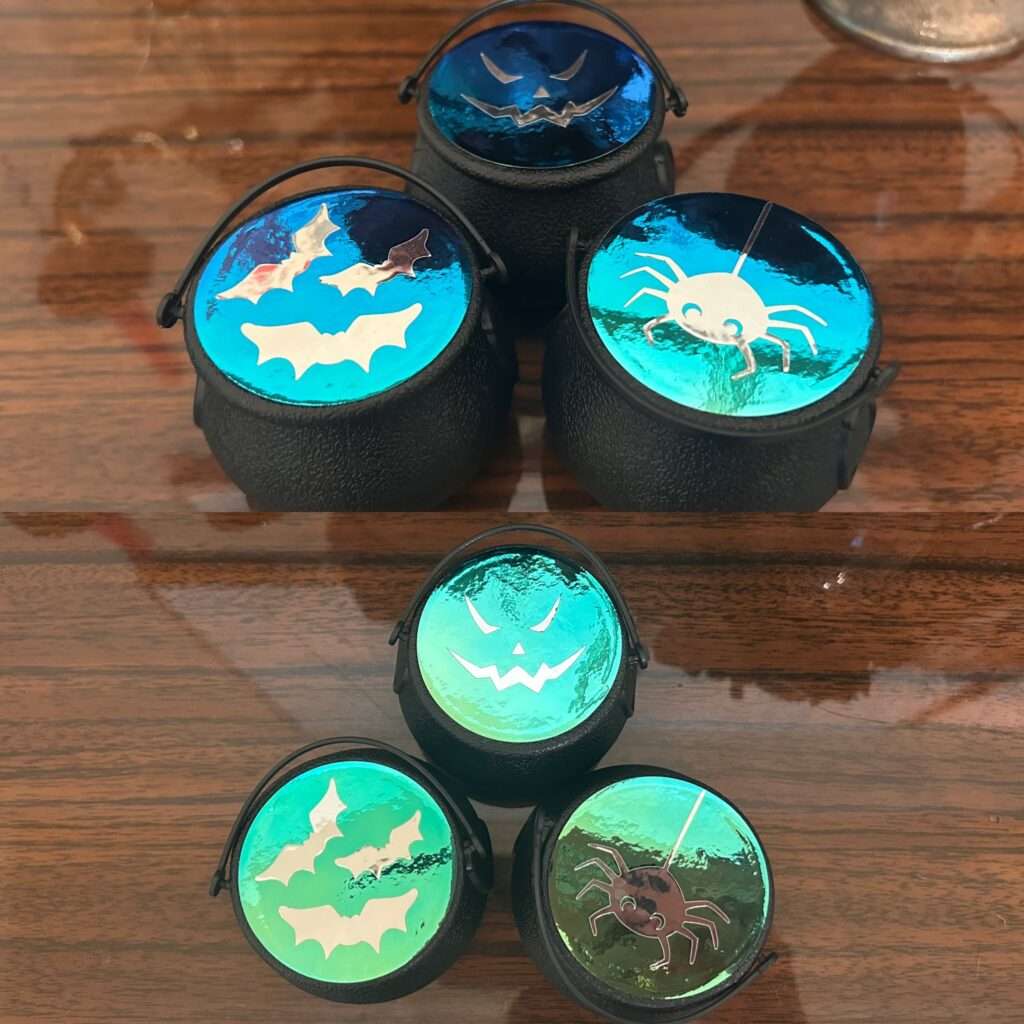
These are my favorite. I topped small black cauldrons with vinyl circles in a bat trio, a jack-o’-lantern face, and a smiling dangly spider. Fill them with candy and you have favors that double as decor. The metallic opal background with silver details looks like moonlight on a potion.
Supplies
- StyleTech Craft metallic vinyl
- StyleTech Craft opal vinyl
- Transfer tape
- StyleTech Craft weeding tool, scraper, and squeegee
- Thrifted spooky silver pieces (pitchers, trophy cups, creamers, anything with a good shape)
- Mini plastic cauldrons
- Faux roses and florals in black and deep red, plus floral foam
- Cutting machine (or scissors and a steady hand for simple shapes)
How to Make the Silver Jack-o’-Lanterns
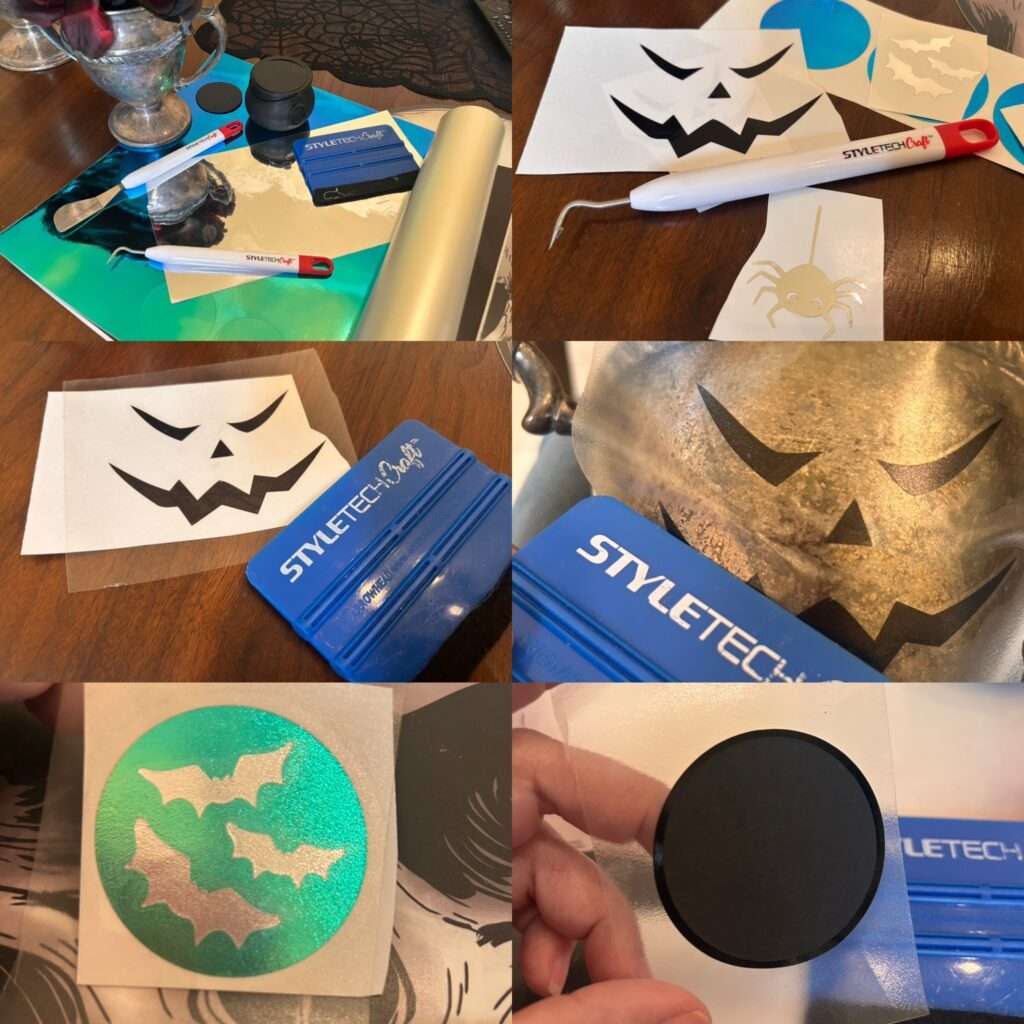
- Cut your design. Cut the jack-o’-lantern face from black metallic vinyl.
- Weed it. Use the weeding tool to pick out the negative space. The eyes, nose, and zigzag grin all have small pieces, so take your time and go slowly around the points.
- Apply transfer tape. Lay the tape over your design and burnish it with the squeegee so the vinyl grabs it.
- Place it. Peel the backing and position the face on your clean, dry silver piece. Step back and check it before you stick it down.
- Press and release. Squeegee firmly, especially along the edges, then slowly peel the transfer tape away at a low angle.
Tip for curved pieces: Silverware is rarely flat. Work from the center outward and press the vinyl down in small sections so you don’t trap air or wrinkles. Simple, bold faces like this one stay crisp on curves.
How to Make the Cauldron Toppers
- Cut circles. Cut circles of metallic vinyl sized to fit the top of your cauldron. Cut cardstock circles that are smaller than the vinyl circles.
- Layer the details. I cut my bats, spider, and jack-o’-lantern in contrasting silver and applied them over the background circle with transfer tape. The opal vinyl in green looked incredible with the silver bats, and the blue metallic made the details really pop.
- Weed carefully. Spider legs are thin, so go slow and use the weeding tool to lift tiny bits.
- Place the vinished vinyl “sticker” on top of the cardboard circle. This will keep the candy and toys inside the cauldron from getting stuck on the vinyl, while leaving a sticky edge that will adhere to the top of the cauldron.
- Apply and trim. Press the finished circle onto the cauldron lid or insert. Fill with candy, treats, or little trinkets.
Why I Love These Vinyls
Metallic vinyl has a mirror-like shine that looks great layered over darker colors, and the opal has a shifting, iridescent color that gives the bats such a magical look. They behave like regular adhesive vinyl when you cut, weed, and transfer, so they’re beginner-friendly even though the finish looks high-end.
Ideas to Take It Further
- Make a whole set of silver pieces with different faces: sleepy, grumpy, and silly.
- Personalize the cauldron toppers with guest names for a party.
- Try glow-in-the-dark or glitter vinyl for the faces.
- Skip the florals and use the decorated silver as candy dishes or candle holders.
I’d love to see what you make! Tag me if you try this, and tell me which jack-o’-lantern face is your favorite. Happy haunting!

Leave a Reply