If you grew up in the 90s, you know Lisa Frank had a chokehold on all of us. The rainbow colors, the sparkle, the over-the-top animal prints — and now I’m bringing all of that energy into our wardrobes with these DIY rainbow leopard tie dye pants. Yes, they are as extra as they sound. Yes, you absolutely need them.
DIY Rainbow Leopard Pants Supply List
- White cotton pants (thrifted is perfect!)
- Silhouette Cameo cutting machine
- Adhesive vinyl
- Weeding tools
- Tulip Fabric Marker in black
- Tulip One Step Tie Dye kit
- Tulip black tie dye
- A small paintbrush
Step 1: Create Your Leopard Stencil
Start by designing your leopard spot pattern in your Silhouette software. Leopard spots have that classic crescent and broken ring shape — think irregular oval outlines rather than solid filled circles. Once your design is ready, cut it out of adhesive vinyl using your Silhouette Cameo and weed away the spots so the openings are exposed. This stencil is what will give you those crisp, defined outlines before the tie dye magic happens.
Step 2: Trace the Leopard Pattern
Lay your thrifted white cotton pants on a flat surface and apply your vinyl stencil wherever you want the leopard spots to appear. Press the edges down firmly so the marker doesn’t bleed underneath. Then, using your Tulip fabric marker in black, trace the outline of each spot through the stencil openings. Remove the vinyl carefully once you’re done. You should have a gorgeous leopard print outline all over your pants — very Lisa Frank, very iconic.
Step 3: Tie Dye the Rainbow
Now for the most satisfying part. Following the Tulip One Step Tie Dye instructions, apply your dye colors across the pants in a rainbow pattern — think bold sections of red, orange, yellow, green, blue, and purple. The beauty of Tulip One Step dye is that there’s no pre-soaking required, so you can go straight to applying color. Work your way across the pants intentionally so the colors blend where they meet without turning muddy. Once fully dyed, wrap the pants in plastic wrap or seal them in a bag and let them set for at least 8 hours (overnight is even better).
Step 4: Rinse and Dry
After your dye has set, rinse the pants under cold water until the water runs clear, then wash and dry according to the Tulip instructions. Once dry, give them a good iron to set everything and smooth them out. At this point your rainbow leopard outline is looking gorgeous — but we’re not done yet!
Step 5: Fill In the Leopard Spots
Here’s the step that takes these from fun tie dye pants to full Lisa Frank fantasy. Using Tulip black tie dye and a small brush, carefully fill in the leopard spot outlines you drew back in Step 2. The black fills in those crescent shapes around the spots and makes the pattern really pop against all that rainbow color. Once you’ve filled in all your spots, do a final rinse, dry, and iron — and then they’re ready to wear!
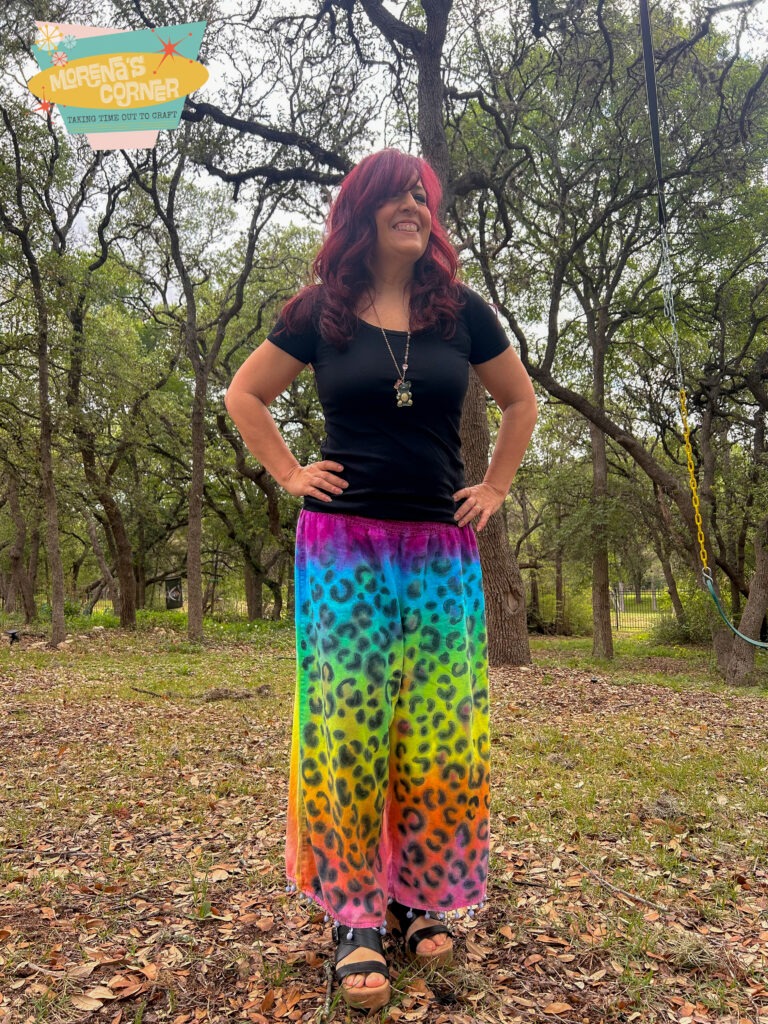
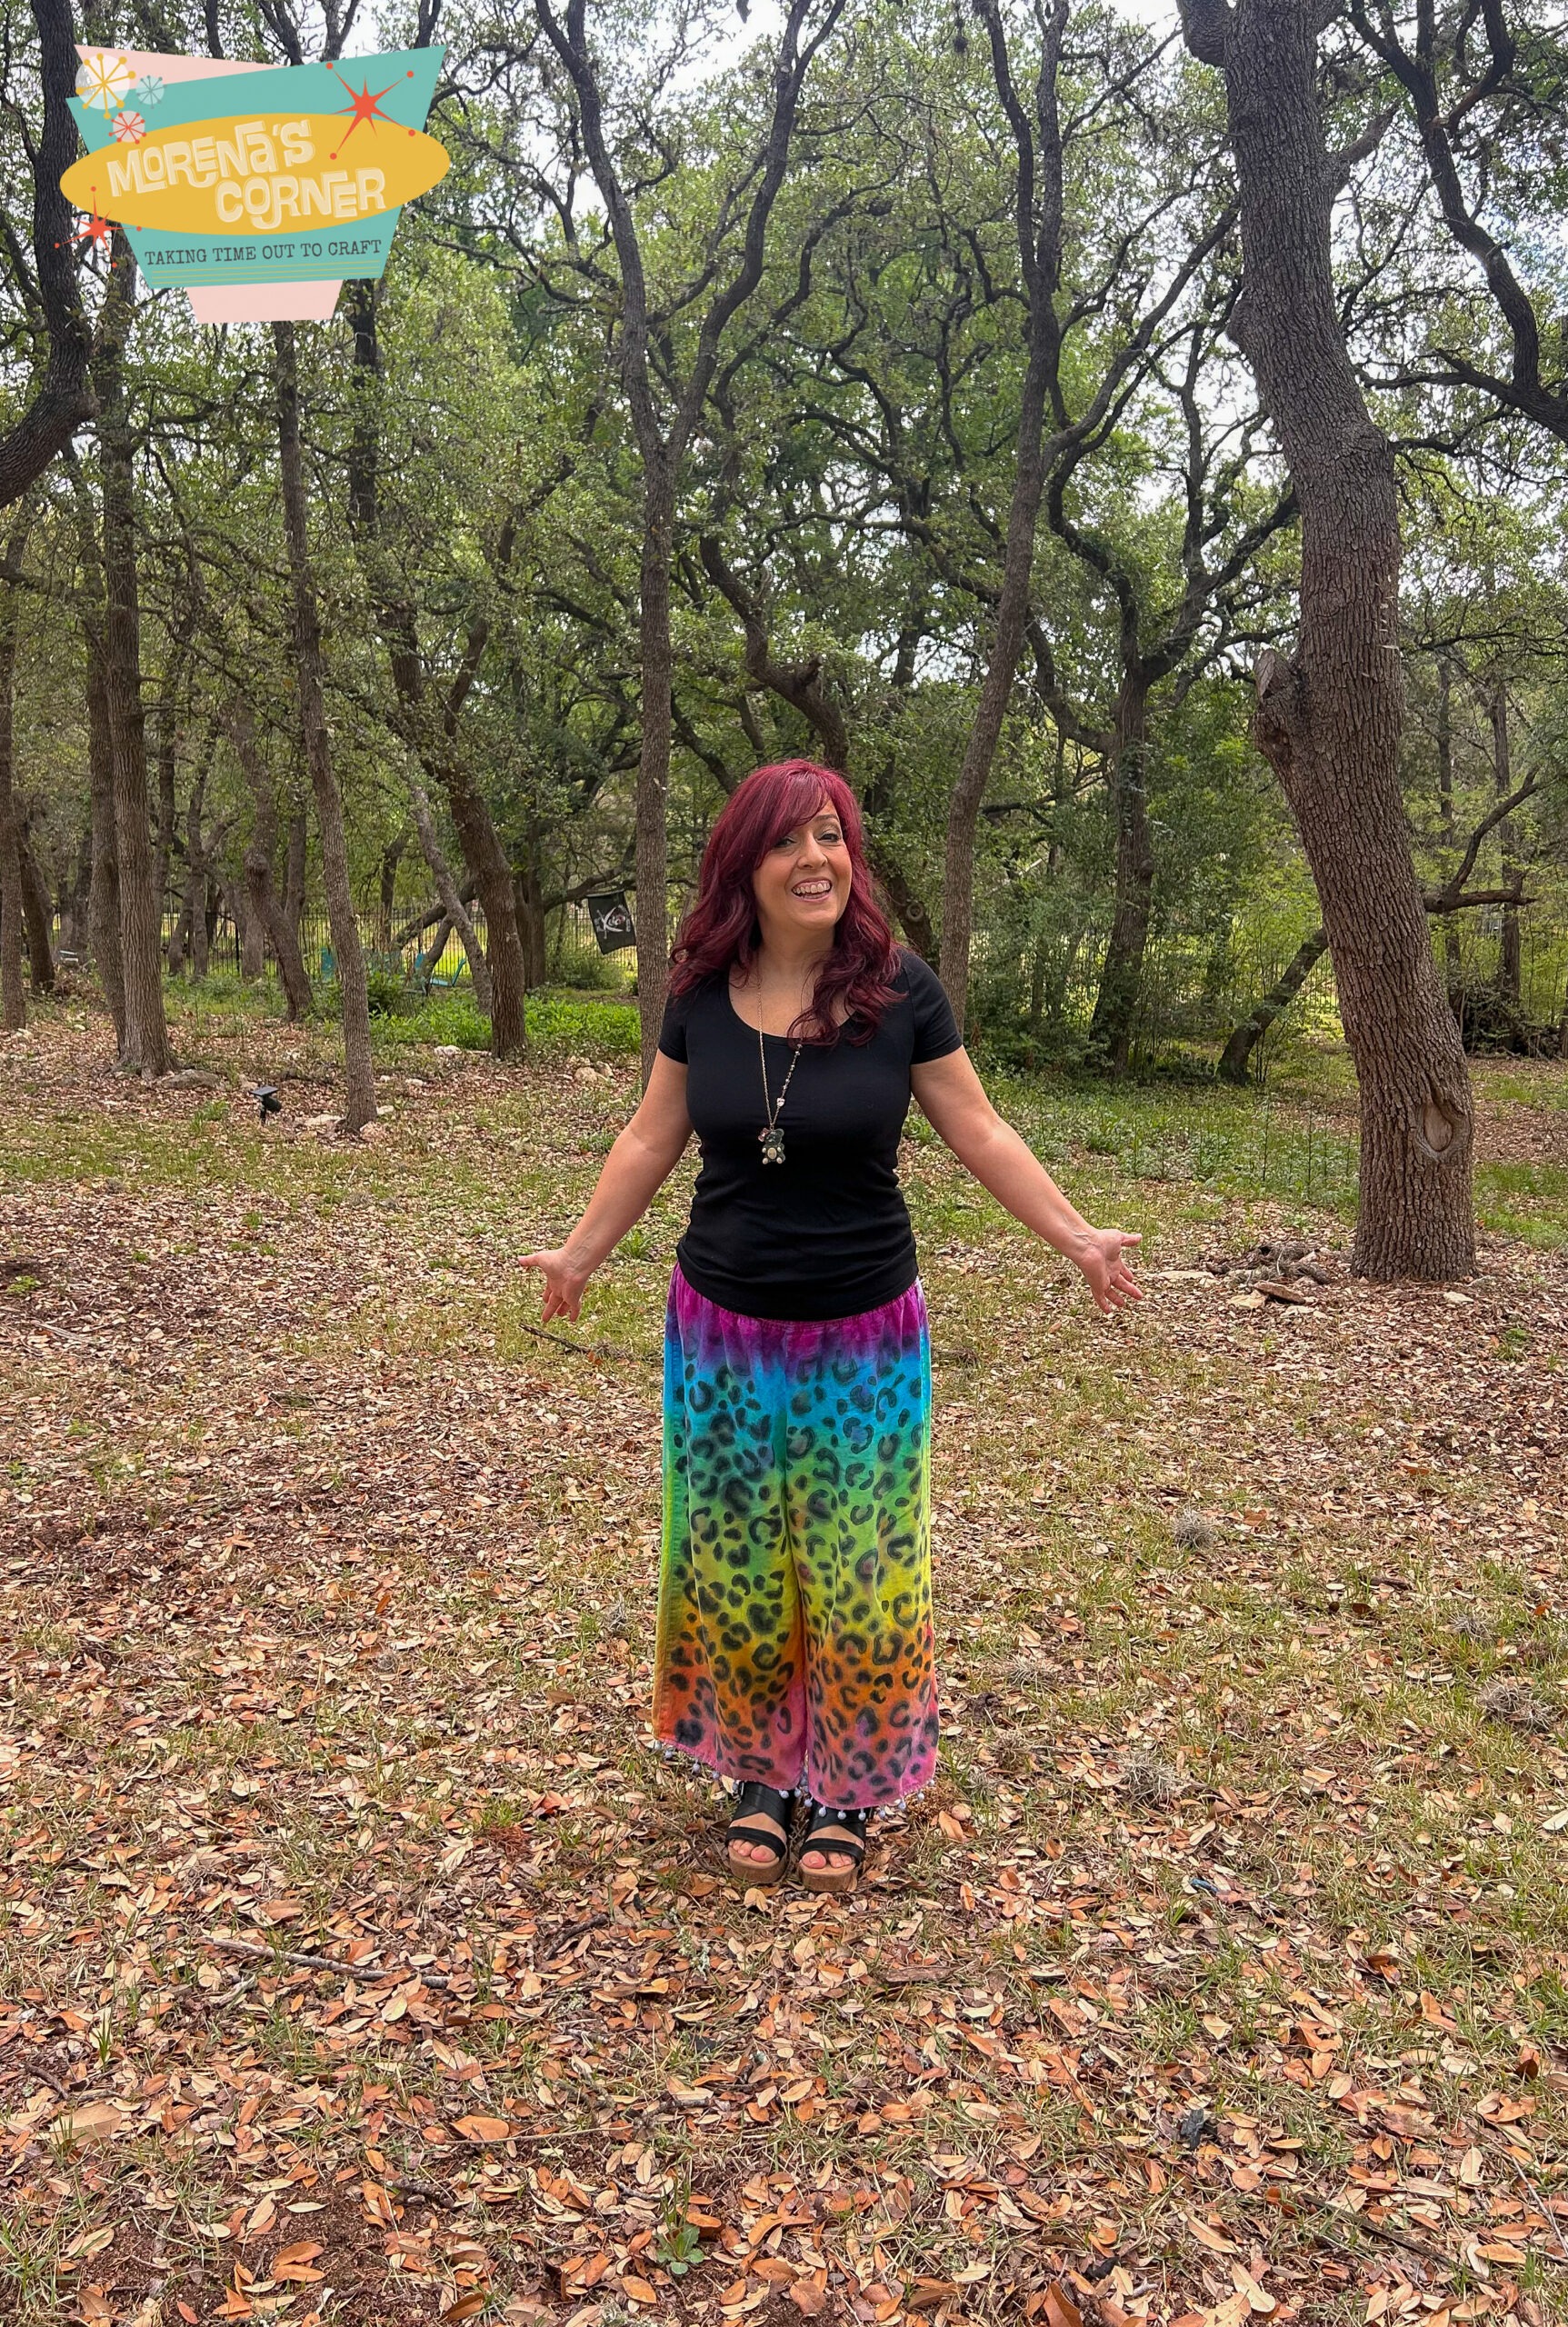
The Final Result
These pants are bold, colorful, nostalgic, and completely one of a kind. The combination of the crisp vinyl stencil technique with the organic flow of tie dye gives you the best of both worlds — structured pattern meets beautiful color chaos. Pair them with a simple white crop top and let the pants do all the talking.
Want to try it yourself? Grab your Tulip dyes using my link below and don’t forget to use code MORENASCORNER15 to save!
🔗 Shop Tulip dyes: https://upf.ai/v8cfheu6 🔗 Full supply list: https://upf.ai/9ywg0hvc
Drop a comment below if you make these — I want to see your version! 🌈🐆
Leave a Reply