This Santa shaker frame DIY is an adorable Christmas decor project to make for yourself or to give to someone else! This is a sponsored post with Maker’s Movement.
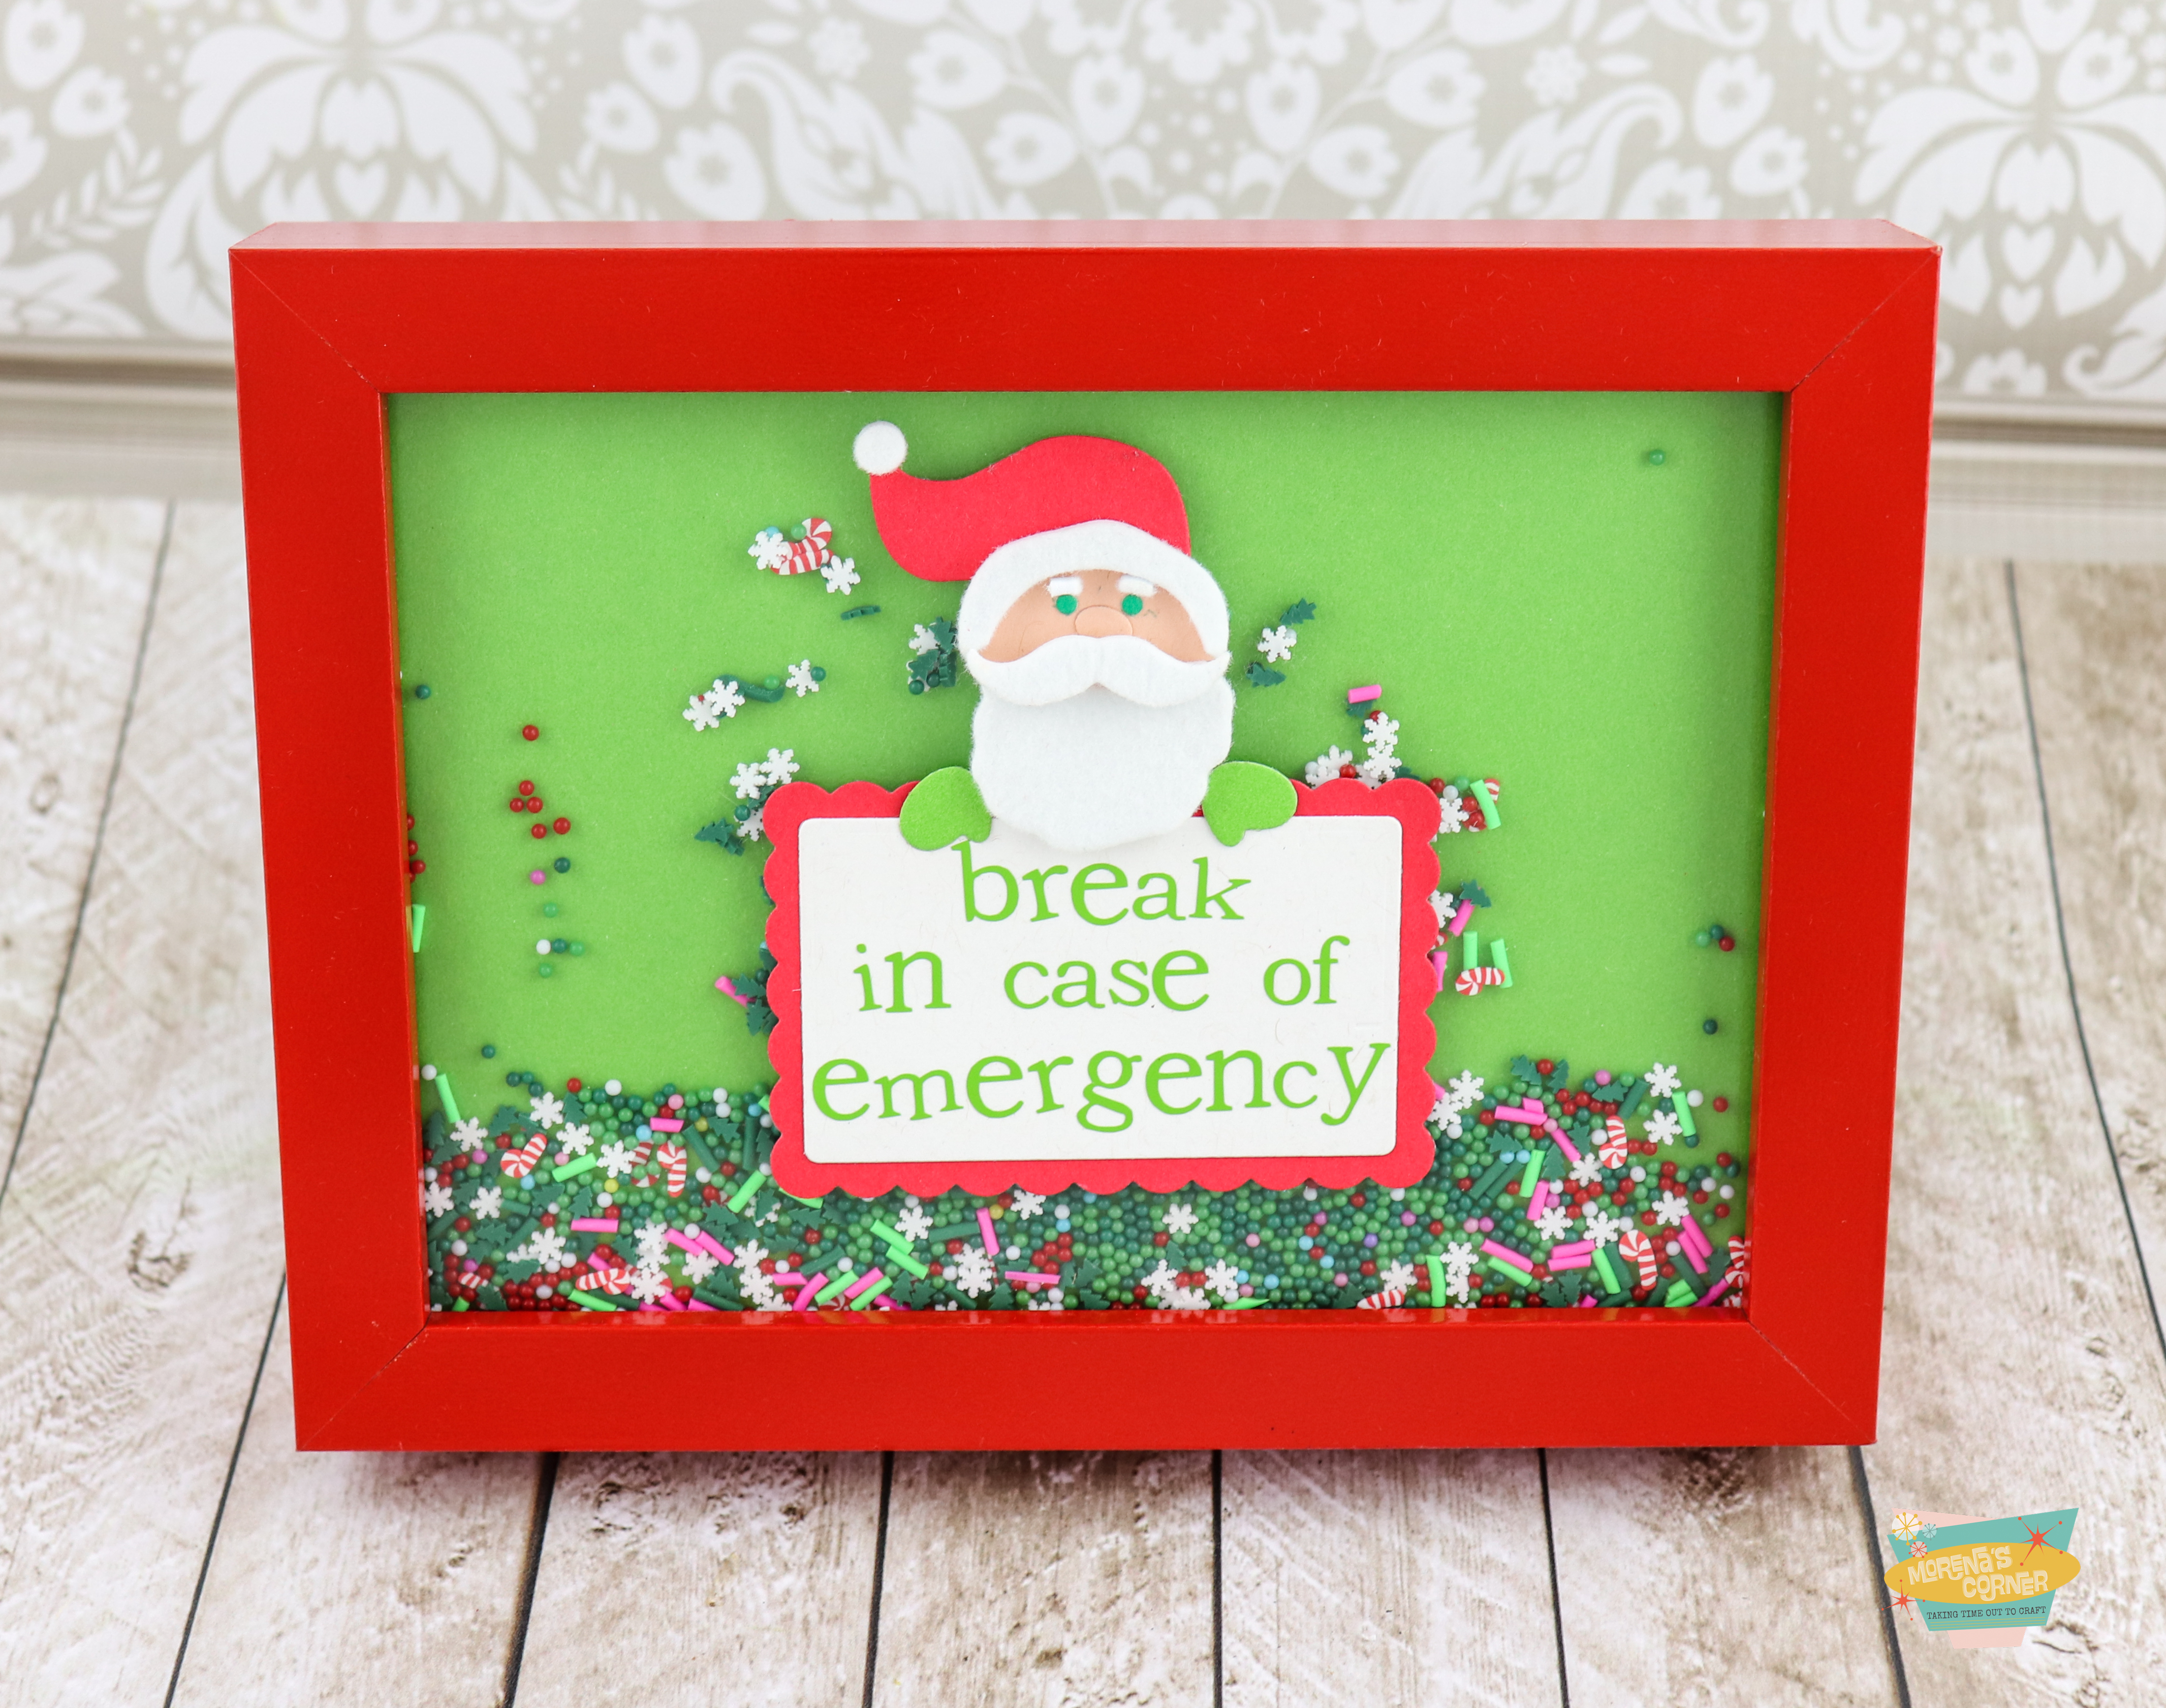
Break in case of emergency! Missing some holiday cheer and sweetness? This cute and colorful frame is here to save the day!! This fun new set from Maker’s Movement is designed to allow you to create two adorable tags for the holidays, but this is another fun way you can use this versatile and adorable set!

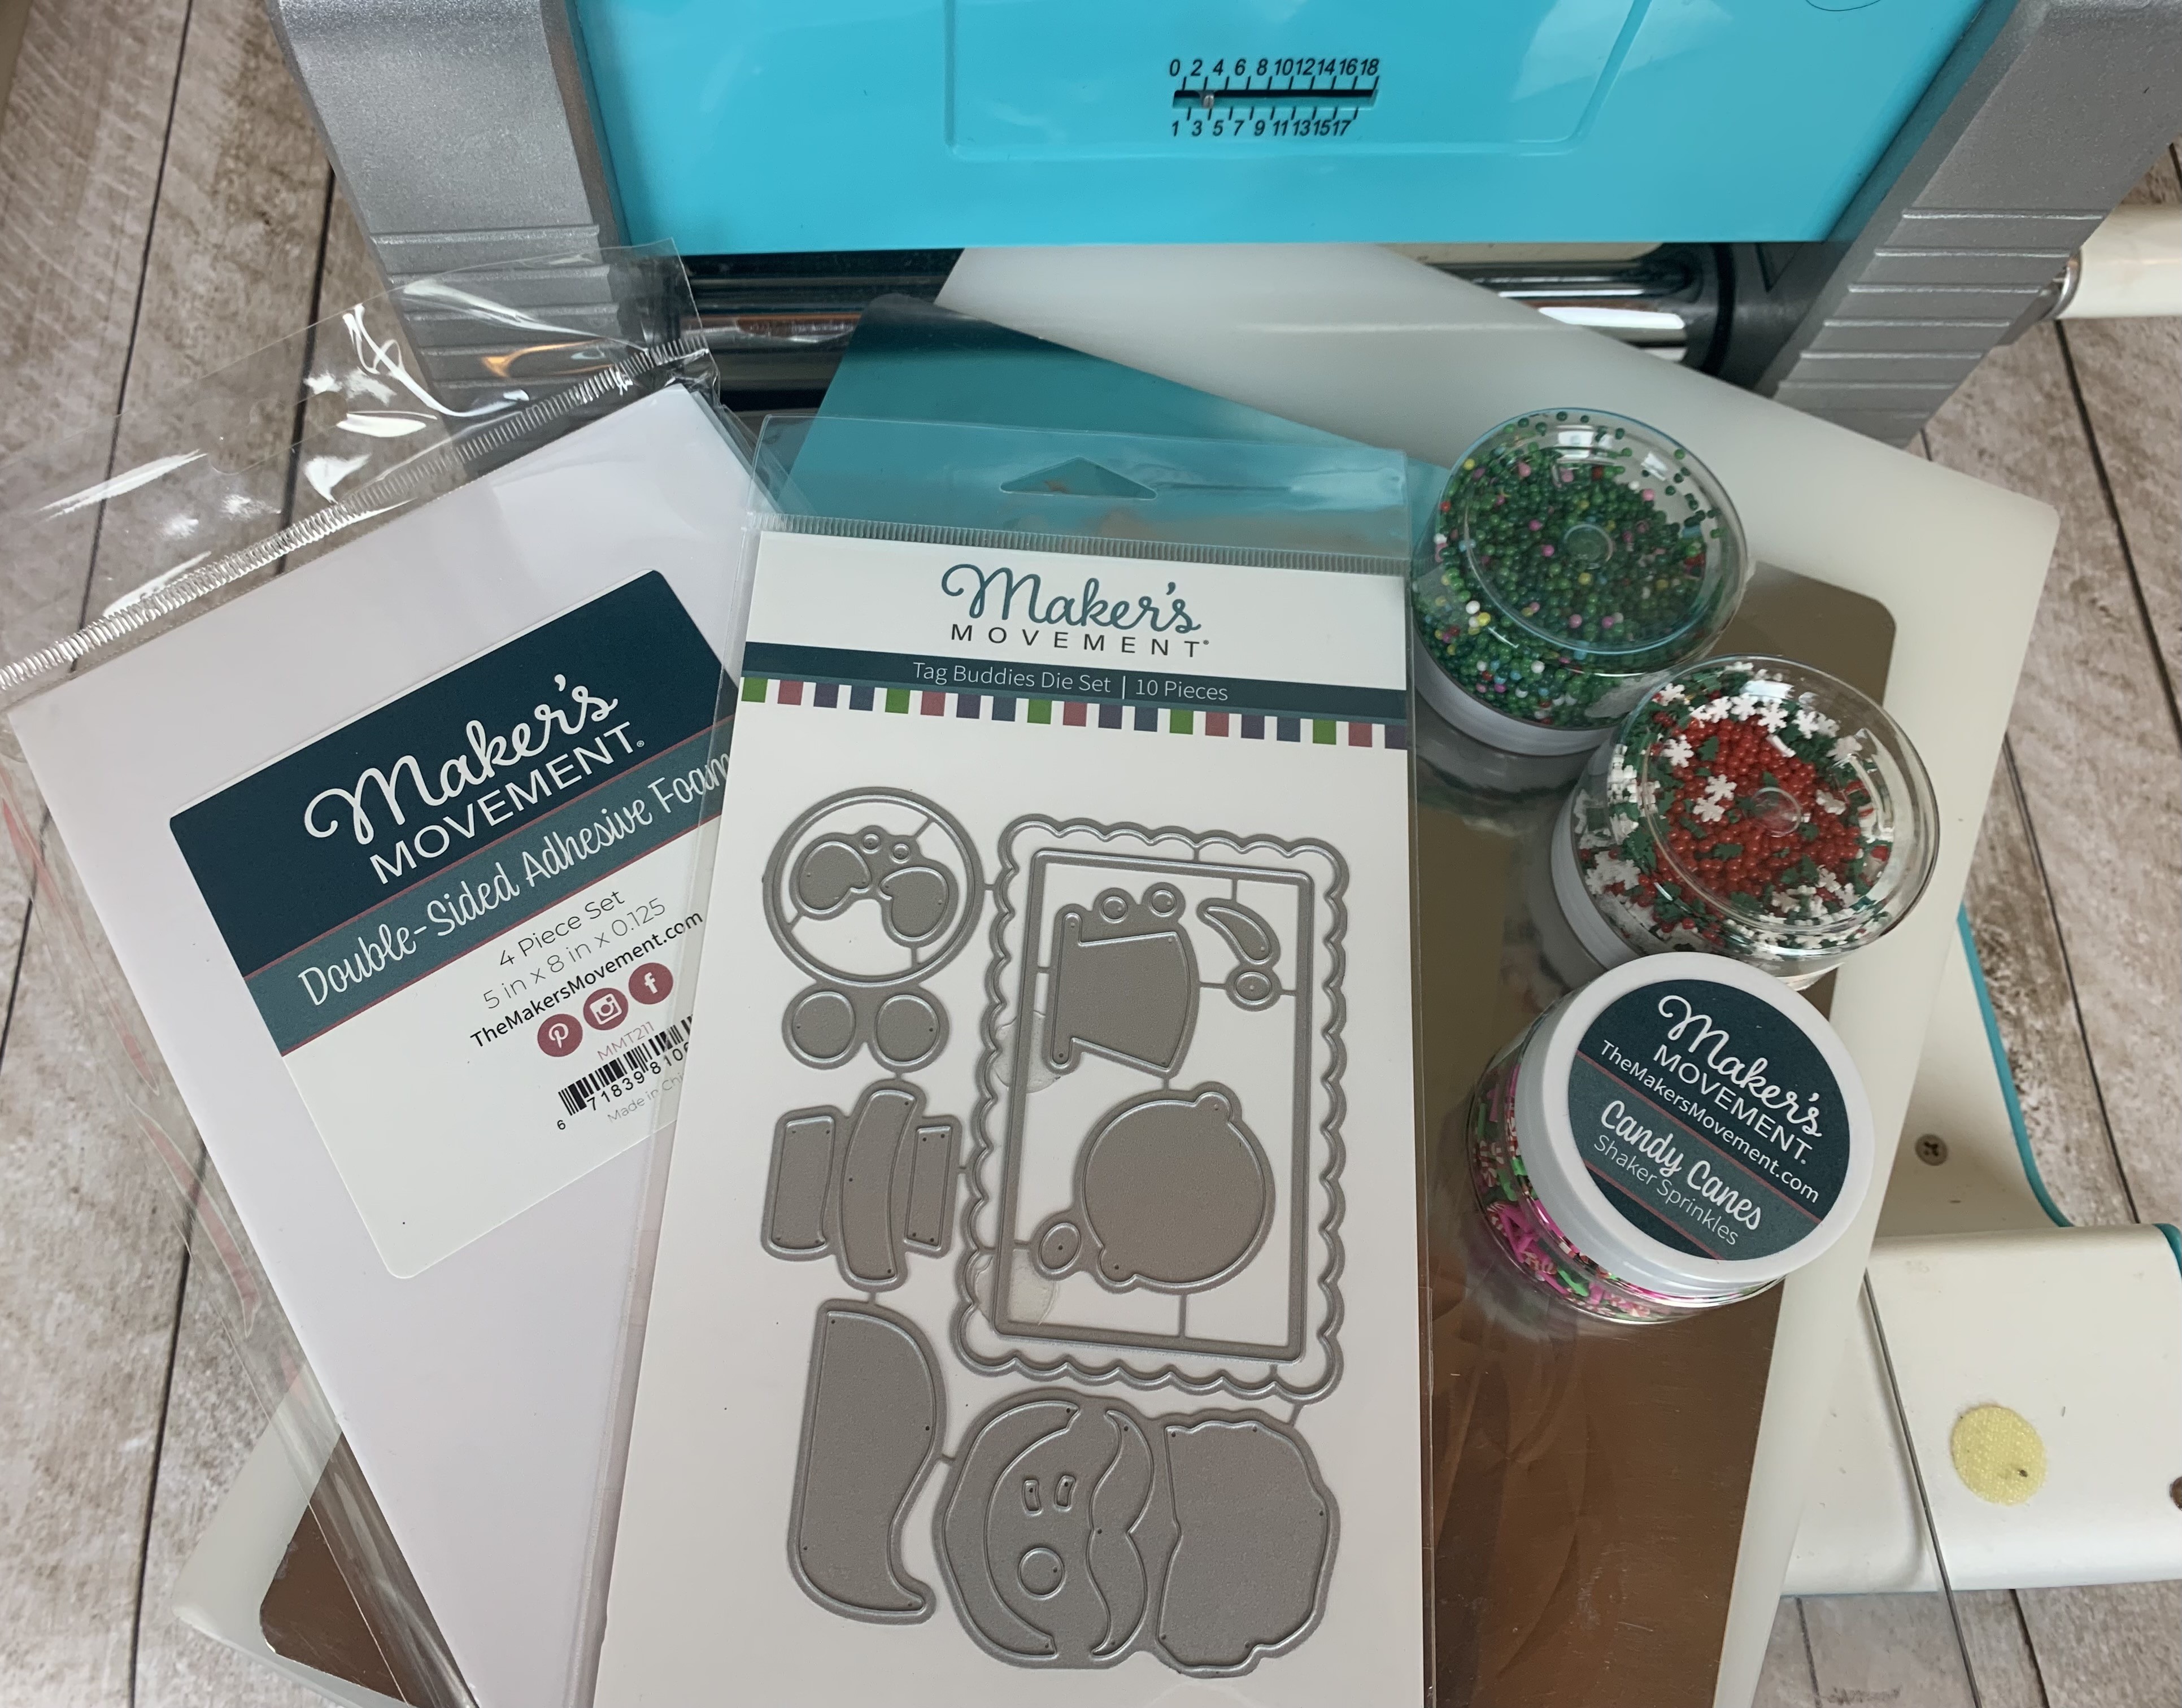
Santa Shaker Frame DIY Supplies
- Tag Buddies Die Set from Maker’s Movement
- Happy Holidays Shaker Sprinkles
- Double Sided Adhesive Craft Foam
- Cardstock
- Die Cutting Machine
- 4×6 Photo Frame with Stand
- White Flocking Powder
- Xyron Sticker Maker
You can make both a Santa tag AND a snowman tag with this one die set! I only made the Santa for this project, but I’ll be making the snowman to use as a gift tag for presents soon.
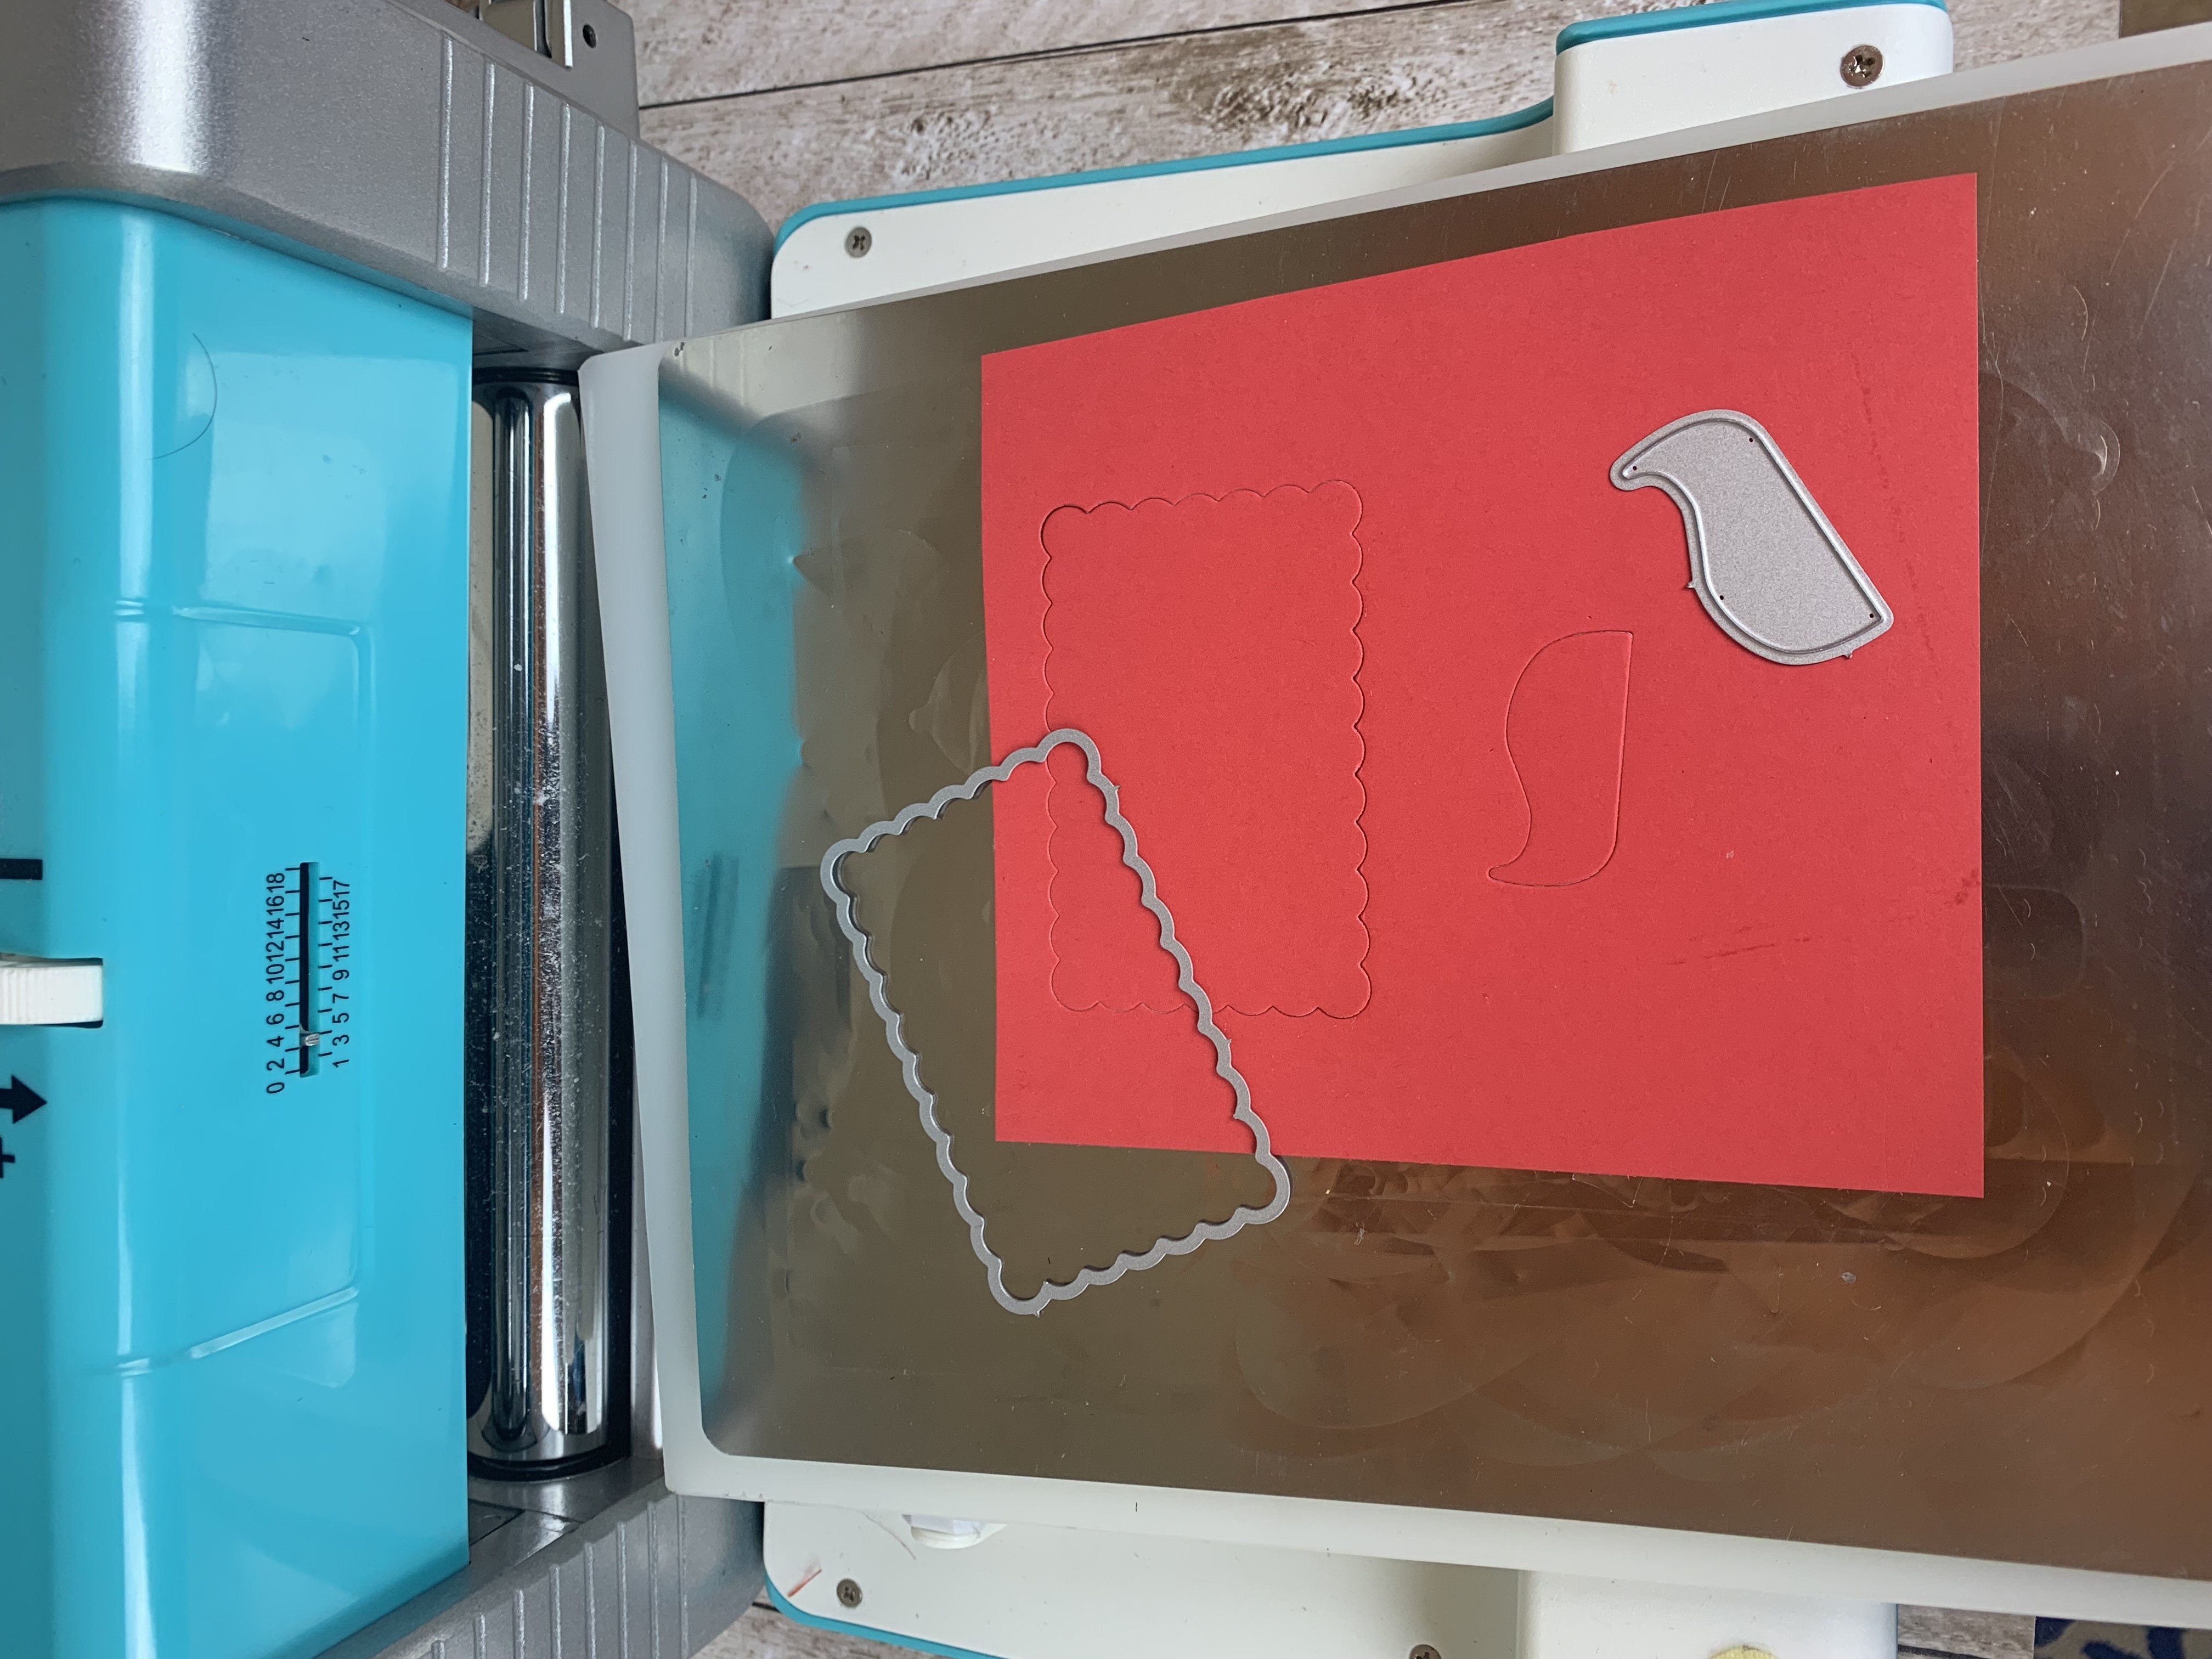
Die cut the different elements from the desired colors. I used red for the hat and frame, white for the insert, and two shades of green for the other items.
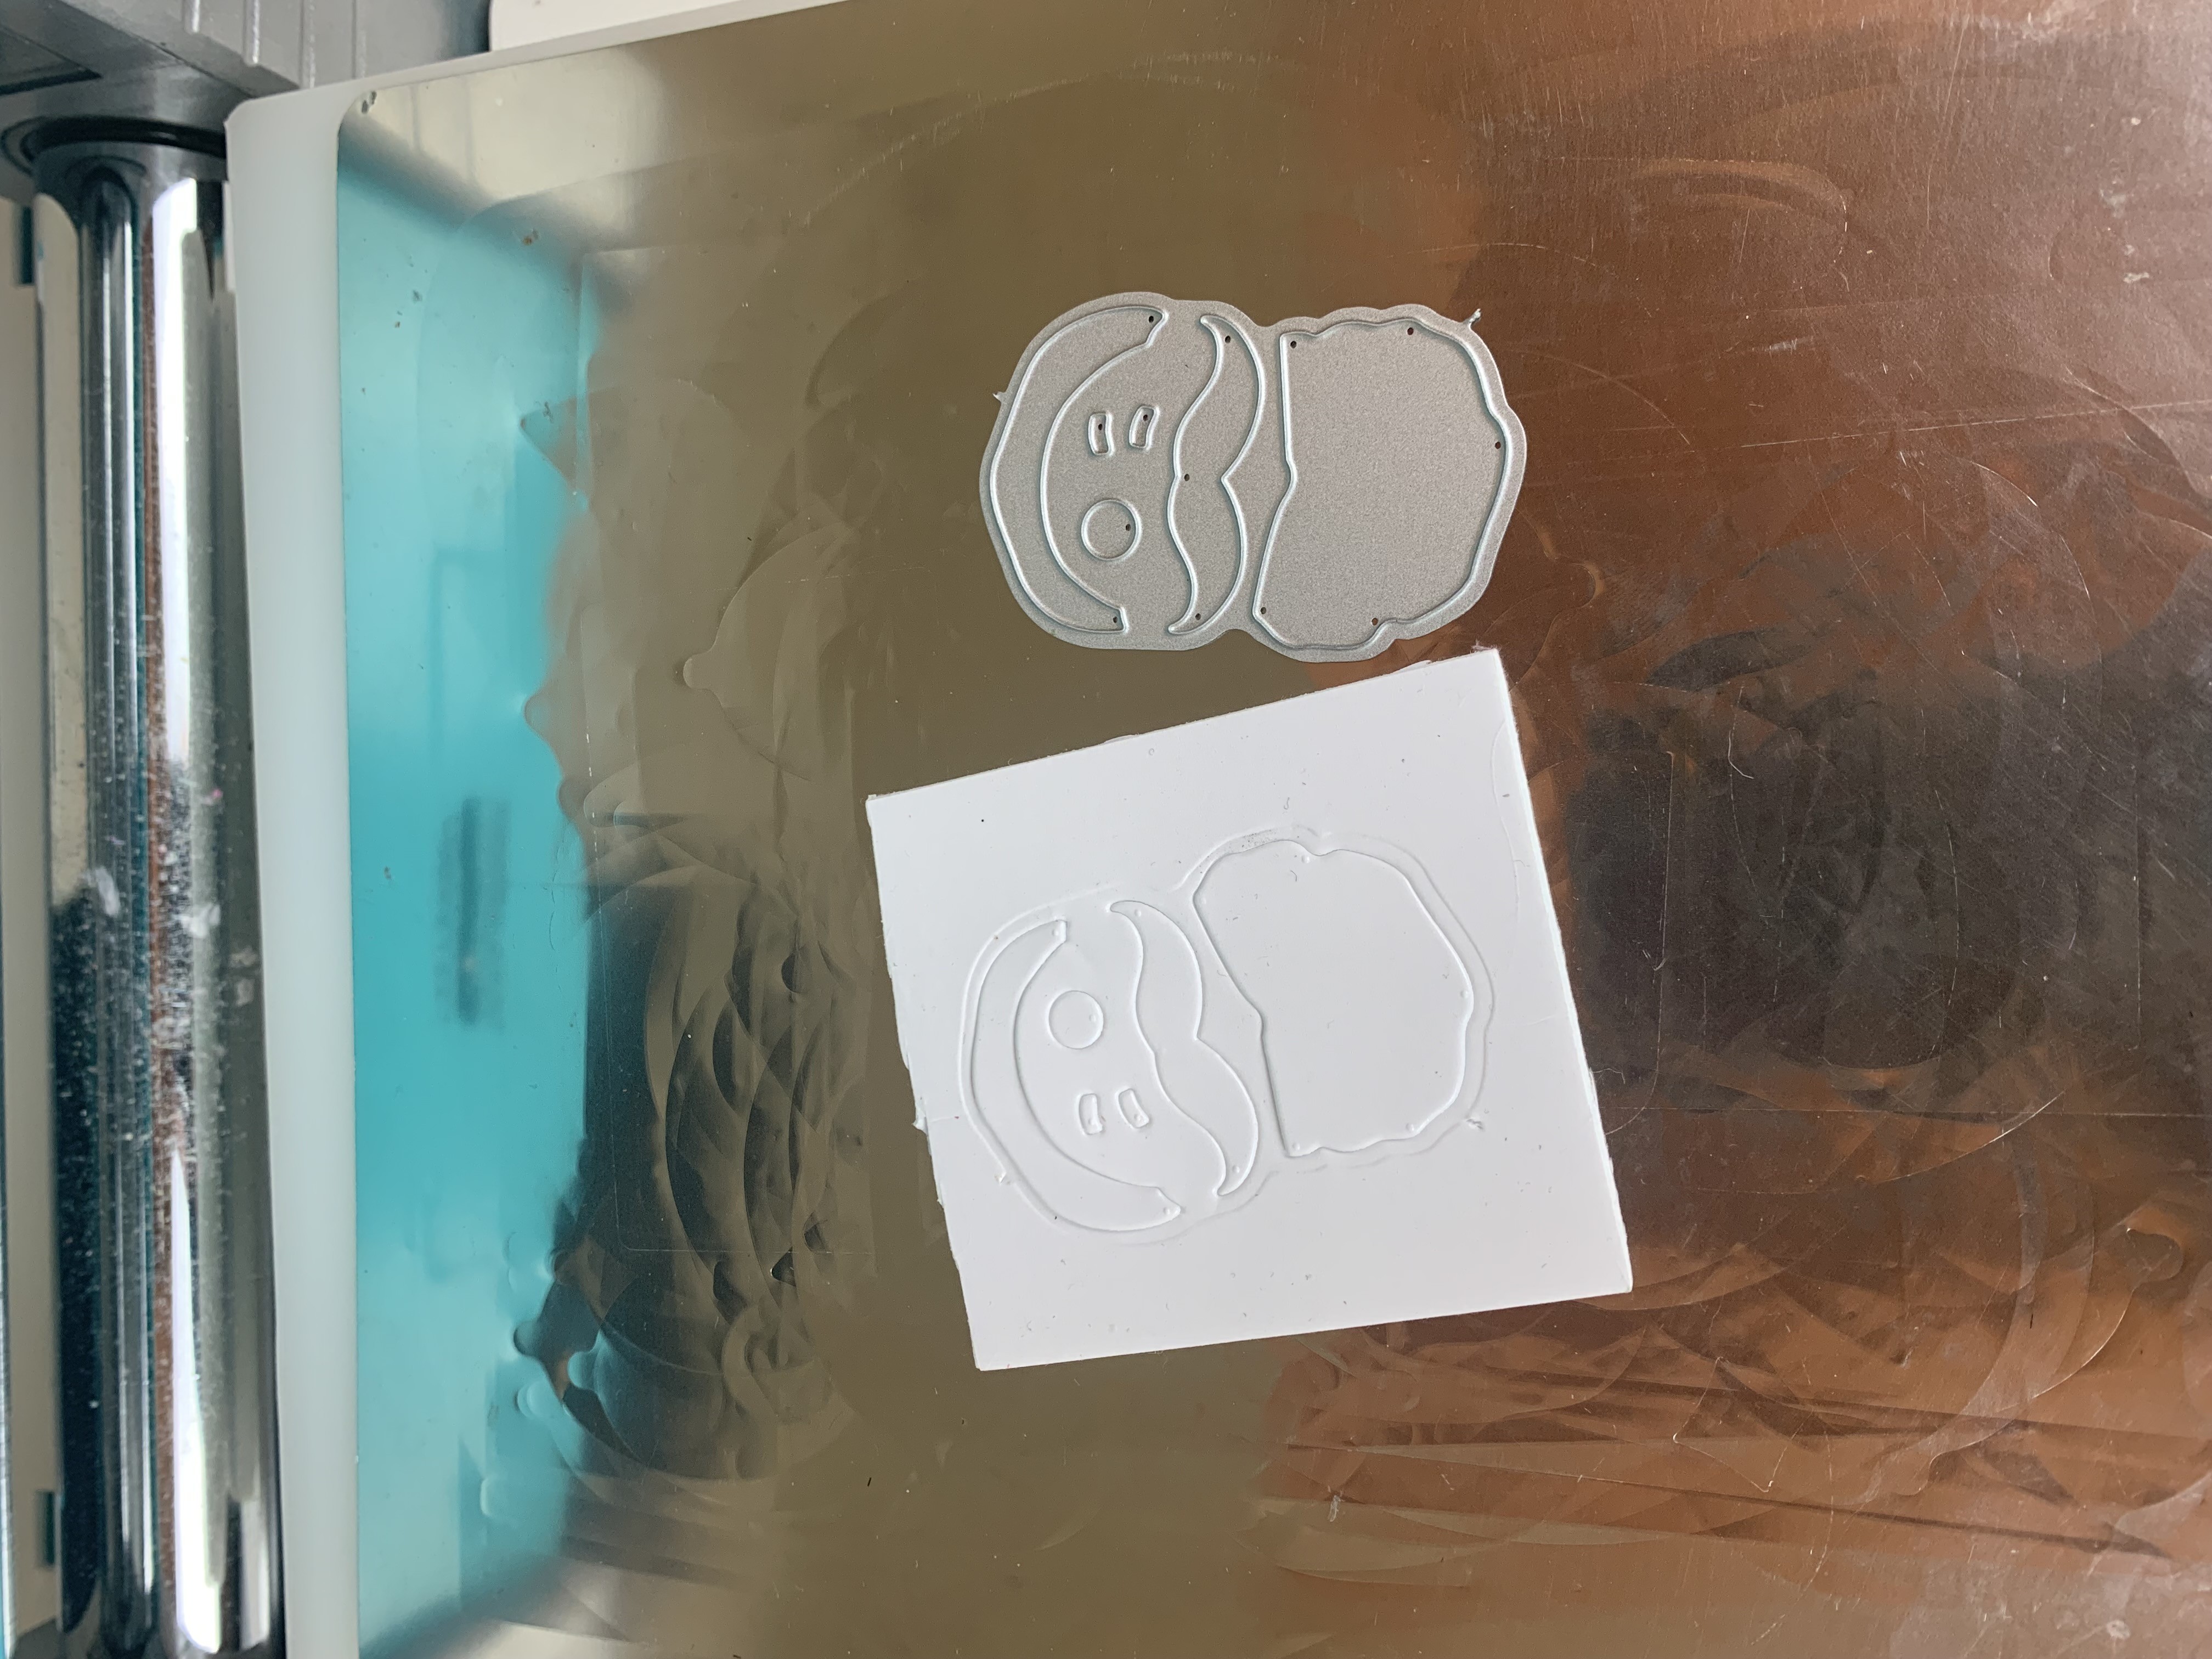
Not too long ago I realized that you can die cut the double sided adhesive foam from Maker’s Movement using their incredible dies. GAME CHANGER! I decided, why not just use the foam as part of my design? It creates the PERFECT 3-D element, especially when it die cuts so cleanly. So first I cut all the white elements from the die set out of the foam.

I peeled the front part of the adhesive off and poured on white flocking powder. Press the powder into the adhesive.
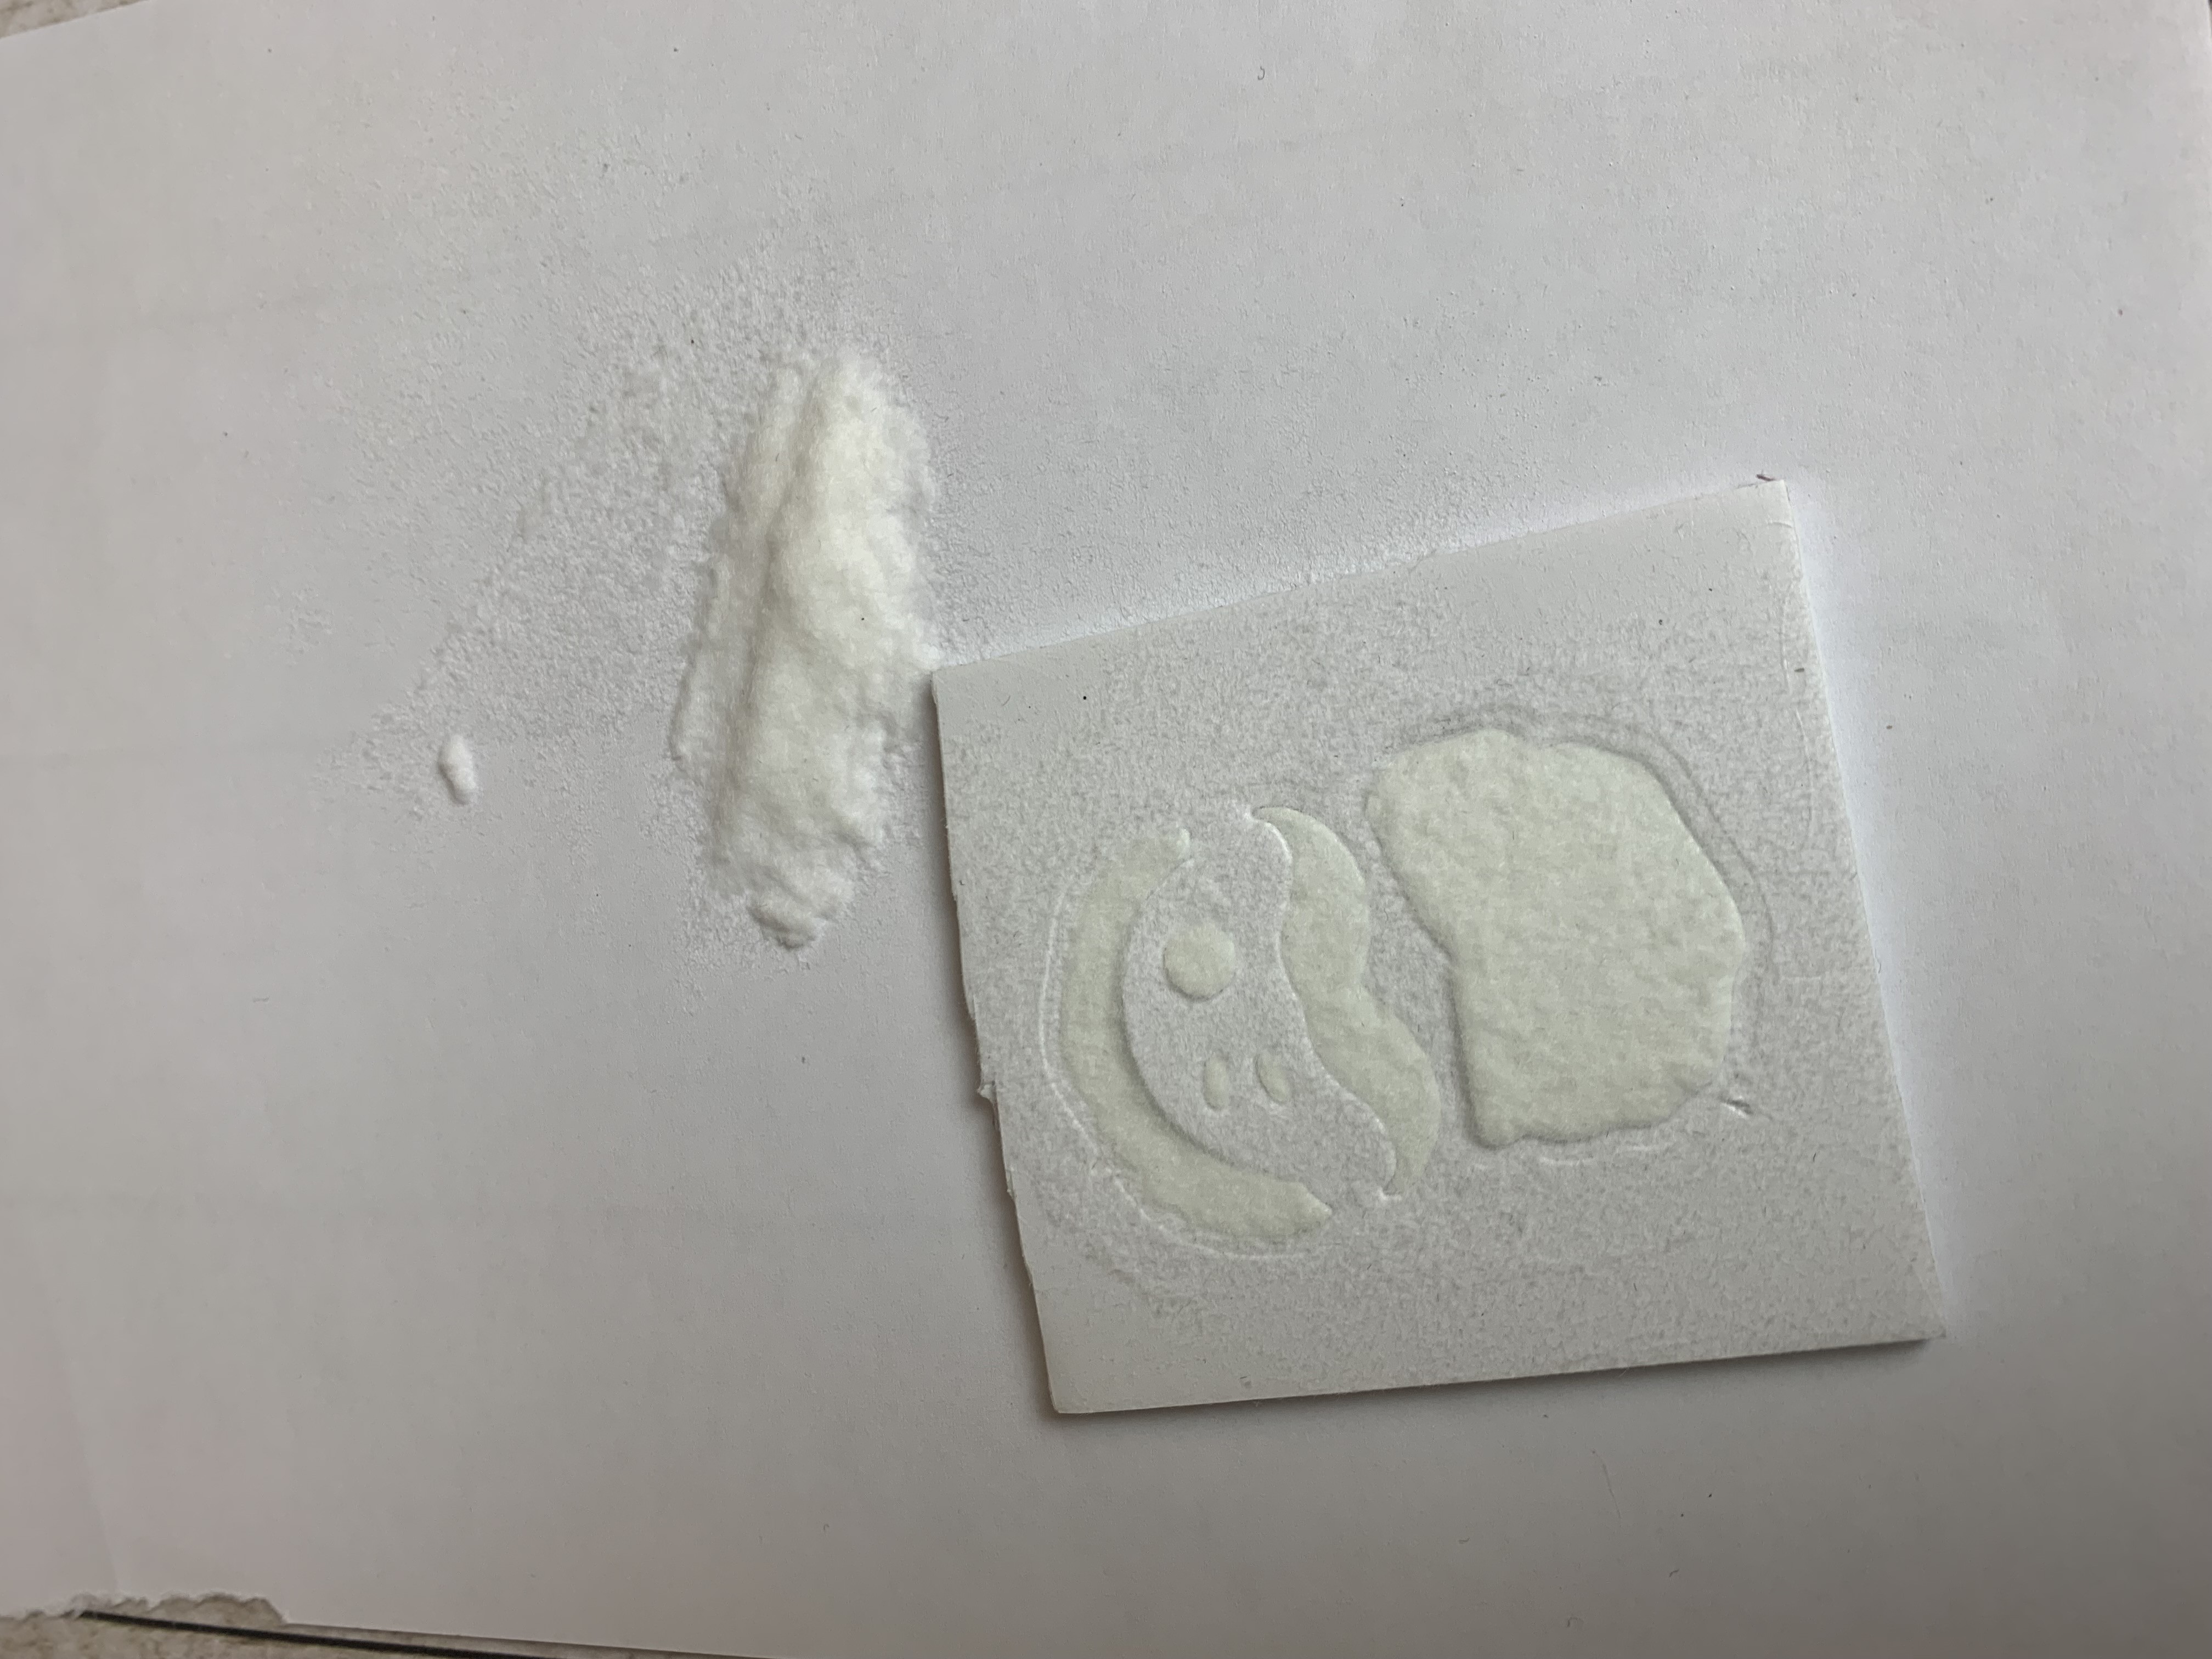
Now the white die cut elements are soft and fuzzy!
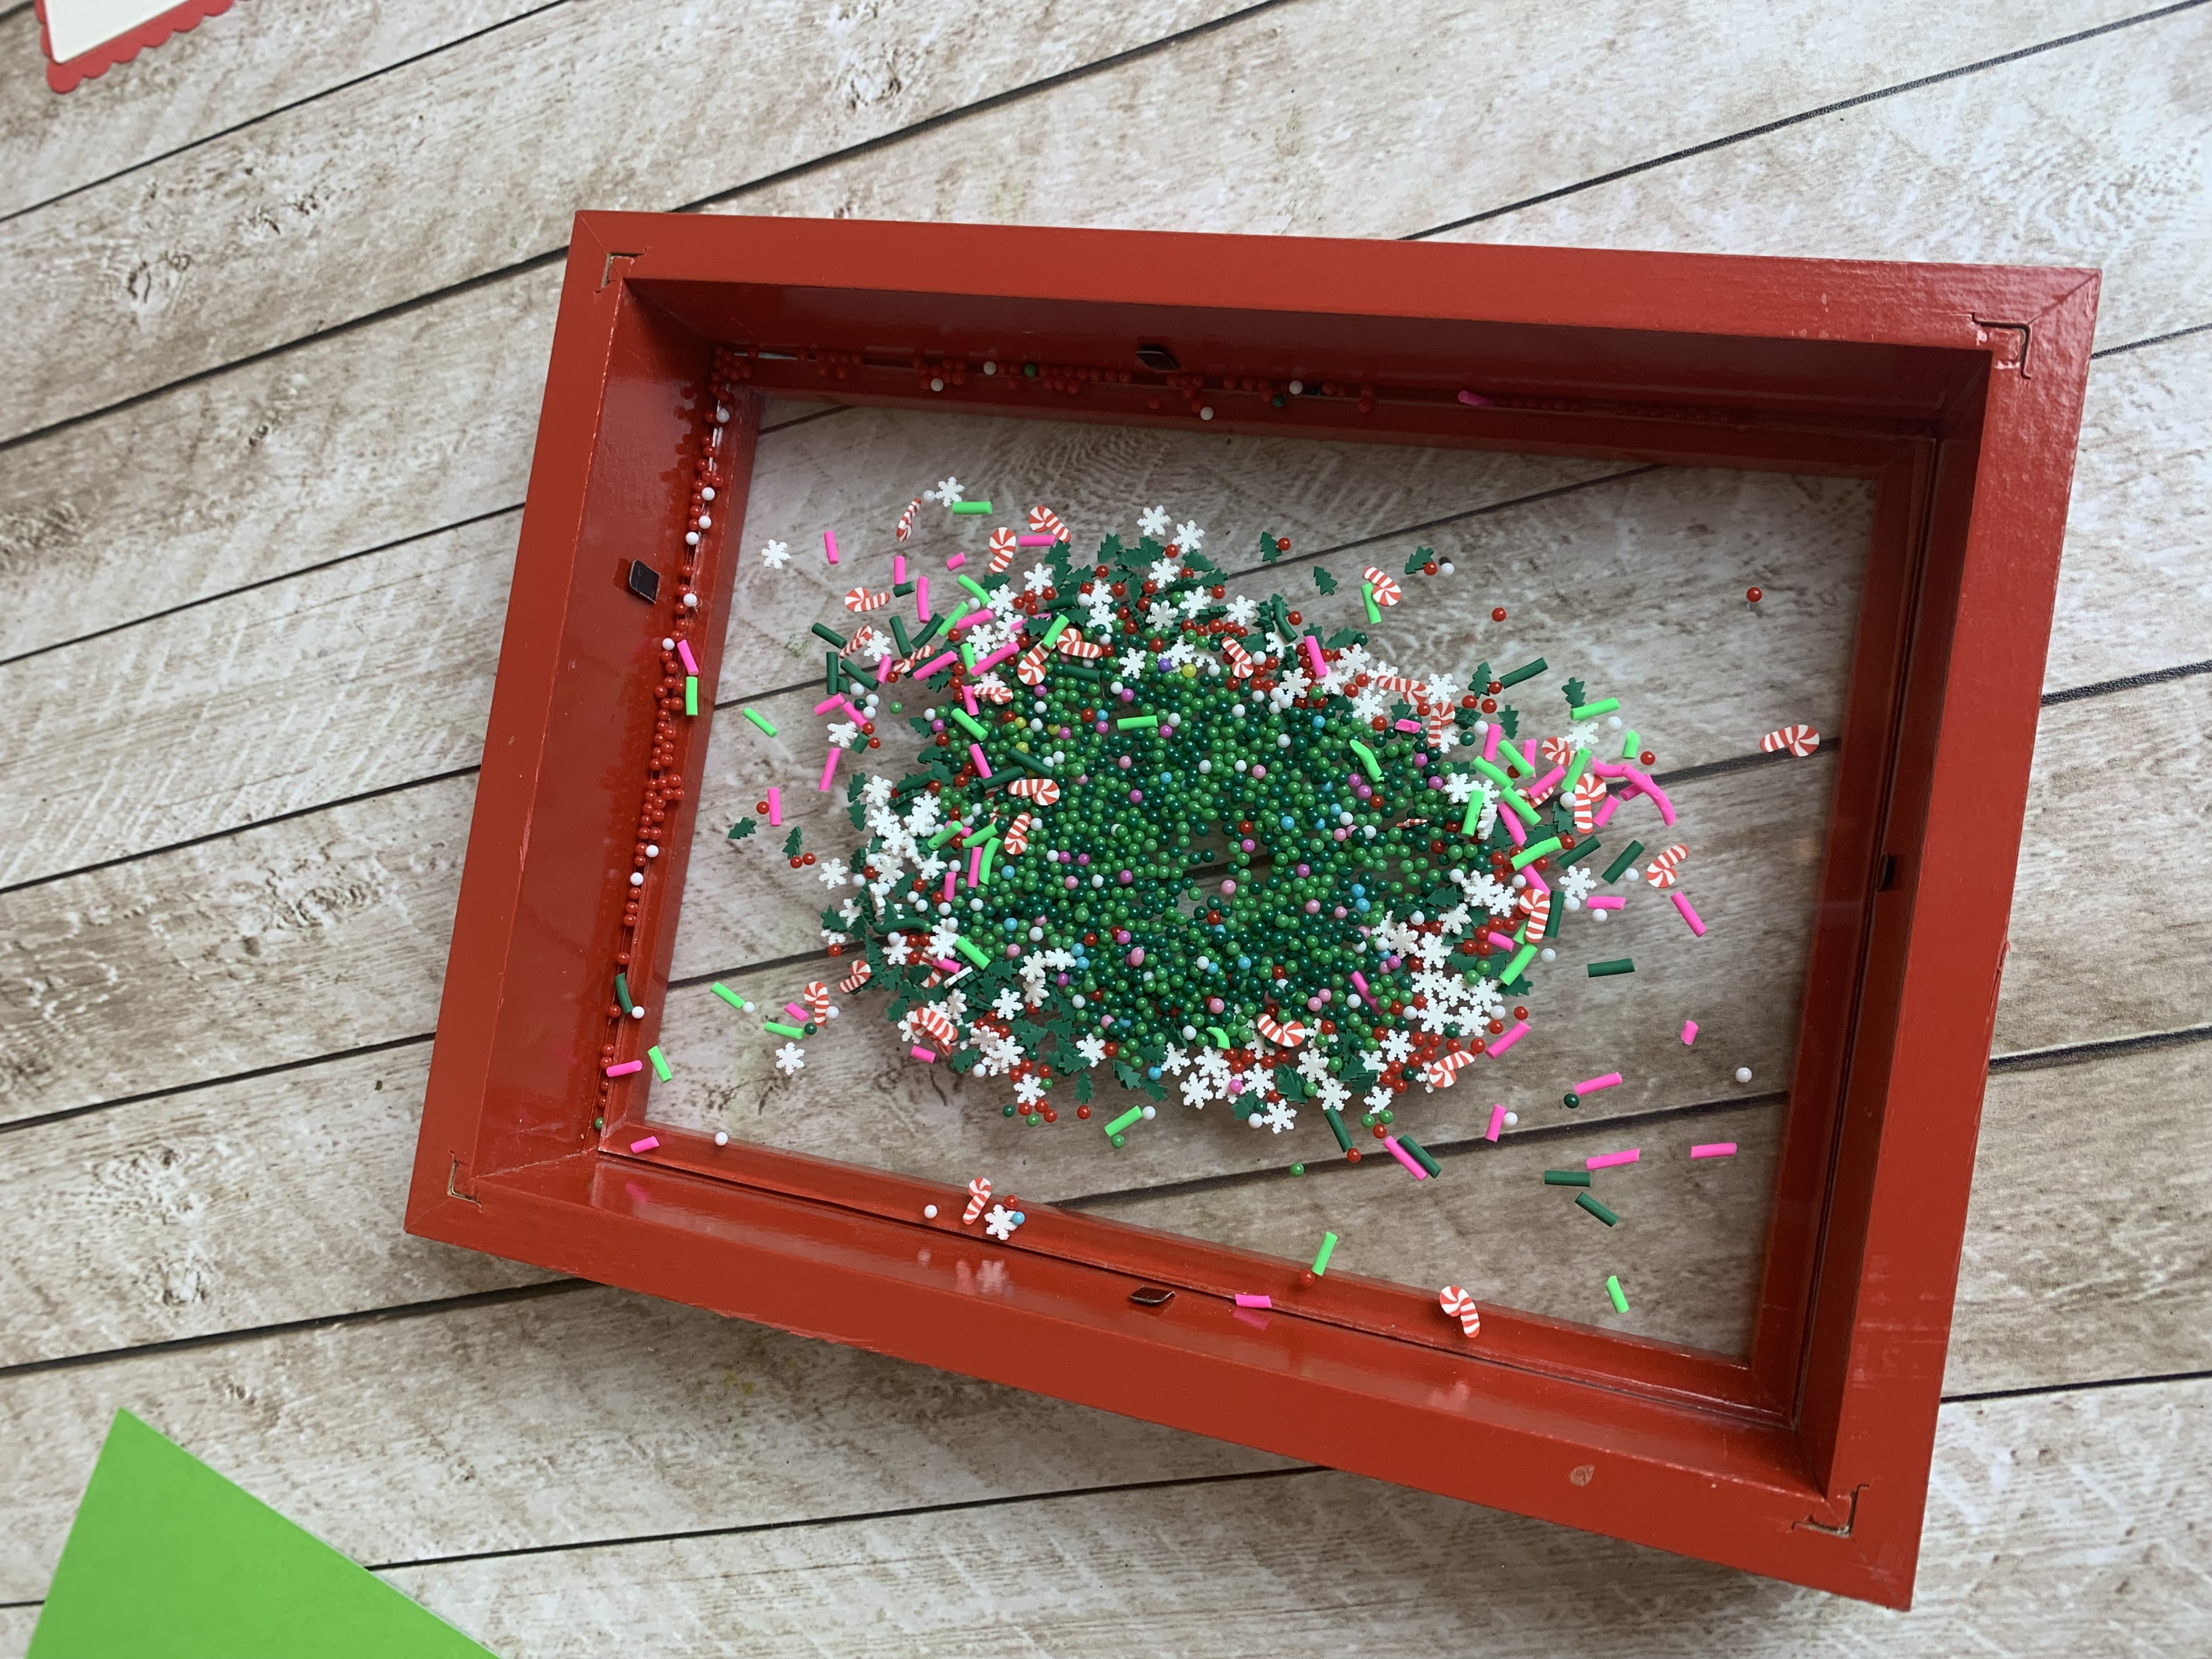
Take apart the frame and add shaker sprinkles. Replace the frame paper backing with a piece of green cardstock.
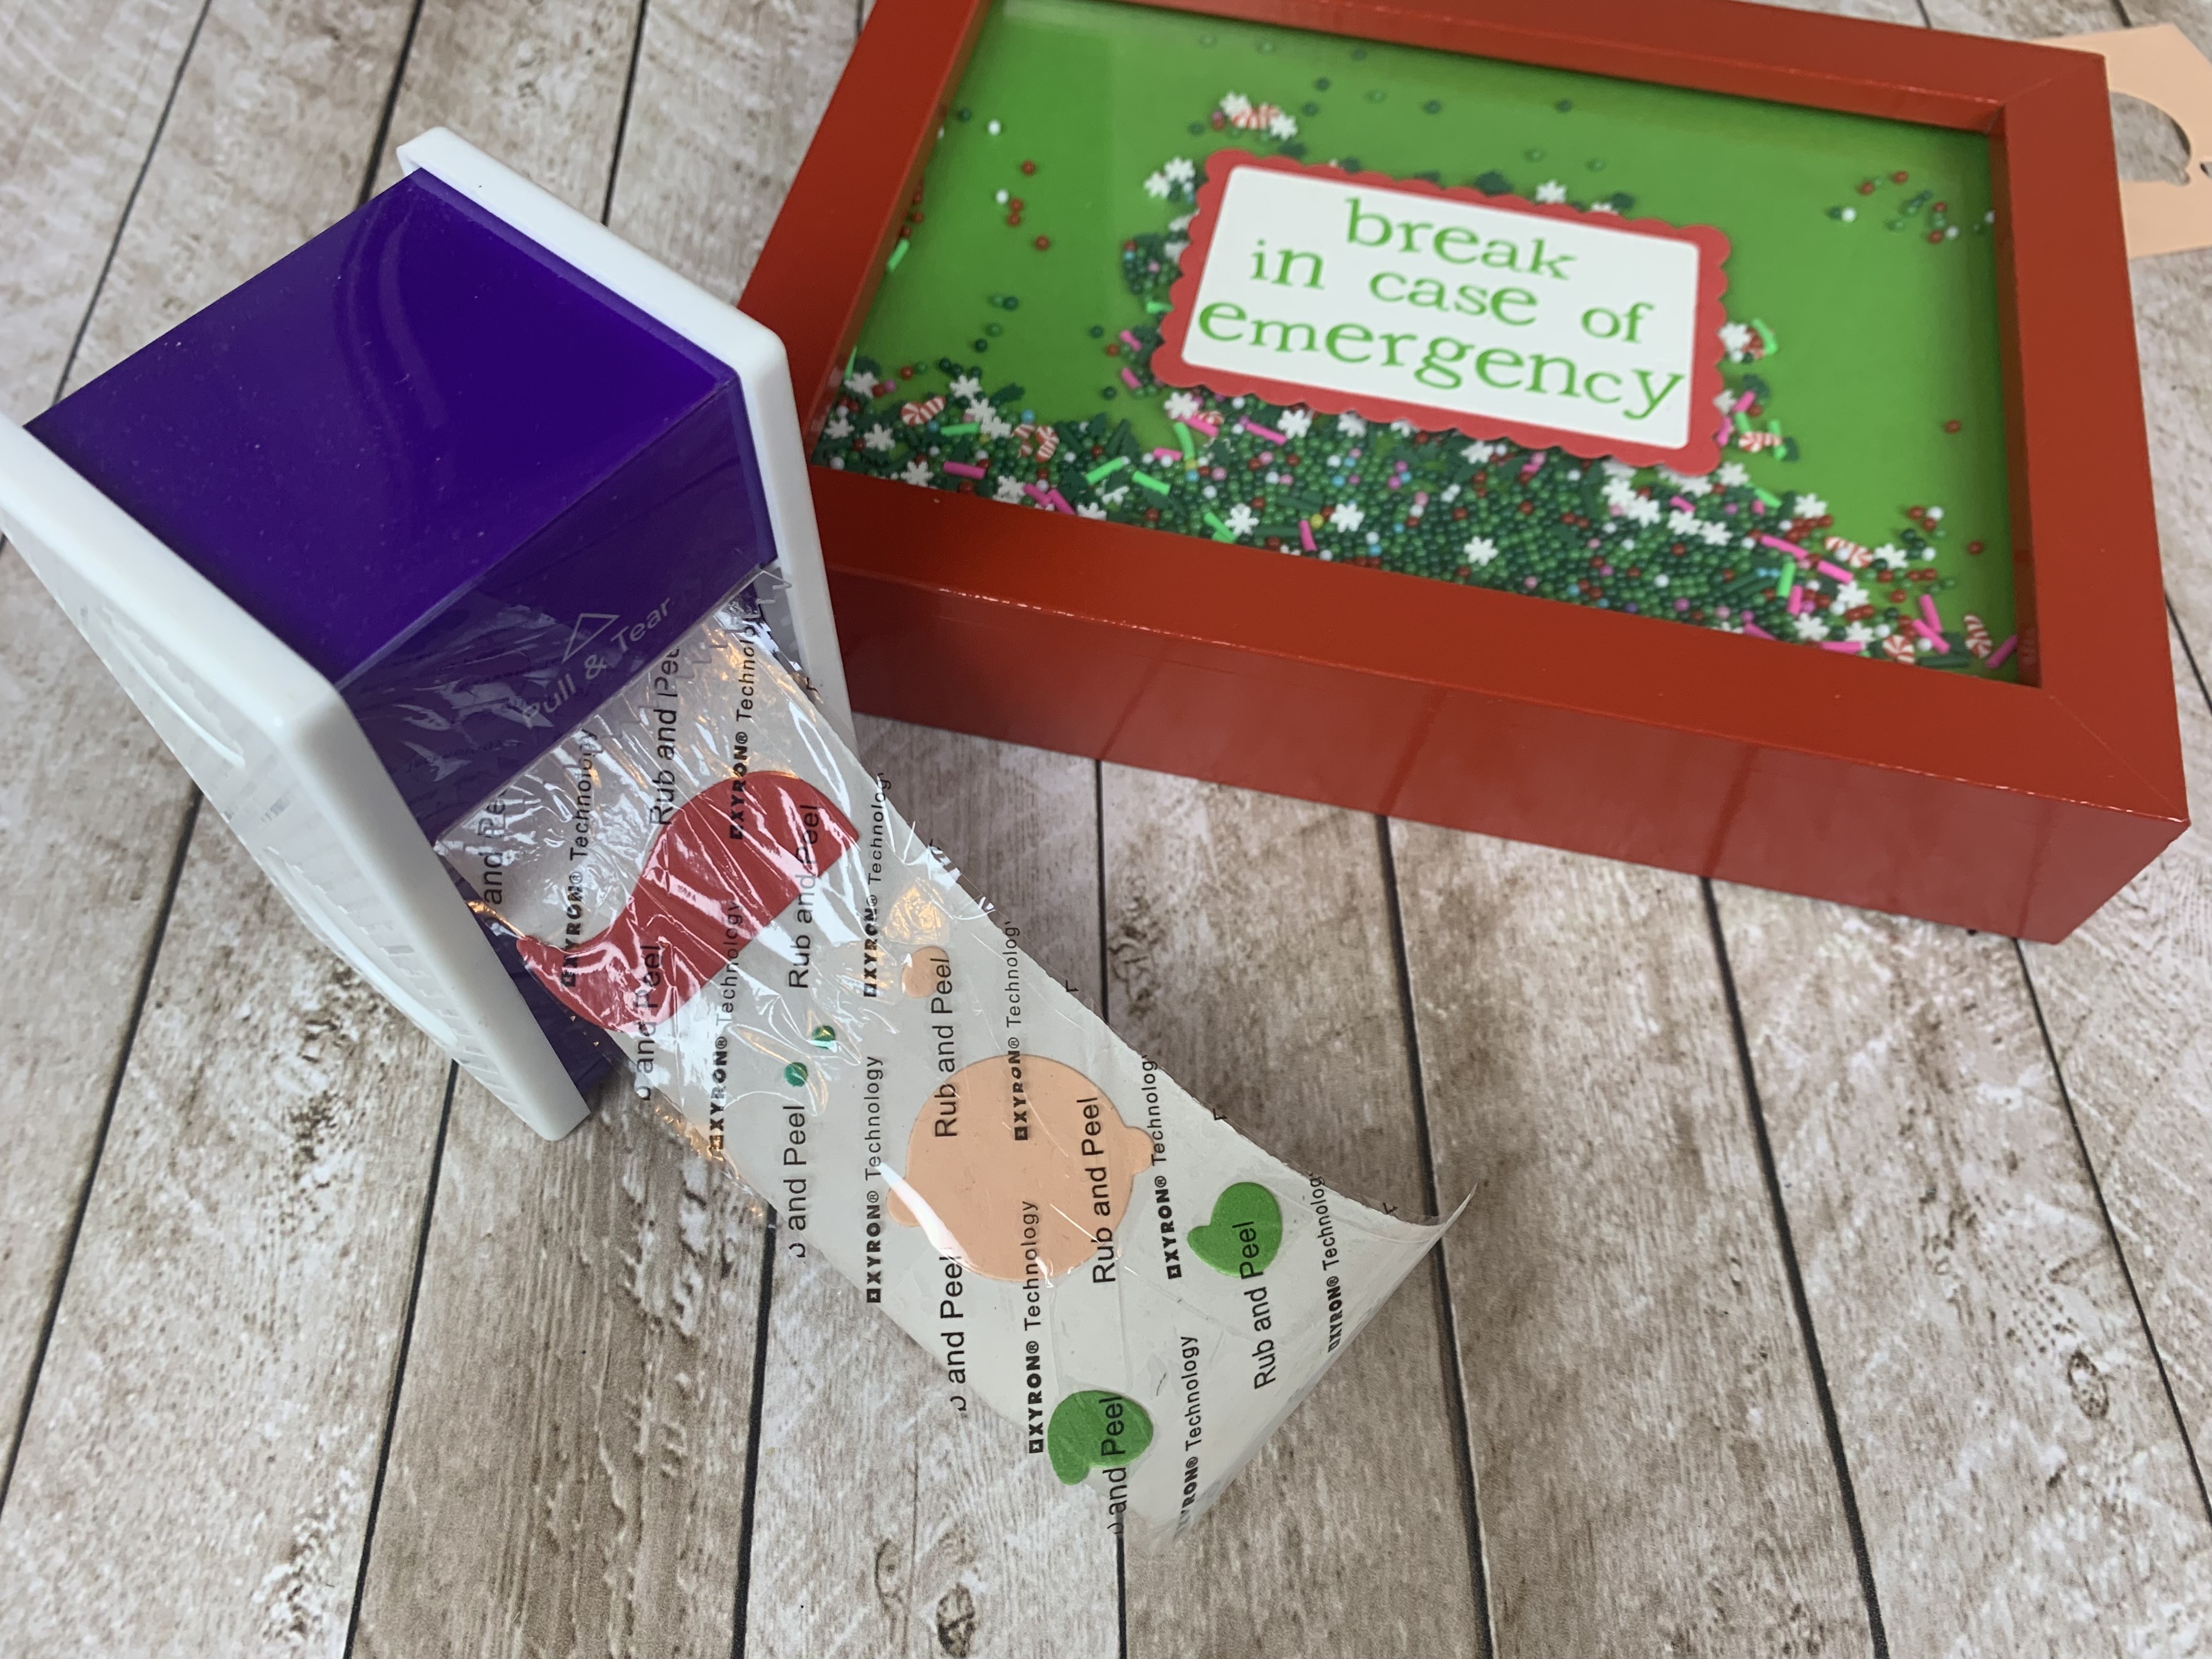
Add a message to the tag. I used vinyl and my Silhouette Cameo, but you could also stamp a message onto the tag. Use a Xyron sticker maker to assemble to frame.
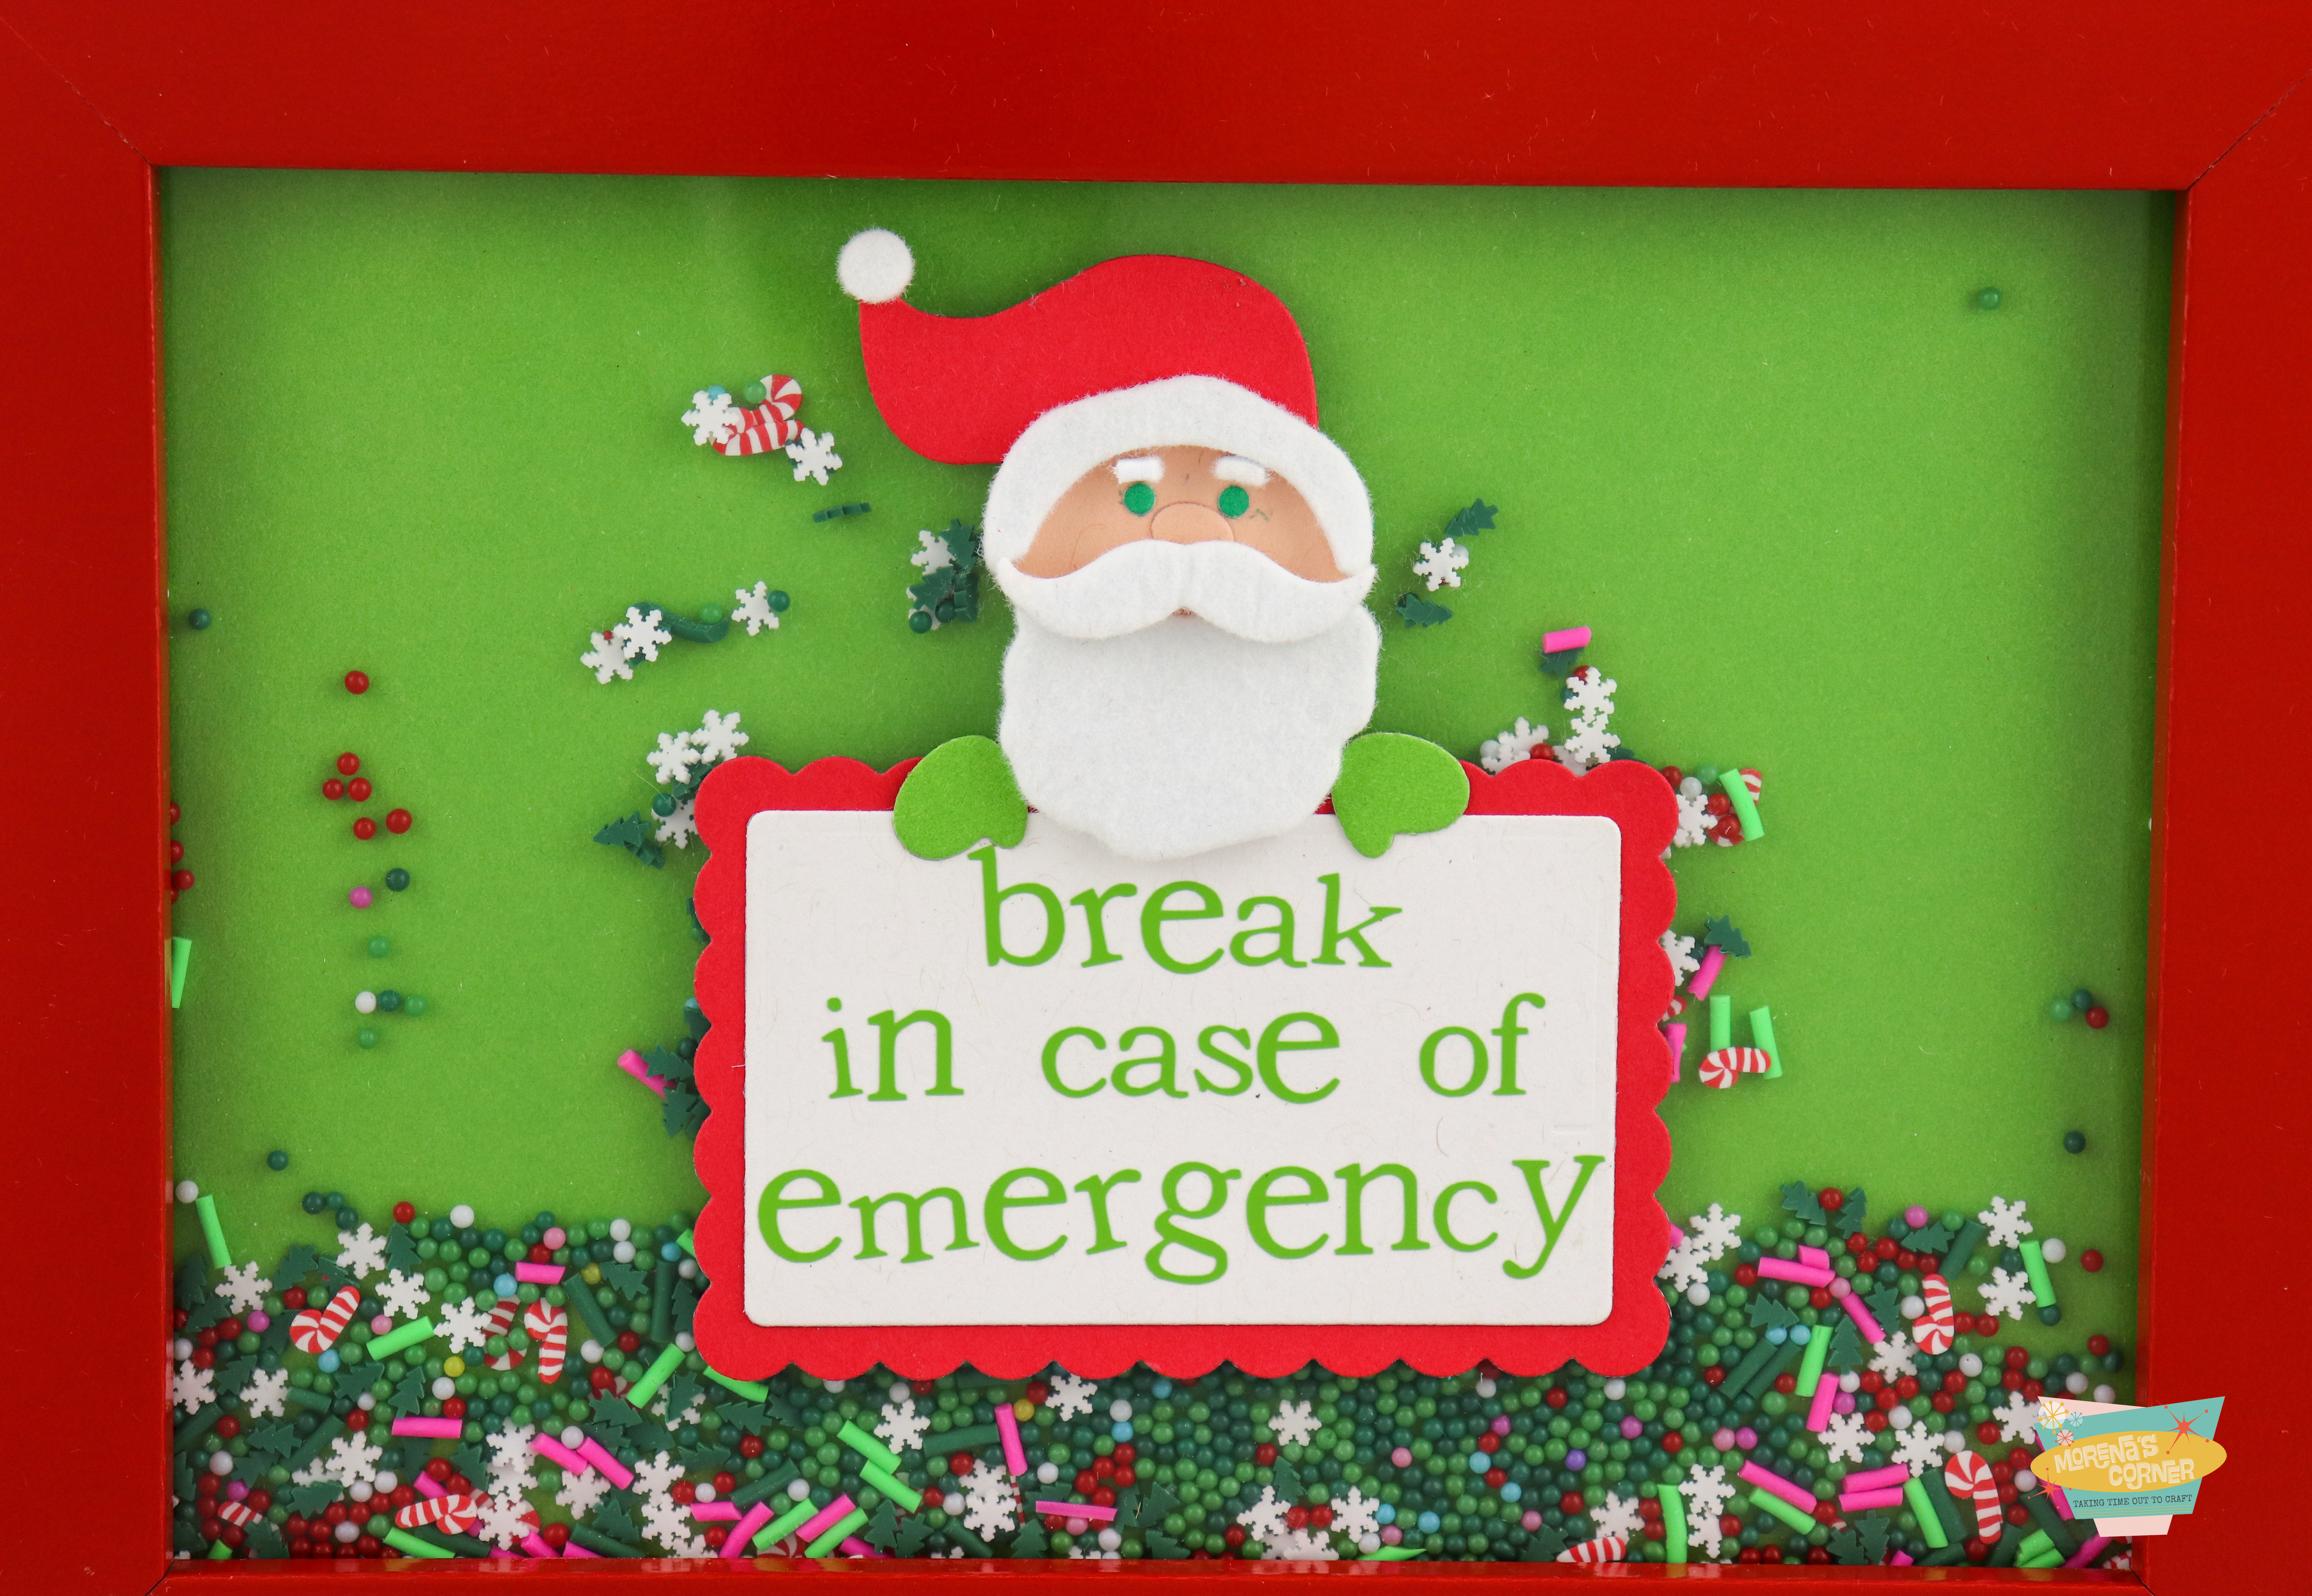
Isn’t he cute? I love how the foam gives Santa a three dimensional quality, as well as some “fuzz”. Whe you shake the frame the sprinkles dance around for joy.

Have fun crafting and creating decor for Christmas!
Leave a Reply