This snowman tin decor DIY adds some cheer to any winter day!

Snow-Tex is one of my favorite products to use for winter crafts! It really does create a fun snowy texture, and it’s easy to work with. A little goes a long way, too, so one bottle will get you through a lot of projects! I originally created this project for the DecoArt website as an artist on their team, and when I pulled this little guy out to decorate my home for winter I realized I hadn’t shared the project here yet. I hope you enjoy this project and will give it a try!

Snowman Tin Decor DIY Supplies
- Tart Tin (found at Goodwill)
- Styrofoam balls
- Bottlebrush tree
- Yarn
- floral foam
- Beads
- Snow-Tex Paste
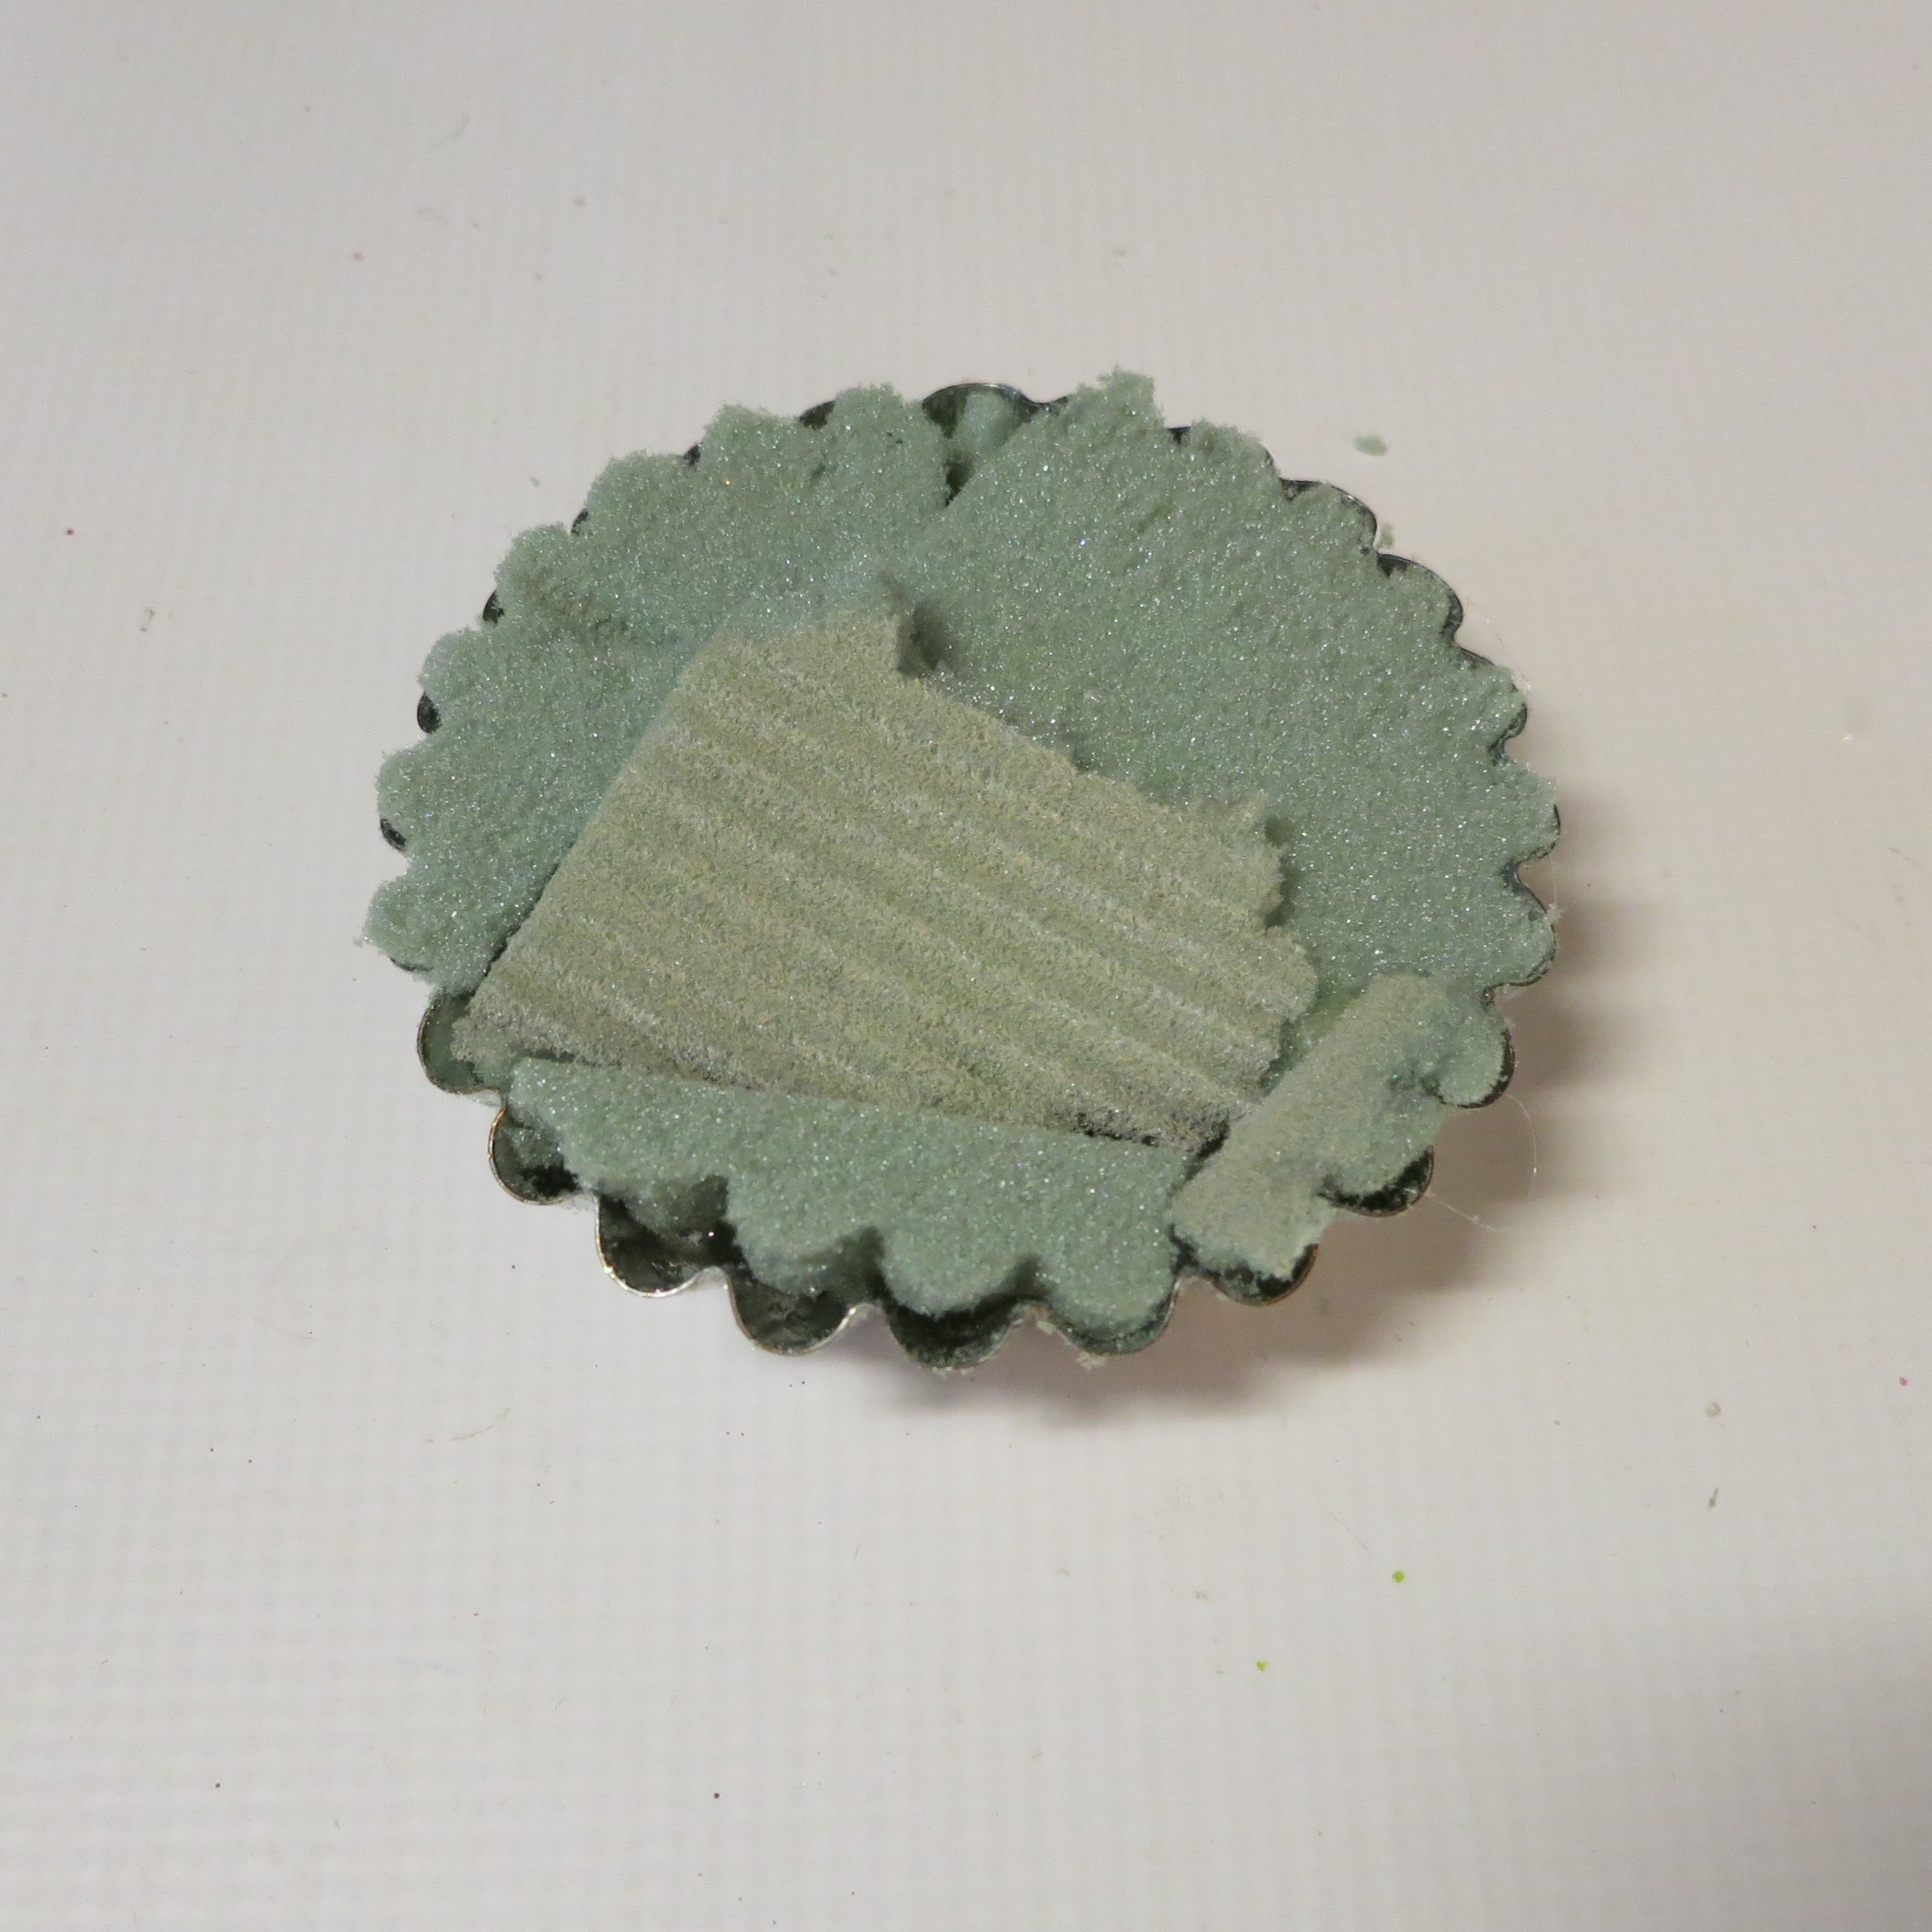
Cut a piece of floral foam to fit inside the tin, and hot glue the foam to the bottom of the tin. This will create a solid base for the piece.

Use toothpicks to attach to styrofoam balls together. Leave one toothpick sticking out at the bottom to use for the stand later.
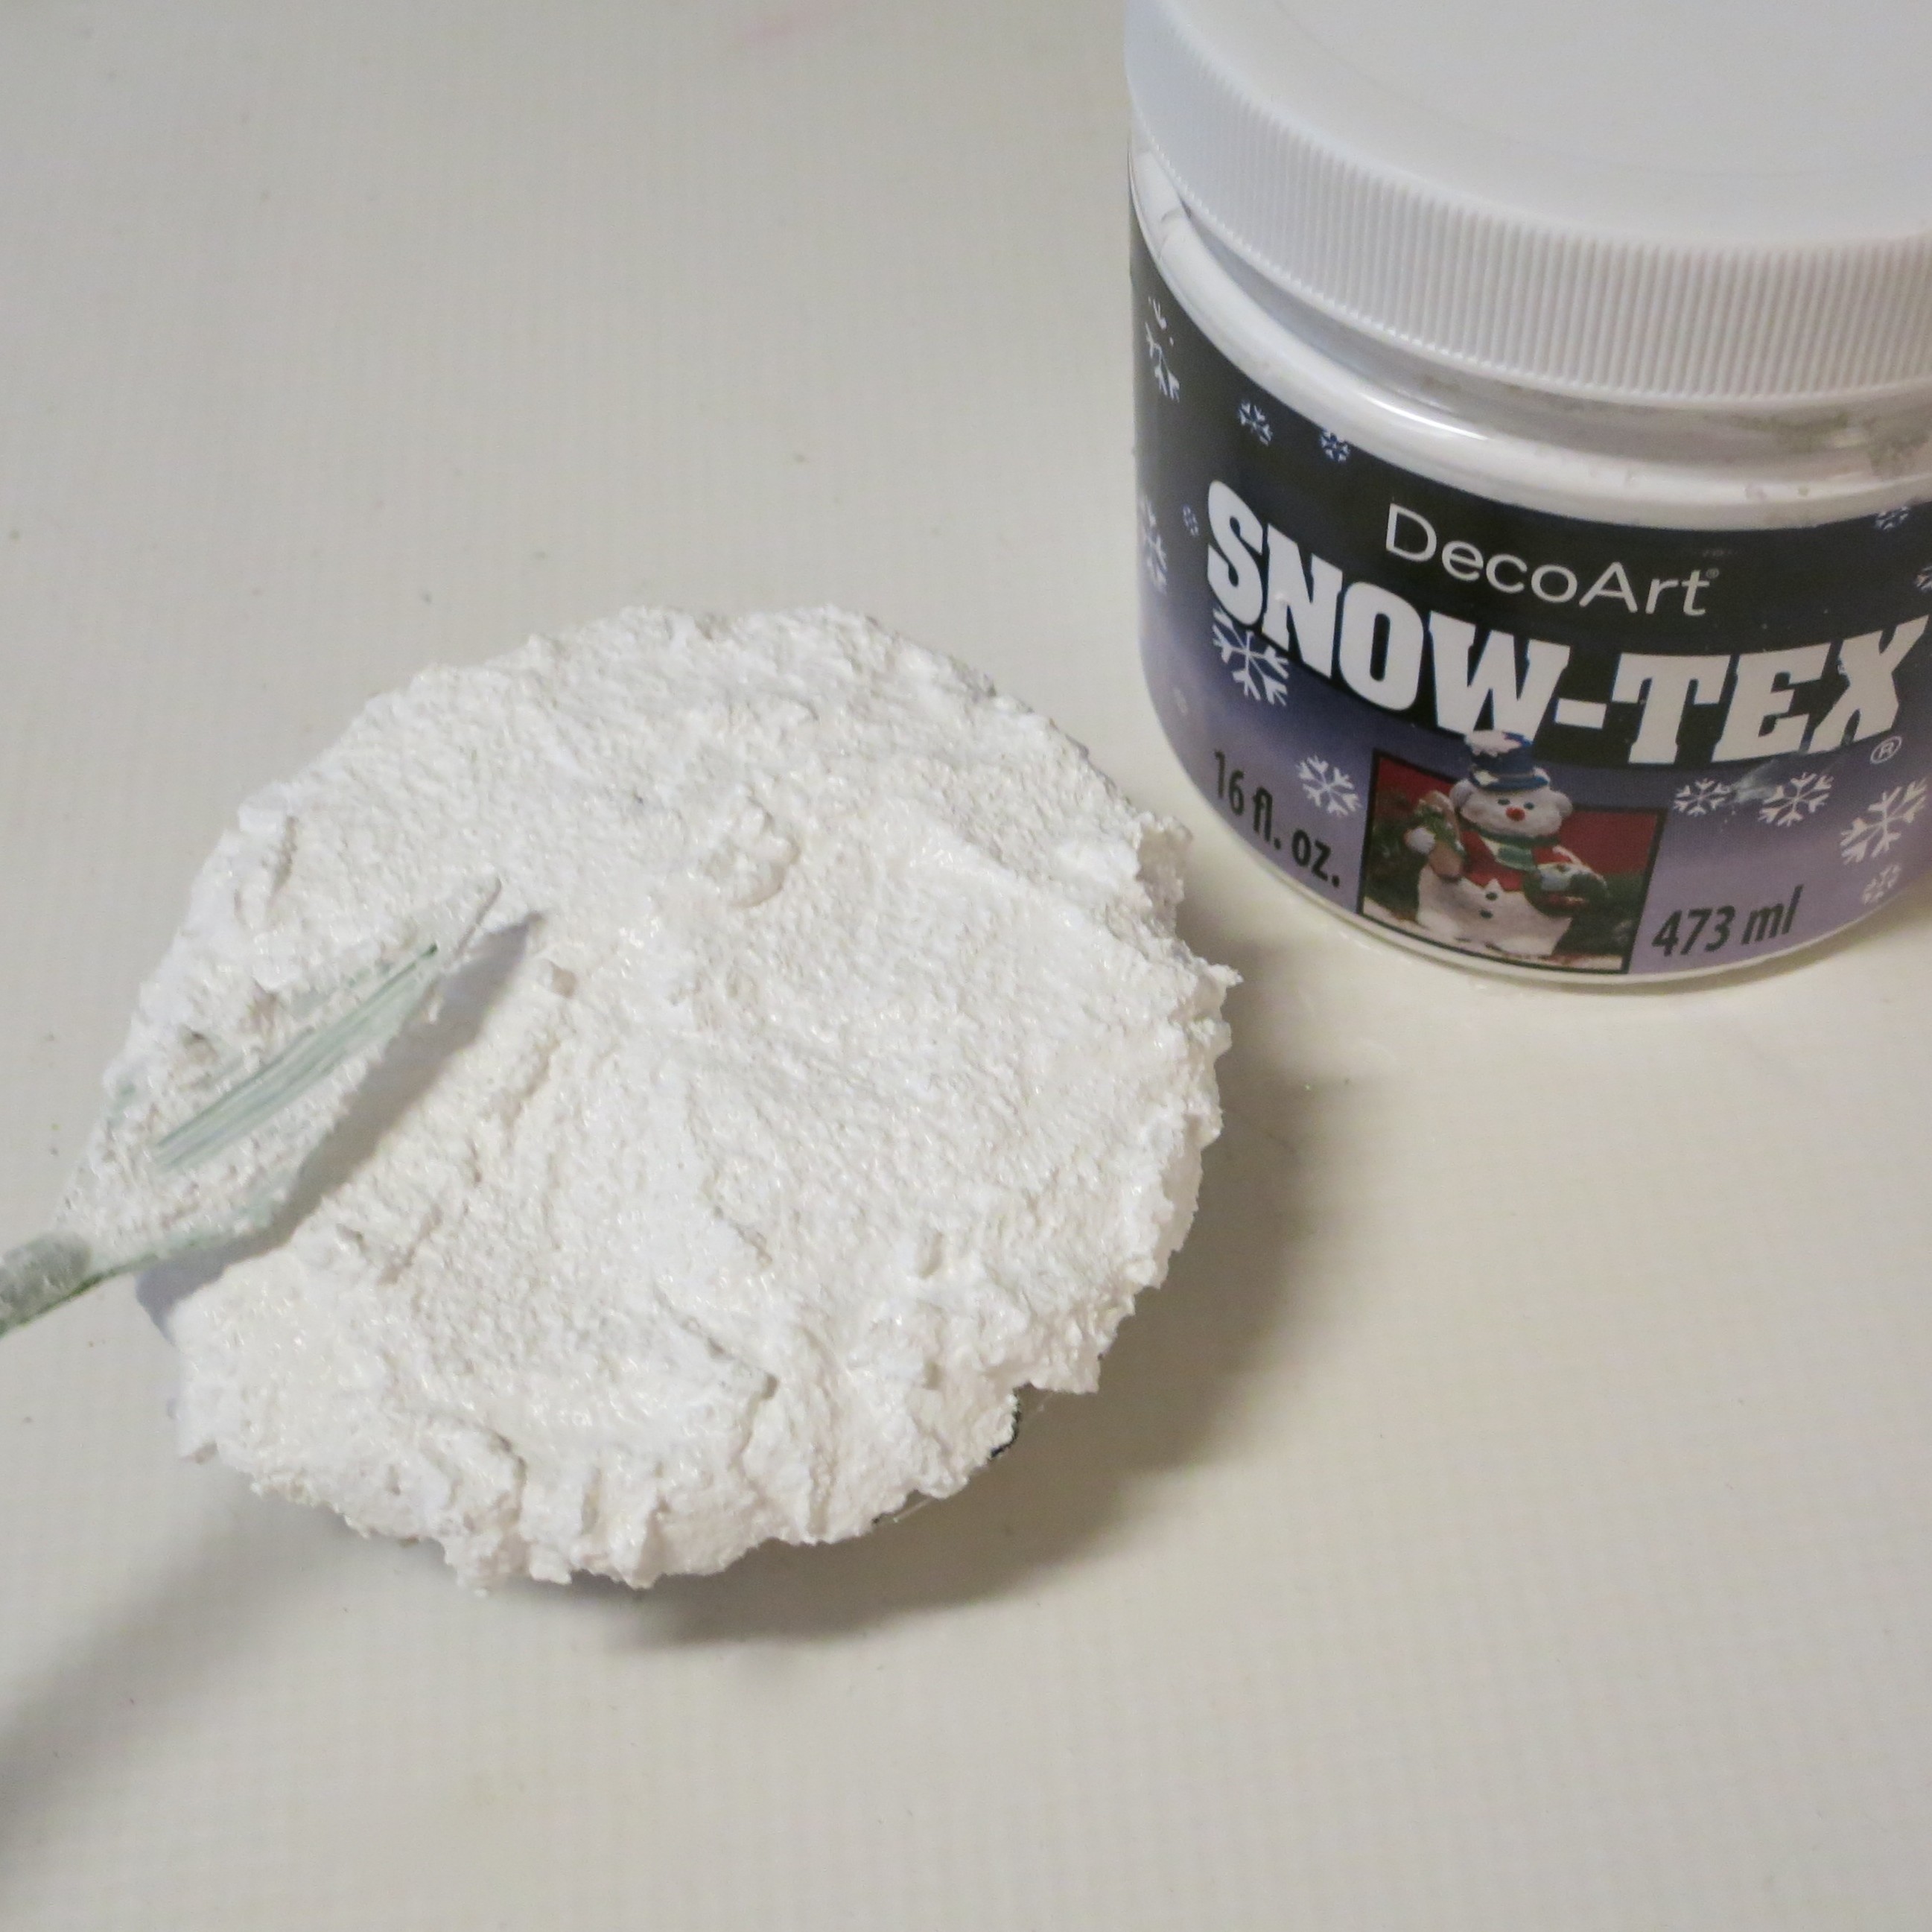
Cover the floral foam with Snow-Tex to create the snowy ground for the scene. Let it dry.
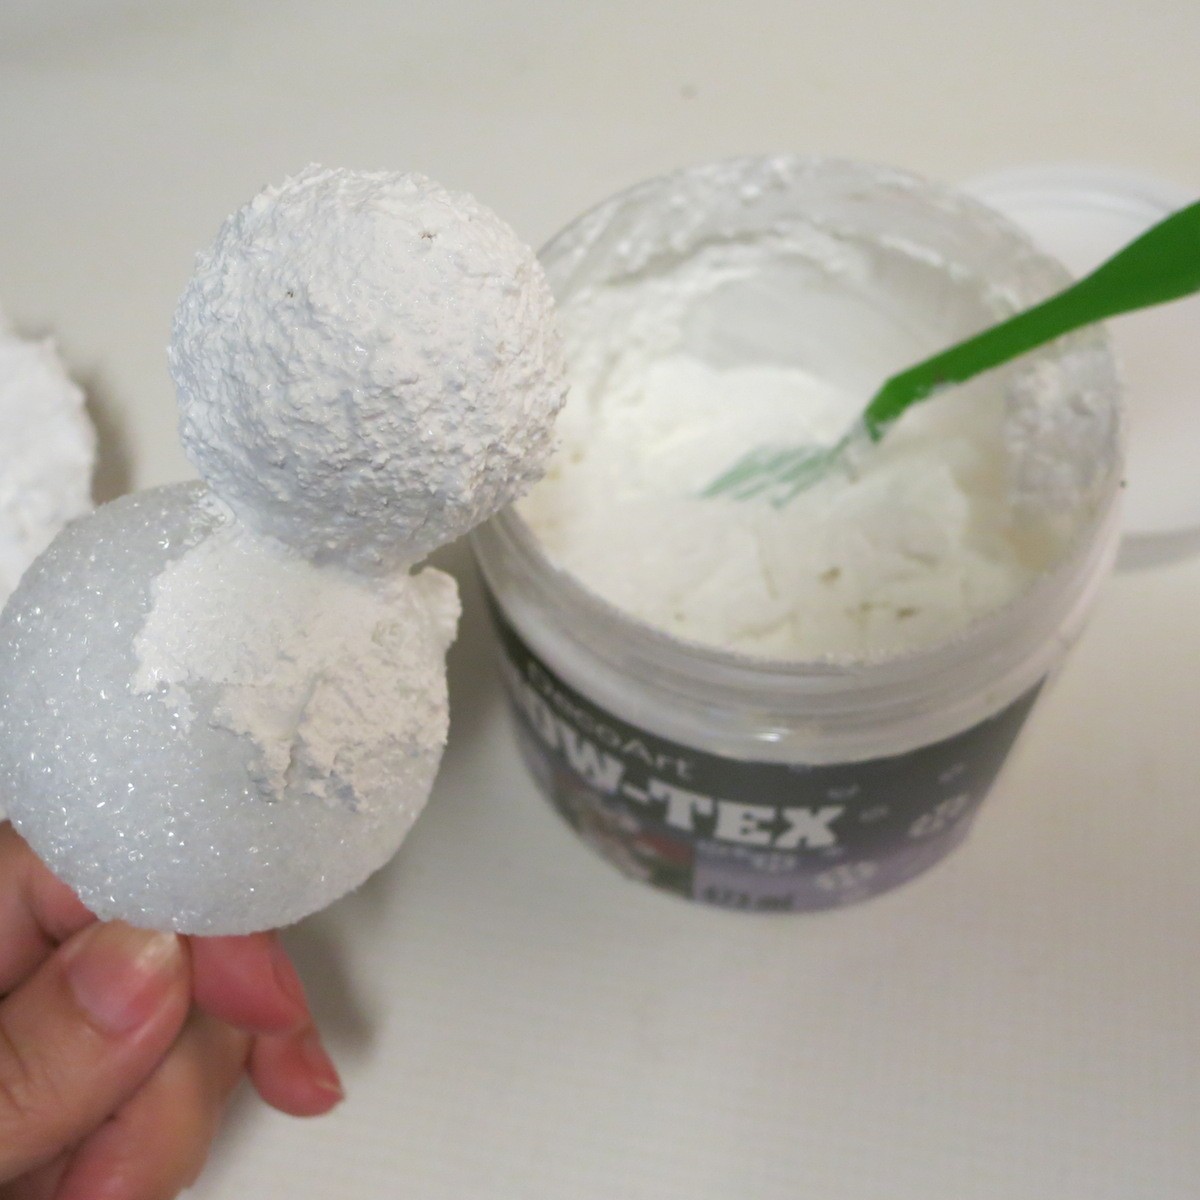
Cover the two styrofoam balls with Snow-Tex to make the snowman. Before the Snow-Tex dries, push in the bead embellishments. I used a cone bead for the nose and round seed beads for the eyes and buttons.

Embellish the snowman with a yarn scarf, paper party hat, and other elements. Add a bottle brush tree and “joy” wood sign to finish the scene. Use hot glue to add them to the scene, or gently push them into the Snow-Tex as it is drying.
Have fun crafting and creating adorable snowmen to decorate with or to give as gifts! Check out my “tutorials” tab for more fun DIY and craft projects to make.
Leave a Reply