Transform a plain purse with this Pennywise purse tutorial. This is a sponsored post with StyleTech Craft Vinyl but all ideas and opinions are my own.
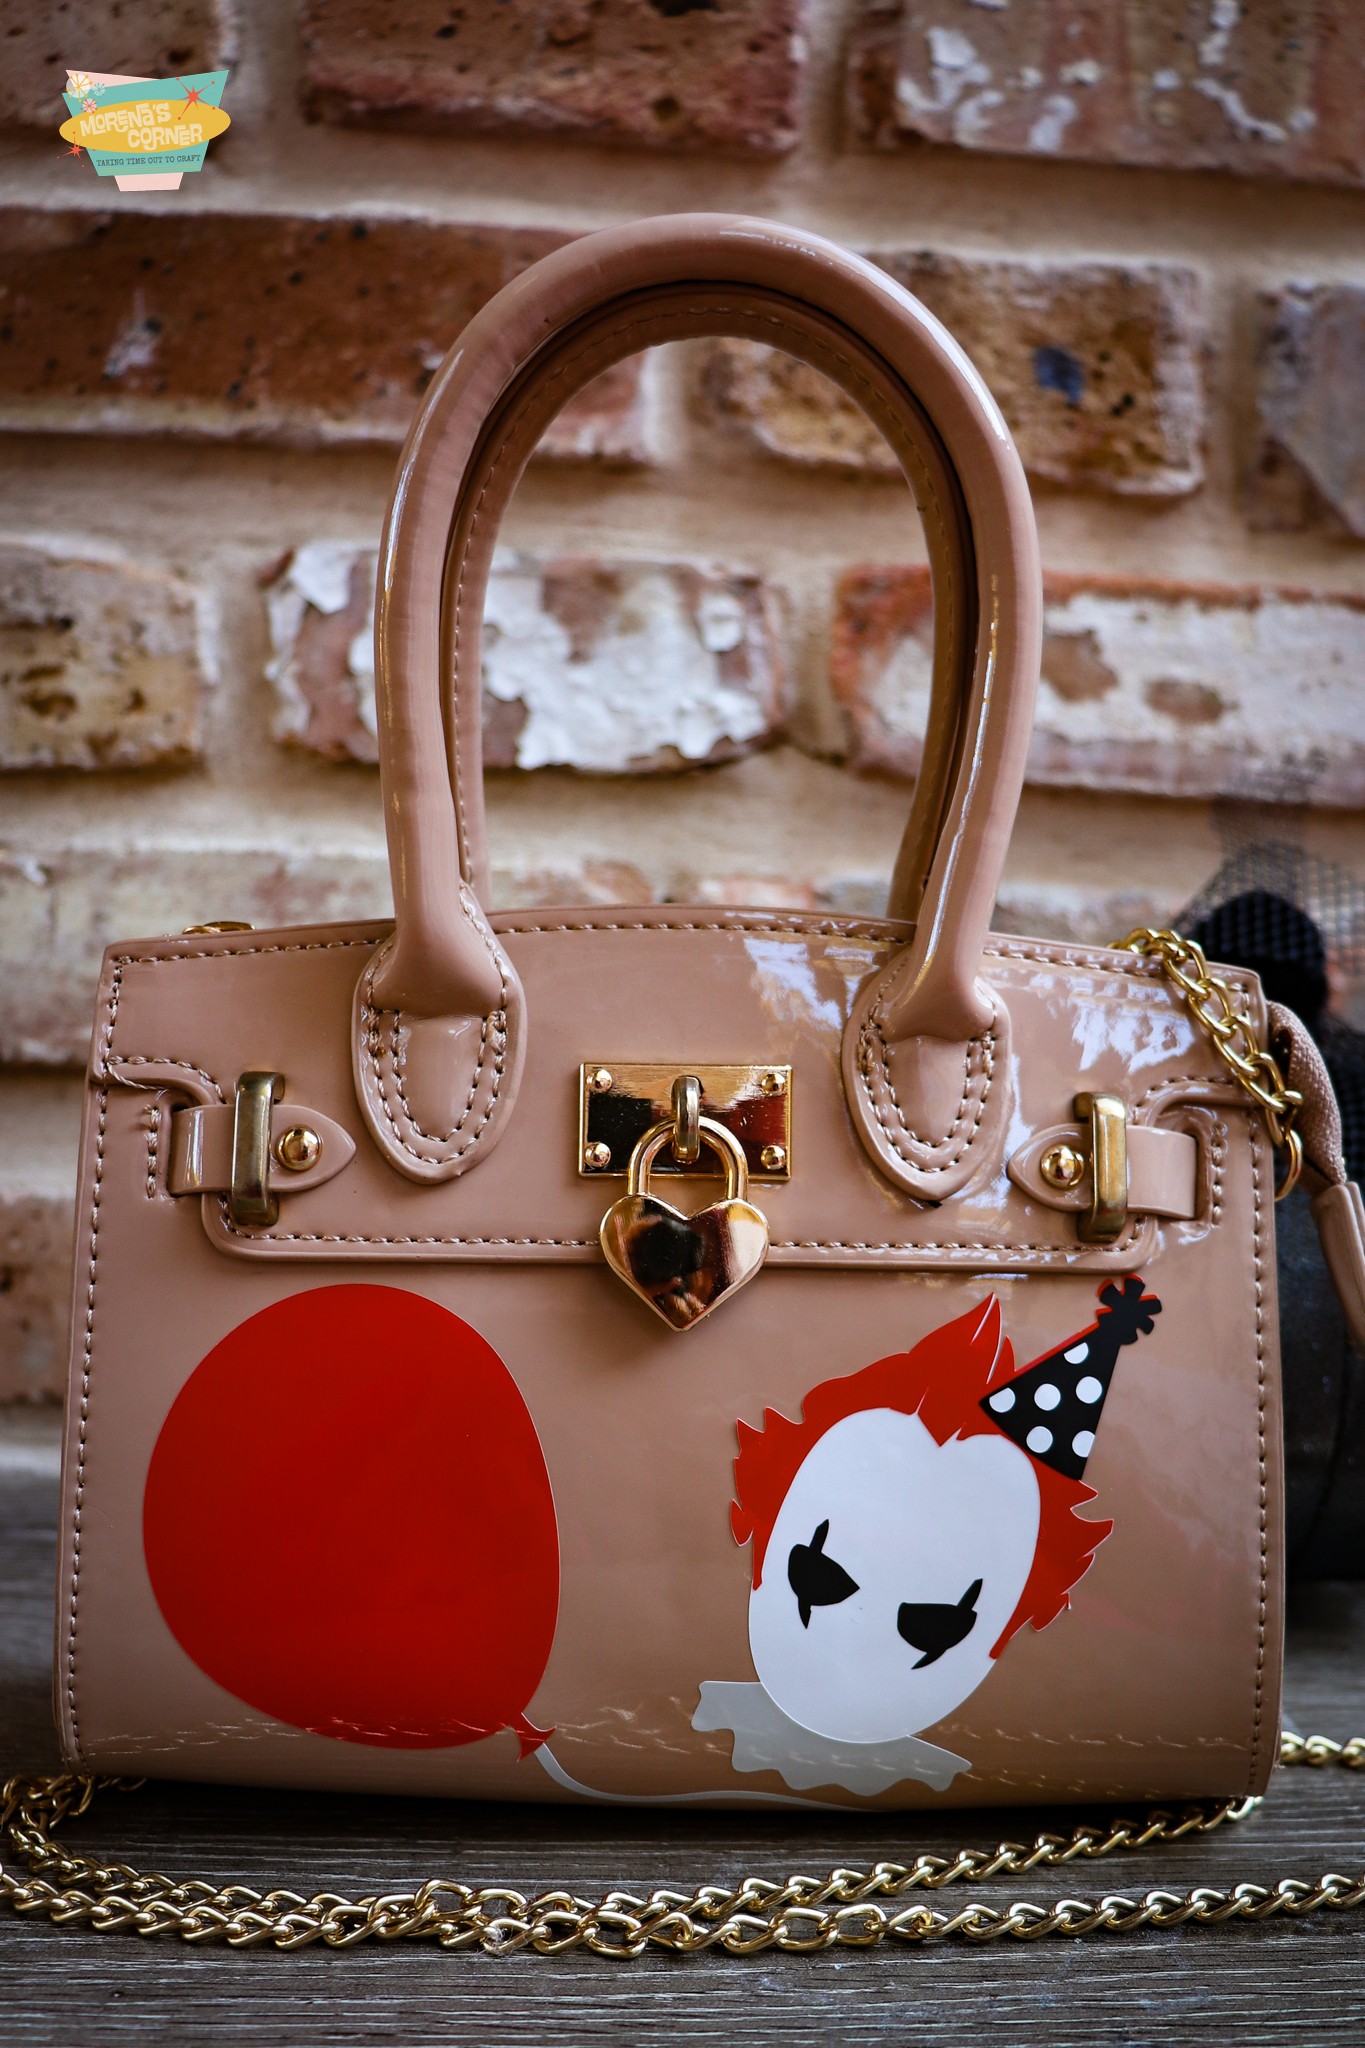
I have Halloween dresses, shirts, and shoes, but not a single Halloween purse! I’ve almost purchased a few but haven’t found the *perfect* bag yet. (And if I’m being honest, I have way too many purses already!) My solution? I dug through my purses to find a plain one that I could embellish with vinyl! I love how this project turned out.
Pennywise Purse Tutorial Supplies
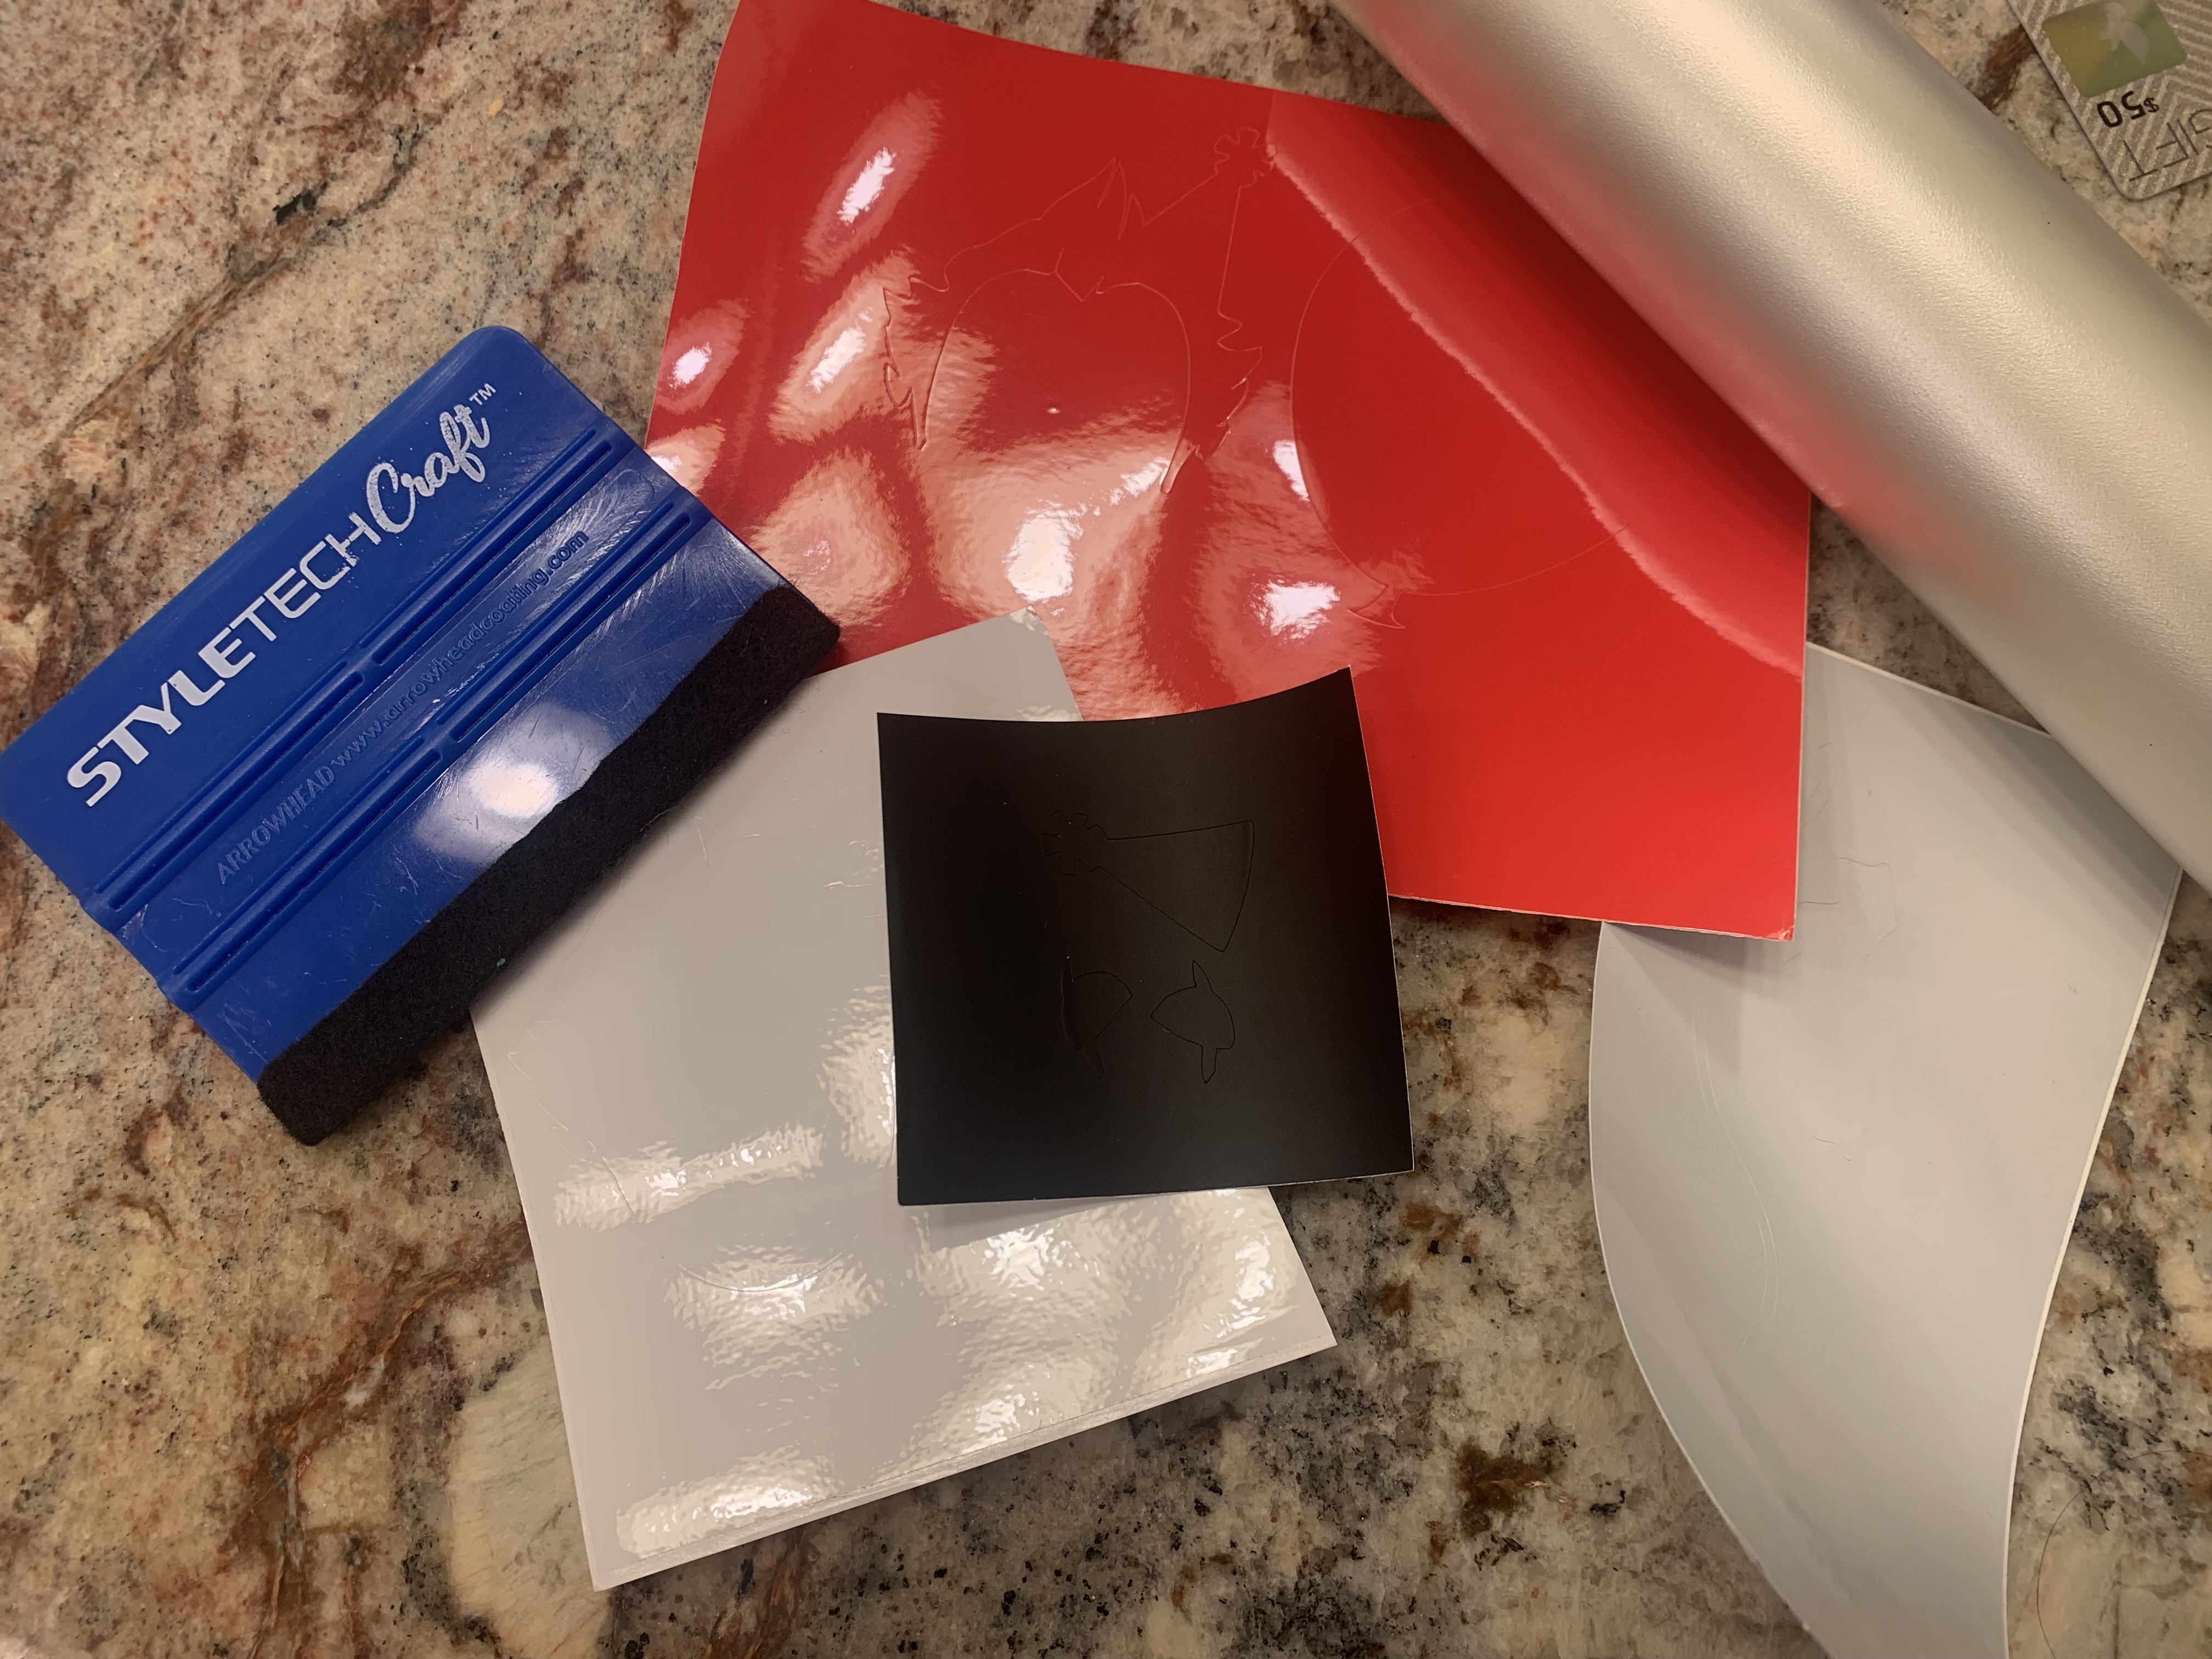
- StyleTech Craft Vinyl in red, black, white, and gray
- Vinyl or plastic purse with a slick surface
- Pennywise Cut File (I used this one)
- Transfer Tape & tools
This purse had been given to my daughter, and it might be from a girl’s department somewhere. Any kind of vinyl or smooth plastic purse will be perfect for this project. You don’t want to choose a purse that has texture or is fabric. Vinyl adheres best to a super smooth, glass like surface.
- Cut the vinyl pieces from the correct colors: white for the background and dots, red for the hair, etc. Use the photos as a guide, or choose your own colors!
- Weed the vinyl and separate the elements.
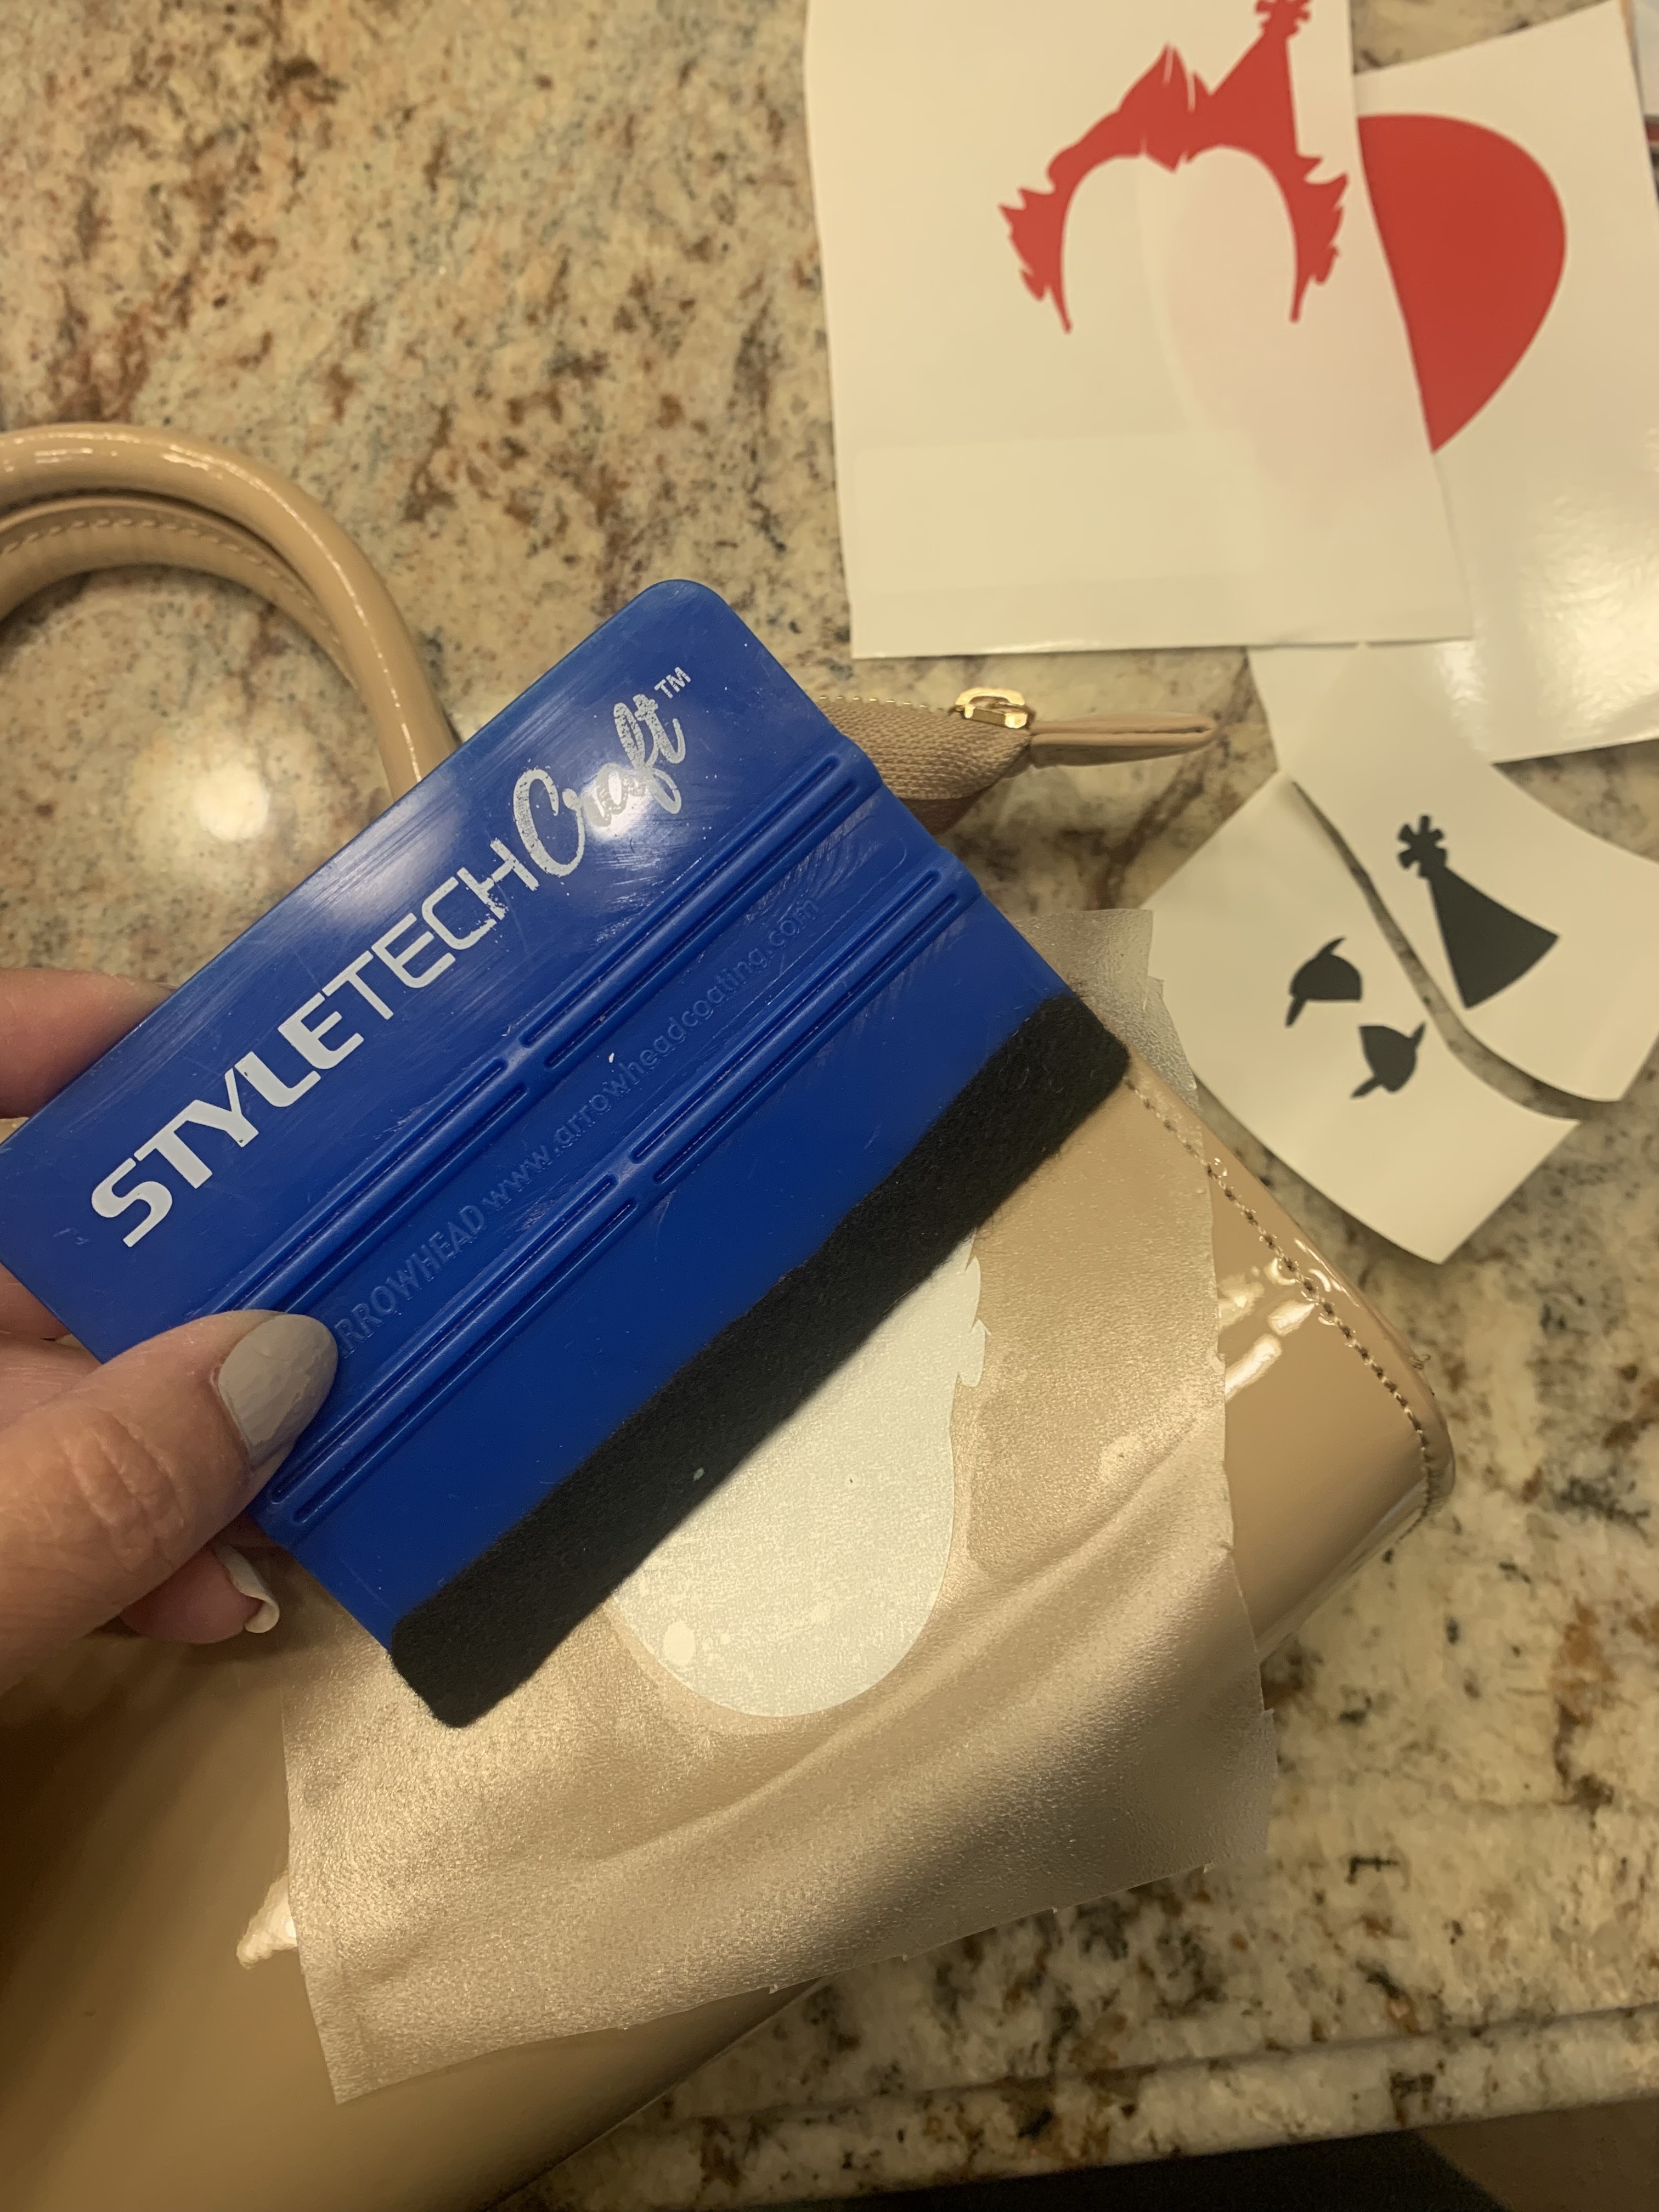
- Wipe the purse to remove dust and fingerprints.
- Use transfer tape to place each element on the purse. Start with the base, then add each of the pieces. I put my hand inside the bag to keep it from collapsing when I transferred the vinyl. You could also stuff it with towels to make the side more rigid.
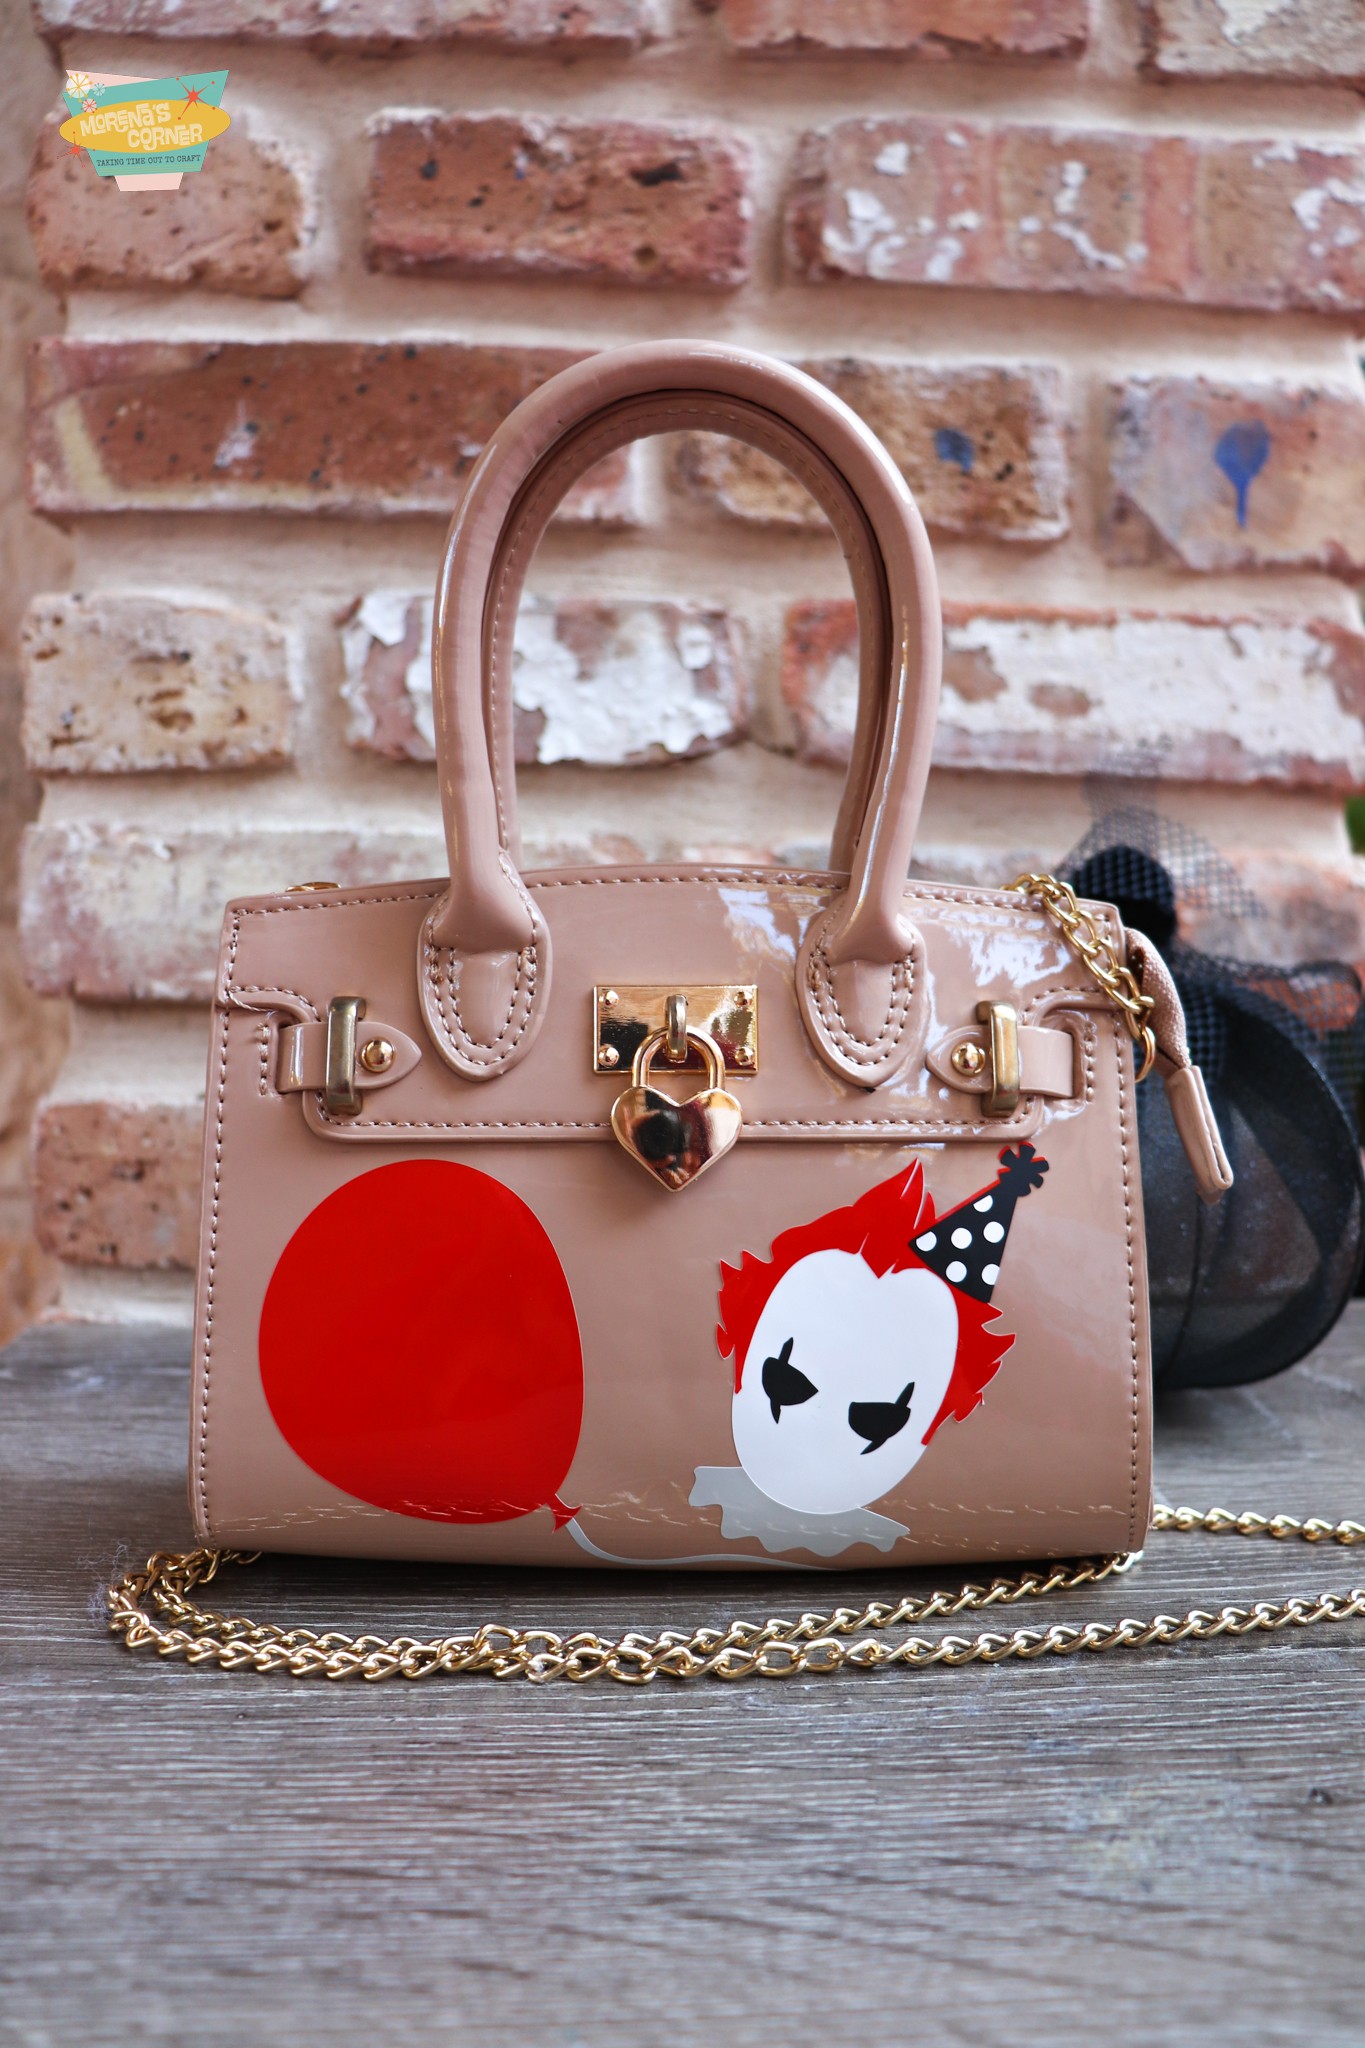
Isn’t it fun? I love how adding a few vinyl cuts immediately transformed this boring purse. I can’t wait to find more purses to decorate for the holidays!

Have fun crafting & creating with StyleTech Craft Vinyl!
Leave a Reply