• Tutorials
  • About

Morena's Corner

Taking Time Out to Craft

How to Transfer a Paper Image to Cloth

Dec 18, 2012 by Morena 14 Comments

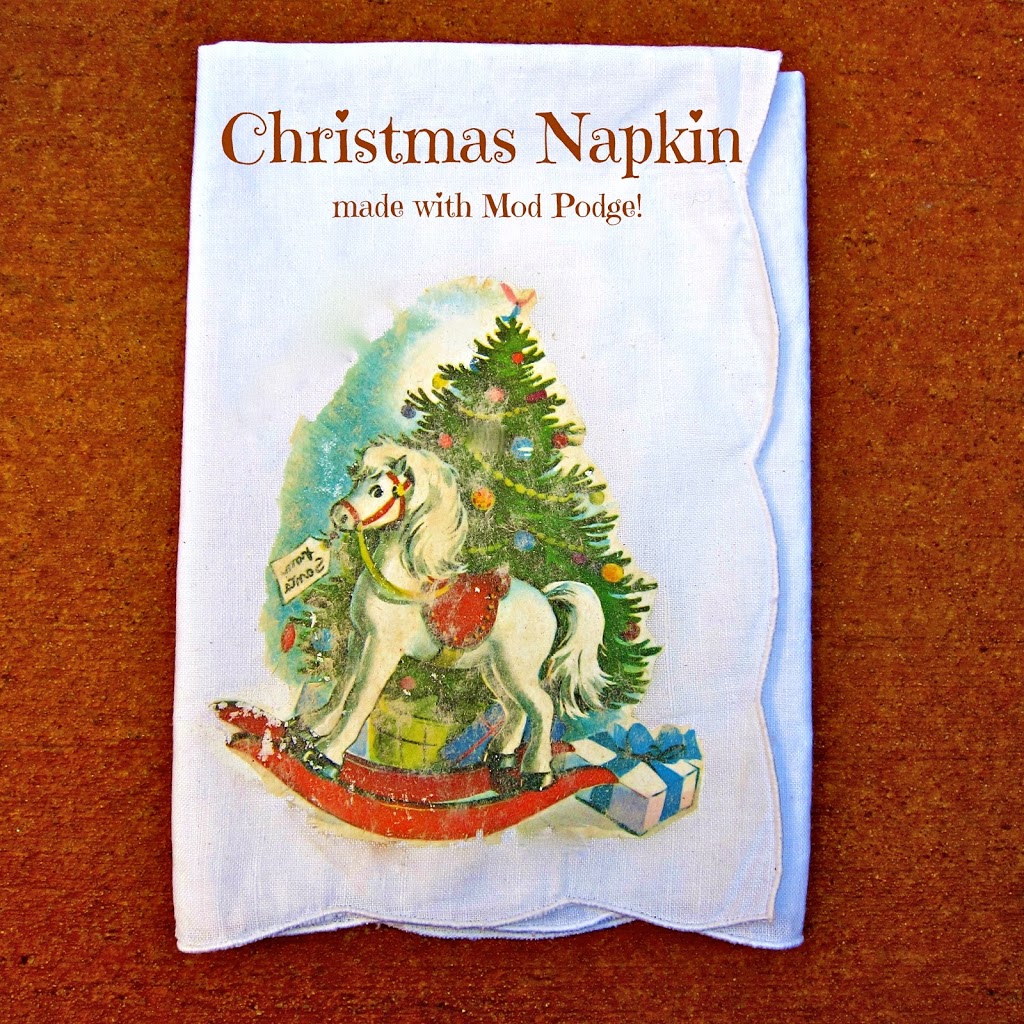
I combined vintage images and Mod Podge, two items that  I love to craft with,
to make fun Christmas napkins!  Seriously, anyone can make these!

This post first appeared on Mod Podge Rocks! which is one of my all time favorite blogs.  It was a huge honor to create this craft for Amy’s awesome blog.  If you like this project, you can find more photo transfer tutorials on Mod Podge Rocks here.

Supplies needed:

Image cut or photocopied from a book
Mod Podge Photo Transfer Medium
Cloth Napkin
Wax Paper


To make your own photo transfer onto fabric:

mod-podge-holiday-napkin-how-to

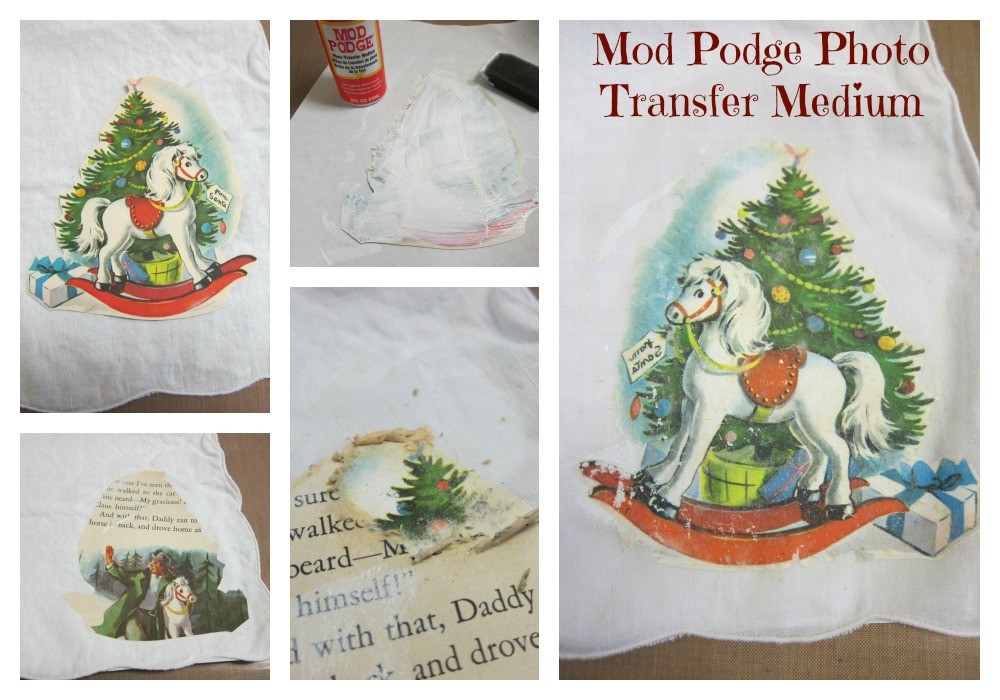
Step 1:  Choose the image you wish to use.  I cut mine from a book that was falling apart.
 
Step 2:  Apply a generous amount of Mod Podge Photo Transfer Medium to the image.  It should be thick enough that you can barely see the image underneath.
Step 3:  Place your cloth napkin on wax paper.  Place your image face down onto the fabric and press down firmly.  Remove any excess that seeps out.  Let it dry for 24 hours.
 
Step 4:  Use a wet washcloth to get the paper damp.  Rub gently to remove the paper and expose the image underneath.  Work in small sections.
One down, seven napkins to go!  I even made wine glass charms out of podgeables to go with my napkins.

Looking for more fun Christmas crafts?  I have a fun round up here.

For more great ideas, be sure to check out Mod Podge Rocks!


Make Embossed Acrylic Christmas Tags
DIY Family of Gingerbread Men Ornaments

Comments

  1. Alicia de los santos says

    Dec 18, 2012 at 4:36 PM

    muy fácil, hermosos

    Reply
  2. Lynne says

    Dec 28, 2012 at 4:59 PM

    Could you please tell me if the napkin is washable….and if yes, what are the washing instructions? thanks for all the good ideas!

    Reply
  3. Morena Hockley says

    Dec 28, 2012 at 5:35 PM

    Hi Lynne! YES, it is washable. The instructions on the package say to wash on the gentle cycle, then air dry or dry with low heat, and don’t iron over the transfer.

    I washed my napkin with my other linens, let it air dry, and then ironed it on the back. The close up image in my tutorial shows what it looks like after washing.

    I want to try it on a shirt or jeans to see how it looks on other fabrics and how it holds up to repeated washings. It’s a really fun product to experiment with!

    Reply
  4. Debbie says

    Dec 21, 2016 at 4:40 PM

    I love this idea! I made a set of Christmas napkins and washed them after 72 hours and most of the print washed away.I’m so disappointed! What do you think went wrong?

    Reply
    • Morena says

      Dec 21, 2016 at 5:07 PM

      I’m so sorry to hear that! I’ve washed my napkin and the image stayed. I let mine air dry…did you put yours in the dryer? I think the heat would take the image off.

      Reply
  5. Hazel says

    Jan 4, 2017 at 1:30 AM

    I have used Mod Podge to stick photo copies to calico. However after removing backing paper and they have dried, there is a slight white film over image. Because I have ‘lost’ small portions of the images I am not confident to Continue rubbing. Will this disappear if I spray with a sealer – as I want a firm finish.

    Reply
    • Morena says

      Jan 4, 2017 at 6:18 PM

      Yes, to mask the slight white film use a sealer. I usually seal it right after I wipe it one last time. It will always have a fuzzy finish unless you seal it.

      Reply
  6. Mini says

    Jul 27, 2018 at 4:16 AM

    Hi Morena,
    Can I ask your expert advice, I need to beautify a toy box which is polyster foldable cube with some patterns with paper napkins. I have never done any decoupage and I am very nervous about my first project. Can you advise me which type of mod podge to use and what type of sealer can I use please?

    Reply
    • Morena says

      Jul 29, 2018 at 11:51 PM

      Practice on a small piece of wood first. Use Mod Podge, either matte or gloss. Use light applications of the medium to keep the napking from wrinkling. I like to use a spray can sealer to finish the project. You can use matte or high gloss spray sealers. Good luck!

      Reply
  7. Lisa Lerfald says

    Jan 1, 2019 at 11:34 AM

    What type of paper to copy the image onto?

    Reply
    • Morena says

      Jan 1, 2019 at 2:19 PM

      Plain copy paper, like the kind you use in your home printer.

      Reply

Trackbacks

  1. How to Transfer a Photo to Wood says:
    Feb 27, 2015 at 5:19 AM

    […]  It is so much fun and surprisingly easy to do.  I’ve transferred images to fabric and even on to painted surfaces.  Give this a try, and you’ll find yourself looking for […]

    Reply
  2. DIY Mod Podge Wine Charms - Morena's Corner says:
    Nov 29, 2015 at 2:49 PM

    […] I’m making a set to coordinate with my napkins, pictured below.  To learn how to use Mod Podge to decorate a napkin, check out my full tutorial at HERE! […]

    Reply
  3. Photo to Wood Transfer Tutorial in 5 Simple Steps says:
    Nov 15, 2016 at 11:06 AM

    […] surface is so much fun and surprisingly easy to do.  I’ve transferred images to fabric (here) and even on to painted surfaces (here).  Once you give this a try, I think you’ll find […]

    Reply

Leave a Reply Cancel reply

Your email address will not be published. Required fields are marked *

This site uses Akismet to reduce spam. Learn how your comment data is processed.

Origami Cards Tutorial: Everyone Can Learn Origami

Farewell, Mr. Sendak

Anthropologie Inspired Project

Mason Jar Gift Idea with Free Printable

marquee cloud letters that light up

Cloud Letters and Numbers Tutorial

Hilarious Costume Tutorial

Funny Baby Bib DIY Gift for New Parents

Repurposed Ceiling Medallion tutorial

Repurposed Ceiling Medallion Room Decor

turn a rake into a rustic wine glass holder

Rake Wine Glass Holder Tutorial

Fun with Googly Eye Bombing

Make a beautiful snow globe gift box for the holidays

Snow Globe Gift Box DIY for Christmas

Jack In the Box Costume Tutorial

Jack In the Box Costume Tutorial

Teach Me: No Mess Glitter Application

Make Your Own Glowing Crystal Ball

cool teacher gift labels

Cool Teacher Gift Labels: Free Printables

Tiny Spool Card Holder

Tips for Organizing Your Fabric Stash

Easy Halloween Craft Projects for Kids

Football Party Decor to Make with Kids

Thrifted Bench Makeover: A Tutorial

Morena is a participant in the Amazon Services LLC Associates Program, an affiliate advertising program designed to provide a means for sites to earn advertising fees by advertising and linking to amazon.com.

Copyright © 2023 · Pretty Creative on Genesis Framework · WordPress · Log in