
I love summer! It’s fun to have my kids at home so we can play and do things outside. I like to keep my kids busy with crafts and baking projects, and this year we’re going to tie-dye our summer. One of our first activities was this colorful rainbow hammock that we can enjoy all summer long.

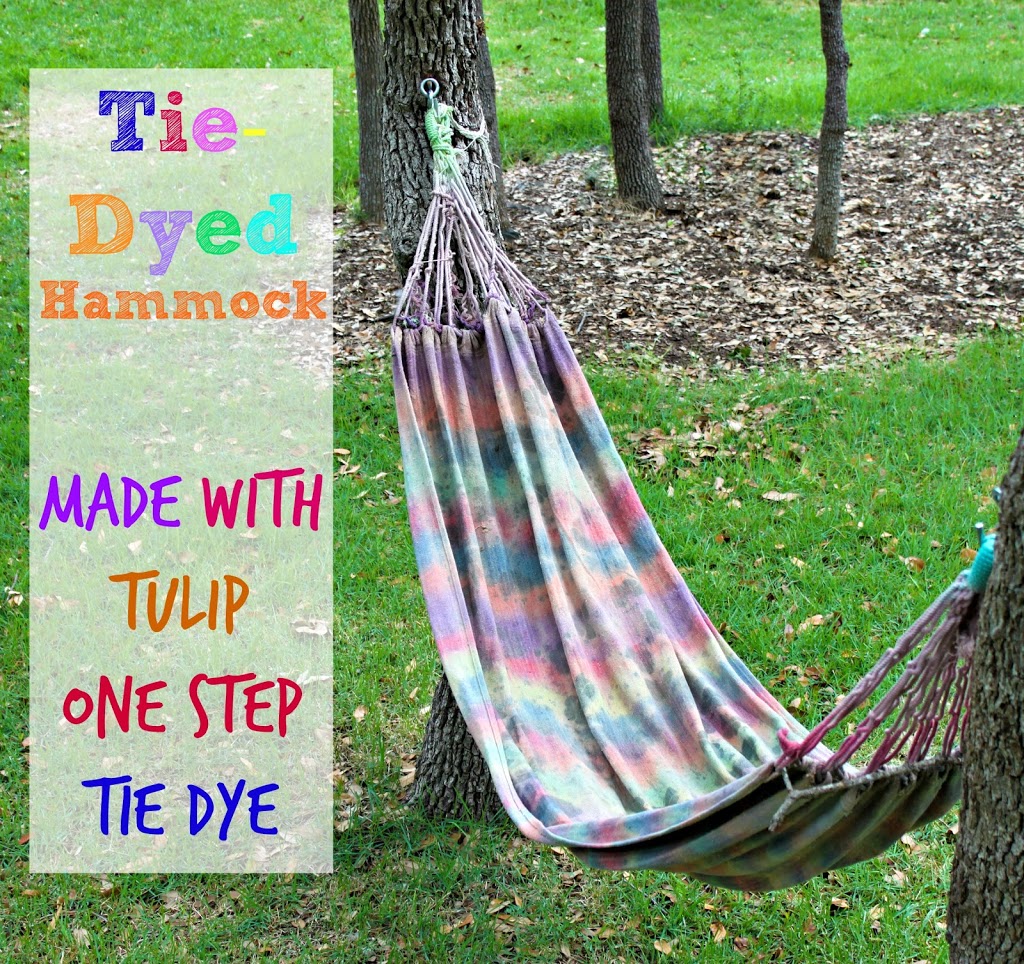
I purchased this hammock at an end of summer clearance two years ago. It was plain, but at only $5 too good of a deal to pass up. I’ve always wanted to liven it up a bit, though, and when I was sent a giant box of Tulip One-Step Tie Dye kits (America’s favorite tie dye!), I knew exactly what I wanted to do. My dingy hammock was about to get a serious makeover!
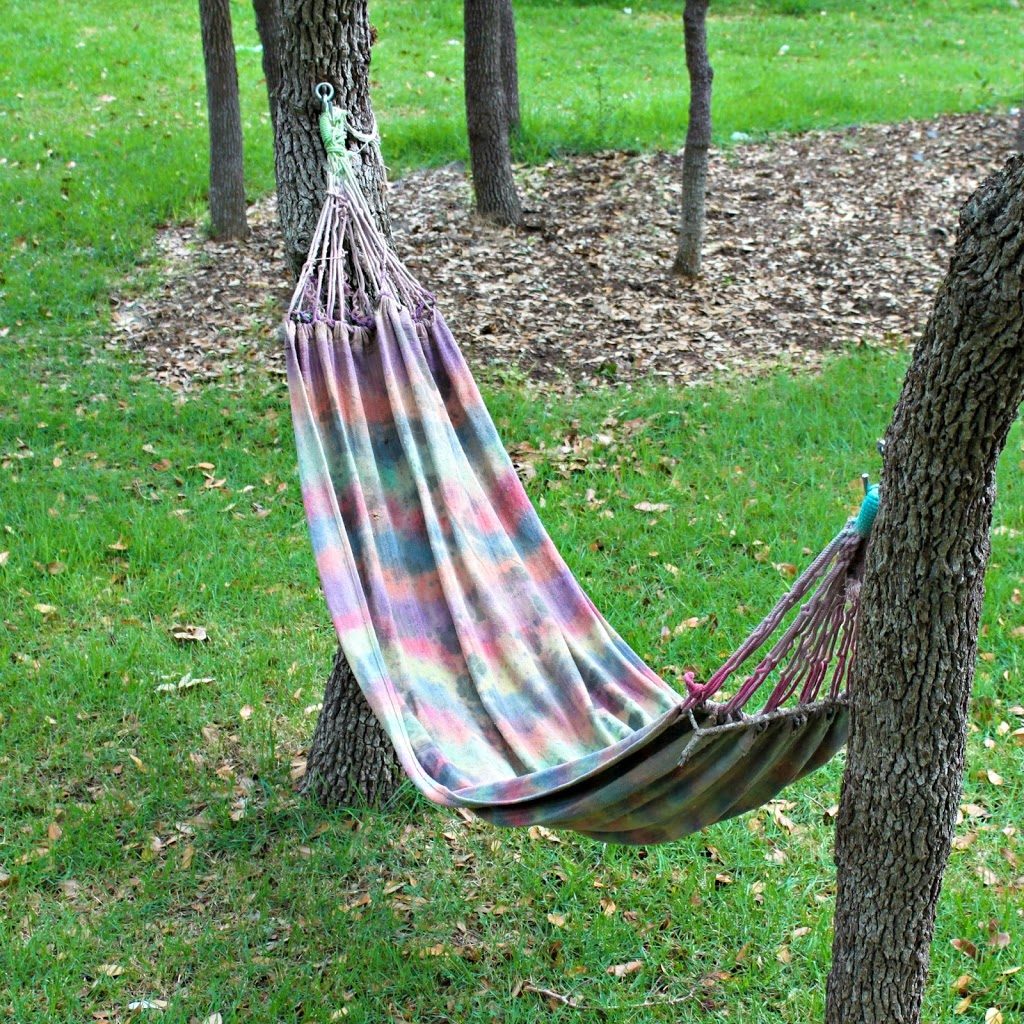
Because it was a burlap colored hammock to begin with, the colors aren’t as bright as you might be used to seeing with tie-dye, but I’m thrilled with the end result. I got exactly the color result I was hoping for. I started out with stripes to mimic a serape, but the rainbow color reminded me of Lisa Frank stickers from my childhood. (Anyone remember those? Leapord spots on rainbow?) So I added the butterflies. The end result is a one of a kind hammock that my family can fight over share outdoors.
Supplies:
- 12 Color Tulip One-Step Tie Dye Kit
- Hammock
- Stencil

Step one: Bundle the hammock into a long strip, and begin placing the rubber bands around it. Since the hammock was long, I found it easier to tie the rubber bands around instead of looping them.
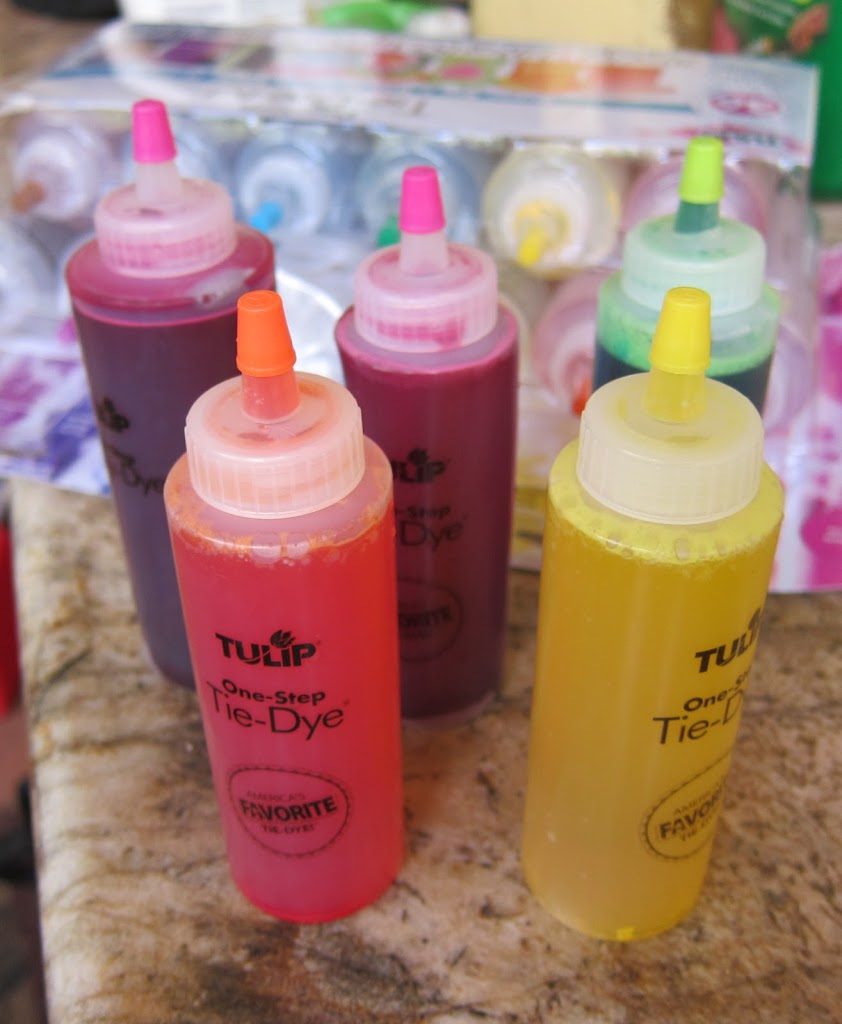
Step two: Put on your gloves, add hot water to the tie dye powder in the bottle, and shake. Seriously, it’s that easy! Just add water for a bold, beautiful color! The dyes are permanent and color fast, so they won’t fade in the wash (or in my case, the rain.) I prepared all the colors that I was planning to use at once, except for the black.
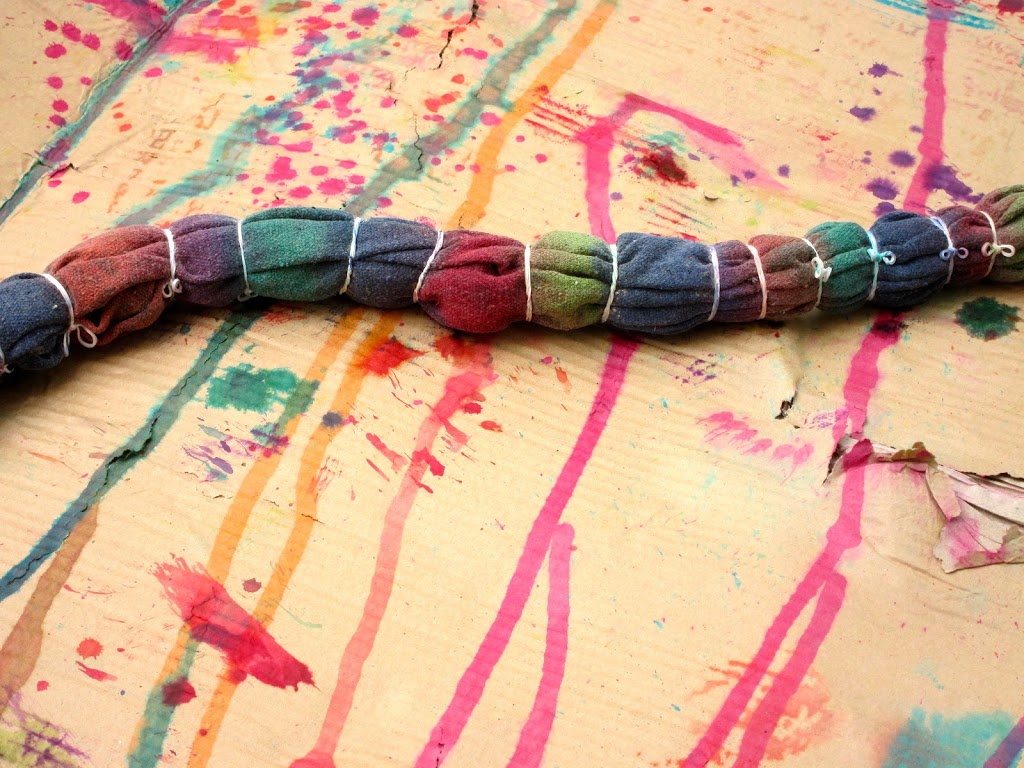
Step three: Apply color to one section of the hammock at a time. I used all the red, then all the green, etc., until the hammock was full of color.
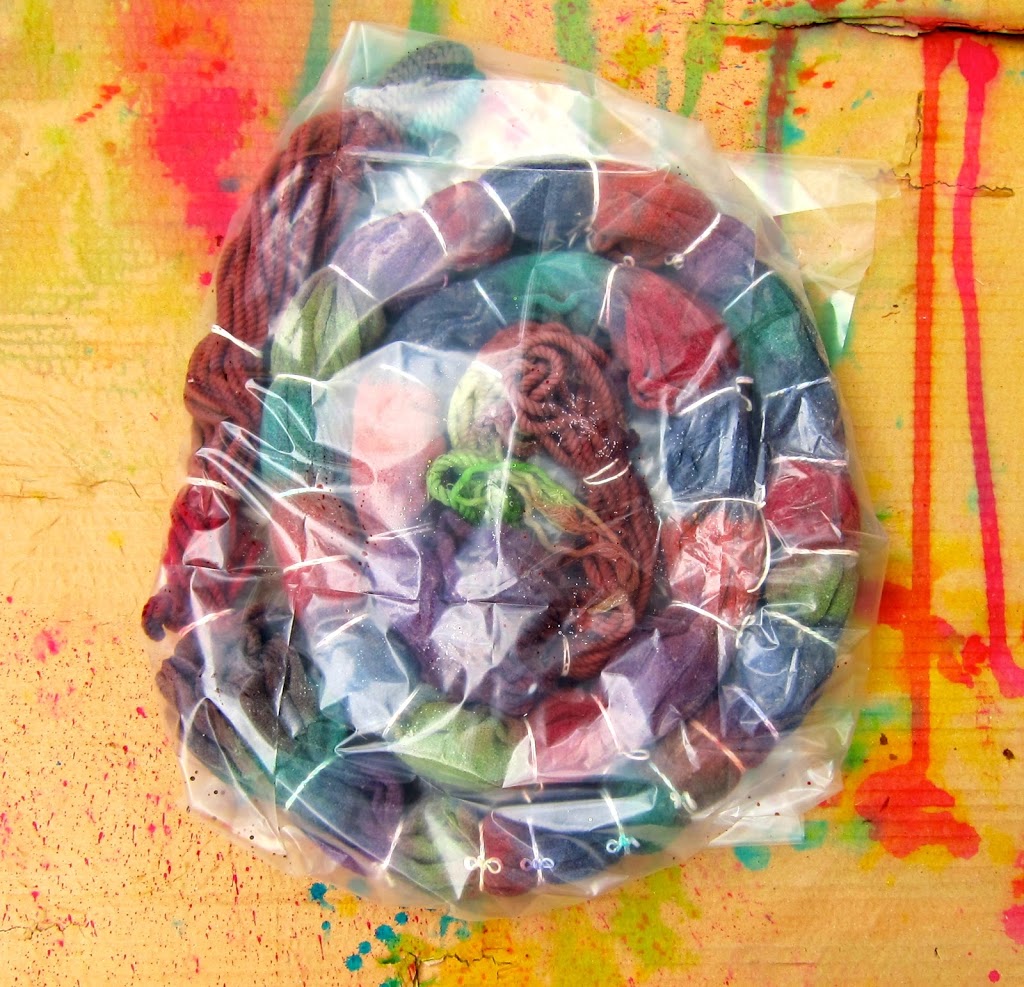
Step four: Coil the hammock and wrap it in the plastic that comes with the kit.
Step five: After 6-8 hours, rinse the hammock, wash it, and let it dry.
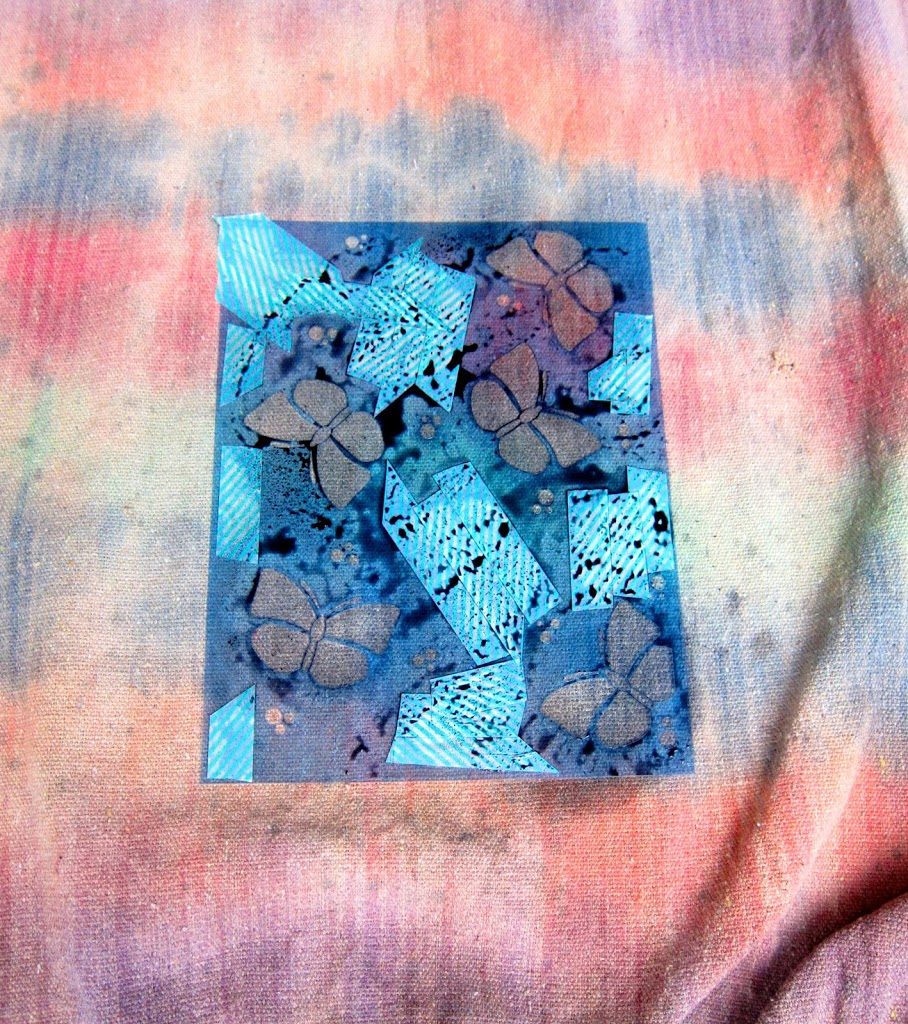
I was happy with my rainbow colored hammock, but I kept looking at the bottle of black dye and thinking of how I could use it. I pulled out a butterfly stencil, and started on the next part of my project.
This time, I transferred the dye from the supplied bottle to a small spray bottle. I sprayed the dye onto the stencil, then picked up the stencil and flicked the excess dye onto the hammock, to create the splatter marks. (Kind of Lisa Frank sticker-ish, no?) I repeated this process with the entire hammock, and let it set. I rinsed the hammock again and hung it to dry.

Pretty, isn’t it? I love to cuddle with my kids in this hammock as we watch the birds fly overhead.
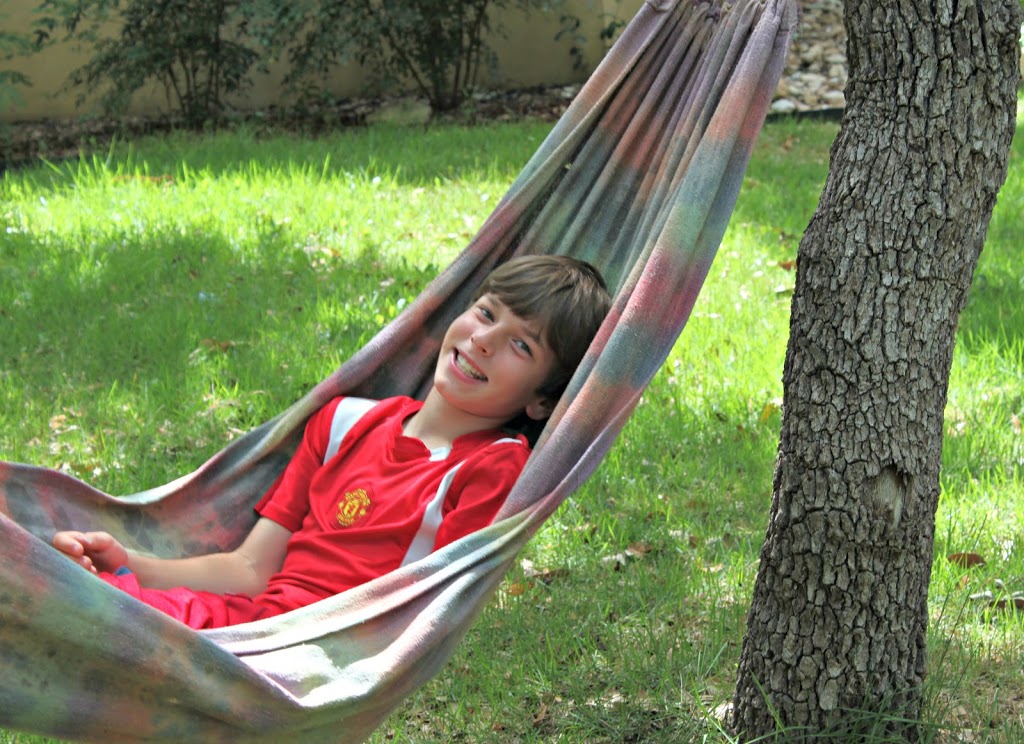
We’ll enjoy many summer days in our tie-dyed hammock. We’re even making tie-dye pillows to lounge on, too. That tutorial is coming soon!
To learn more about Tulip One Step Tie-Dye and to get more tie dyed project ideas, check them out on Facebook, Twitter, Pinterest, and their blog, I Love to Create.
Disclaimer: This is a sponsored post, but all ideas, projects, and opinions are my own.
Leave a Reply