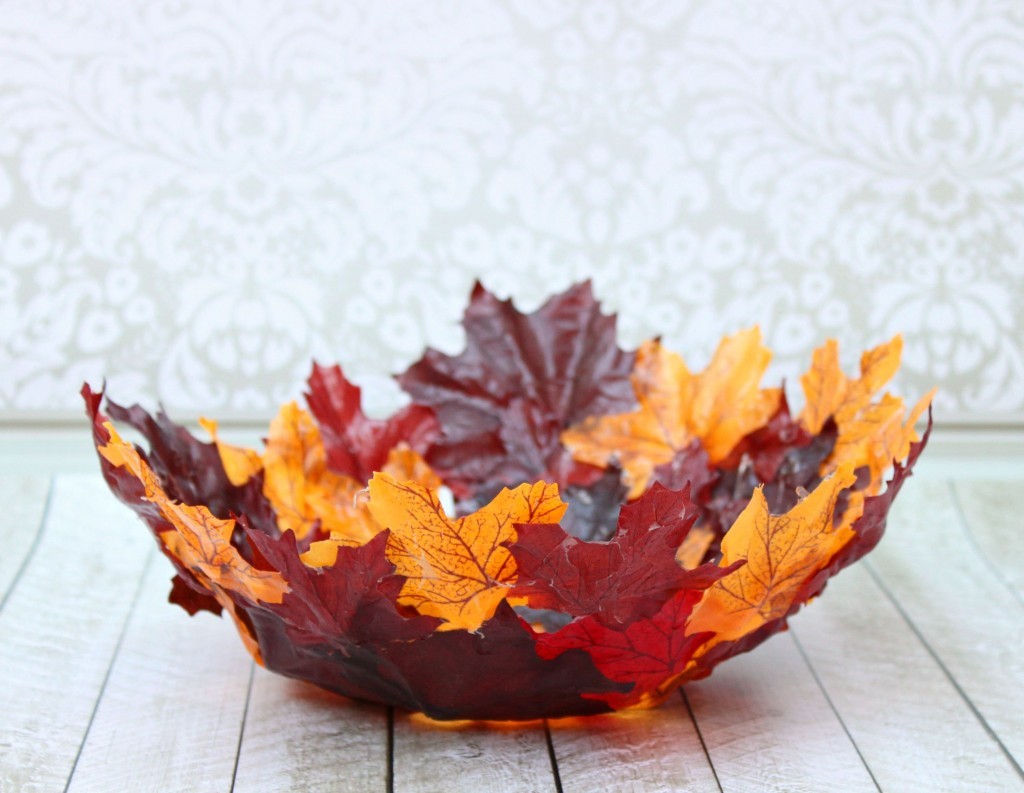
Make a DIY leaf bowl. Turn artificial leaves into a gorgeous shaped bowl. Use Mod Podge and dollar store leaves to create this stunning piece of decor!

I’ve seen this project on Pinterest for years: use Mod Podge and artificial leaves to make a decorative DIY leaf bowl. I even pinned the project last year with the idea to try it myself. With fall around the corner, it seemed like the perfect time to test out this project. Would it work? Was it as easy as Pinterest made it look? Armed with Mod Podge, leaves, and tons of advice left by commenters on the original post, I was ready to give this project a try.
Many of the comments I read said that the leaves were either too hard to take off the balloon, or that the bowl collapsed when they popped the balloon. I think this is because the Mod Podged side of the leaves touching the balloon never dry. This is why I chose to use a bowl instead of a balloon. When the outside dries, you can place the leaves INSIDE the bowl so that they can finish drying without the project collapsing.
I first published this project at Crafts Unleashed, and some commenters kept insisting this project would not work. IT DOES WORK because of the changes I made. Using a bowl and the Triple Thick make the bowl more durable. Mine is still holding up a year later! You can also see THIS fabric heart bowl I made with the same process.
DIY Leaf Bowl Supplies
(affiliate links included)
- Artificial Leaves
- Plastic Bowl
- Mod Podge Matte
- Krylon Triple Thick Glaze
- Plastic Wrap
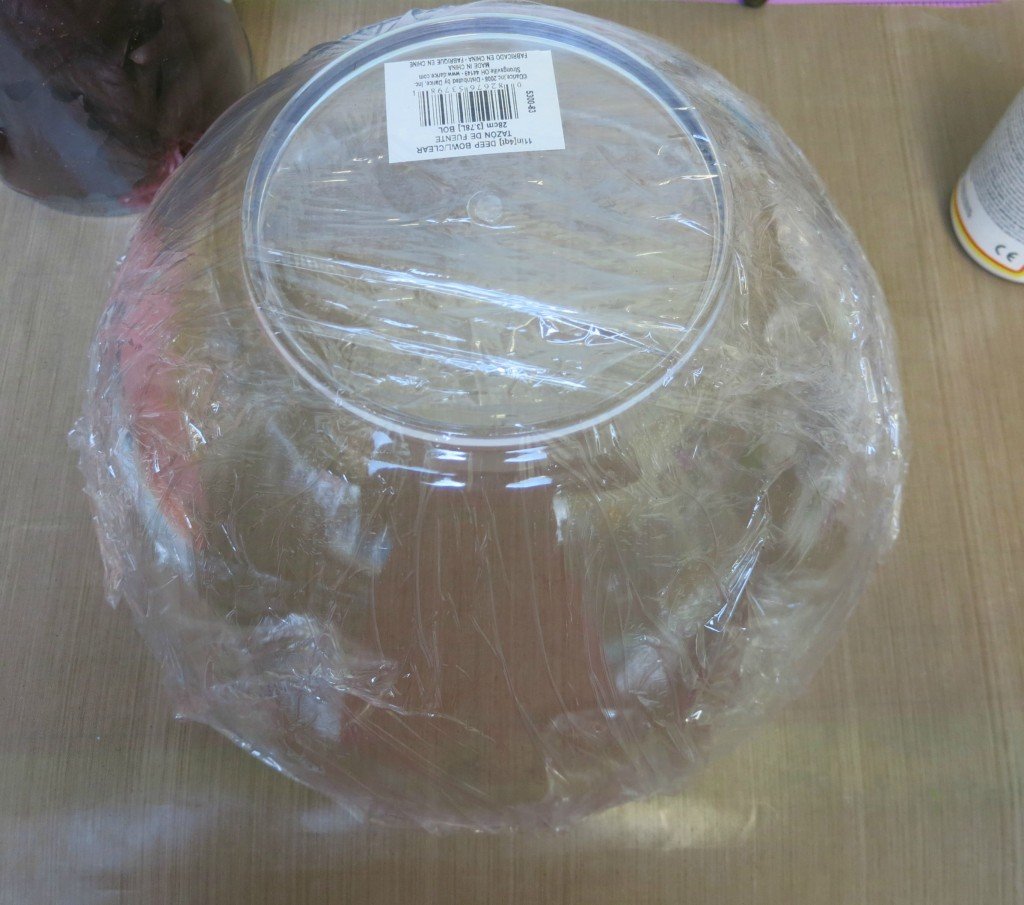
Step one: Cover the bowl with plastic wrap. Don’t skip this step! It will make it easier to remove the project from the bowl later.
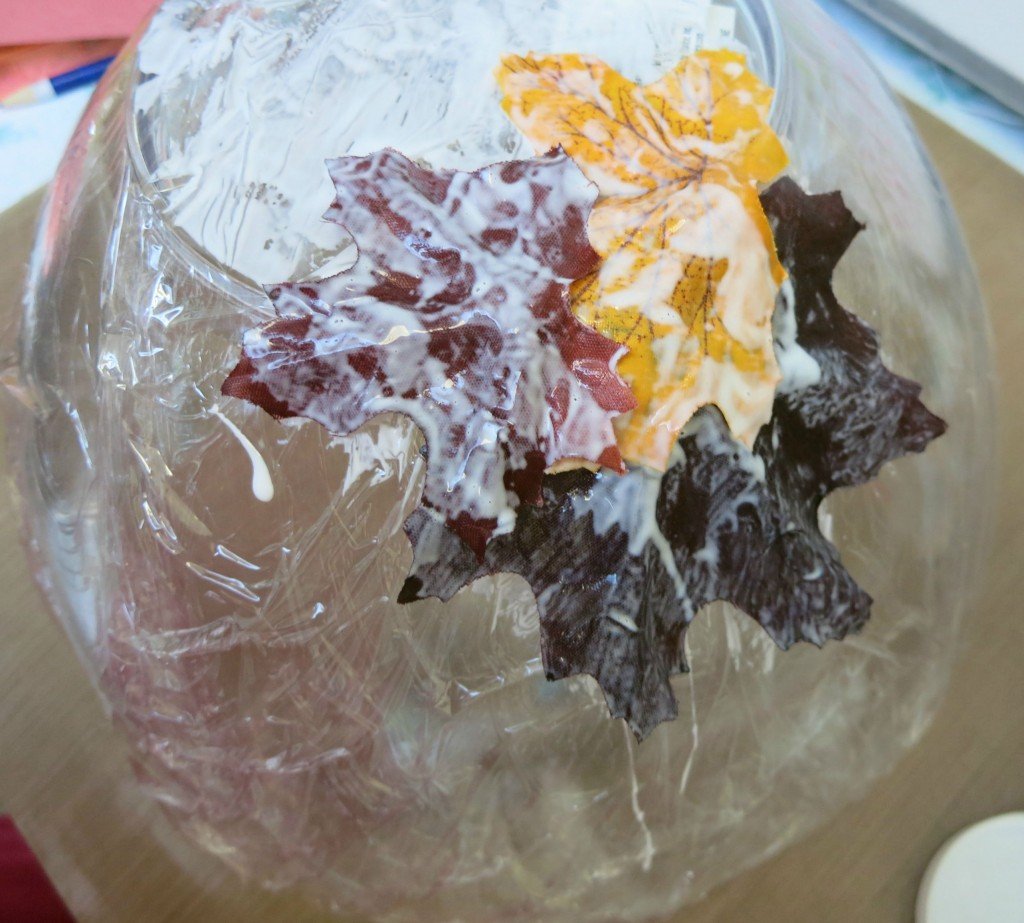
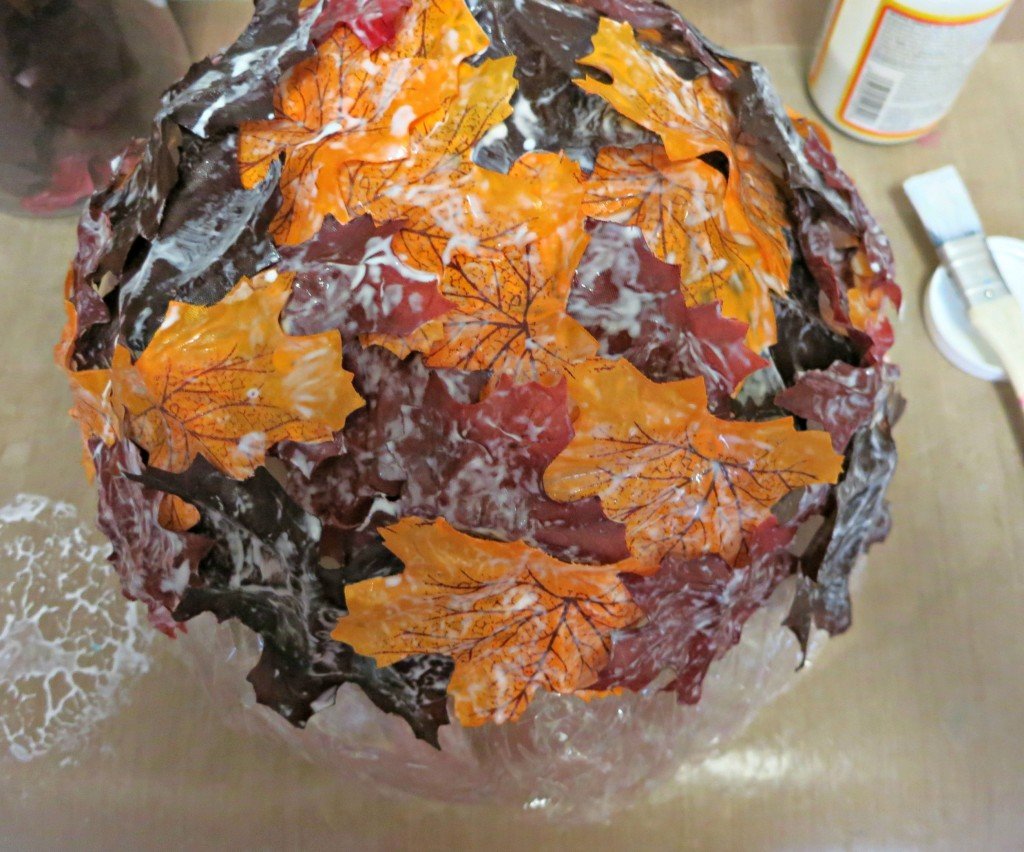
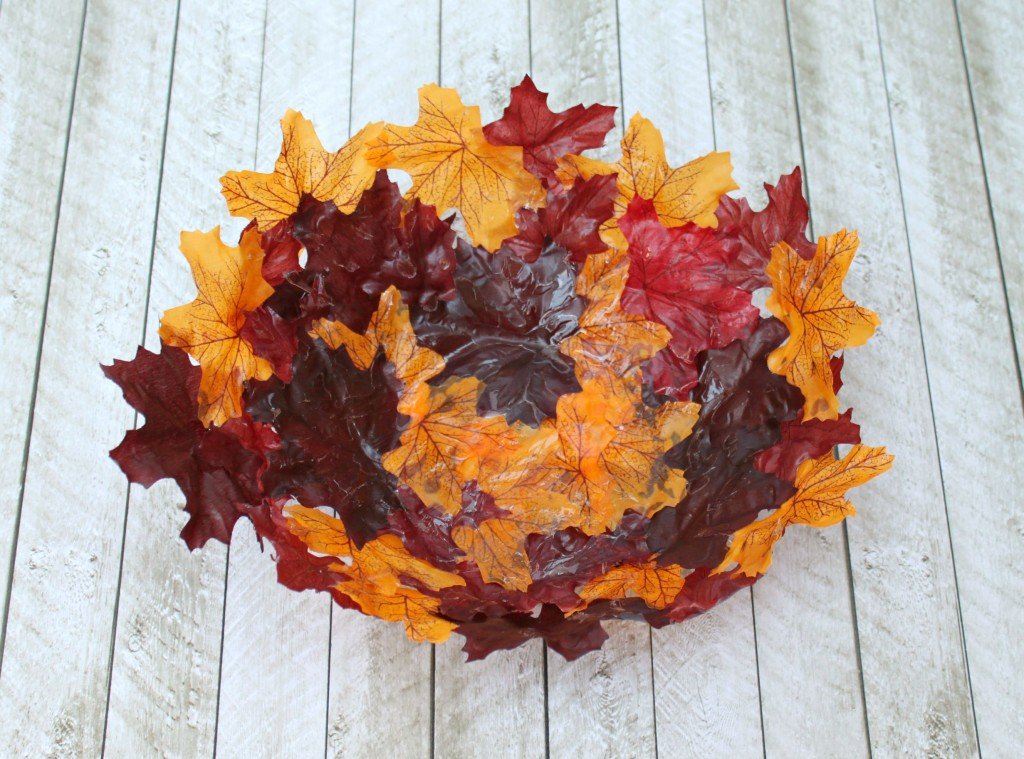
Step two: Paint Mod Podge onto a leaf, and press the leaf onto the bowl. Repeat with various leaves, overlapping the leaves as you go. As you layer and press the leaves onto each other excess Mod Podge will squeeze out, and just brush that over the outside of the leaves. Continue until the base is covered and half the sides of the bowl are covered with leaves.
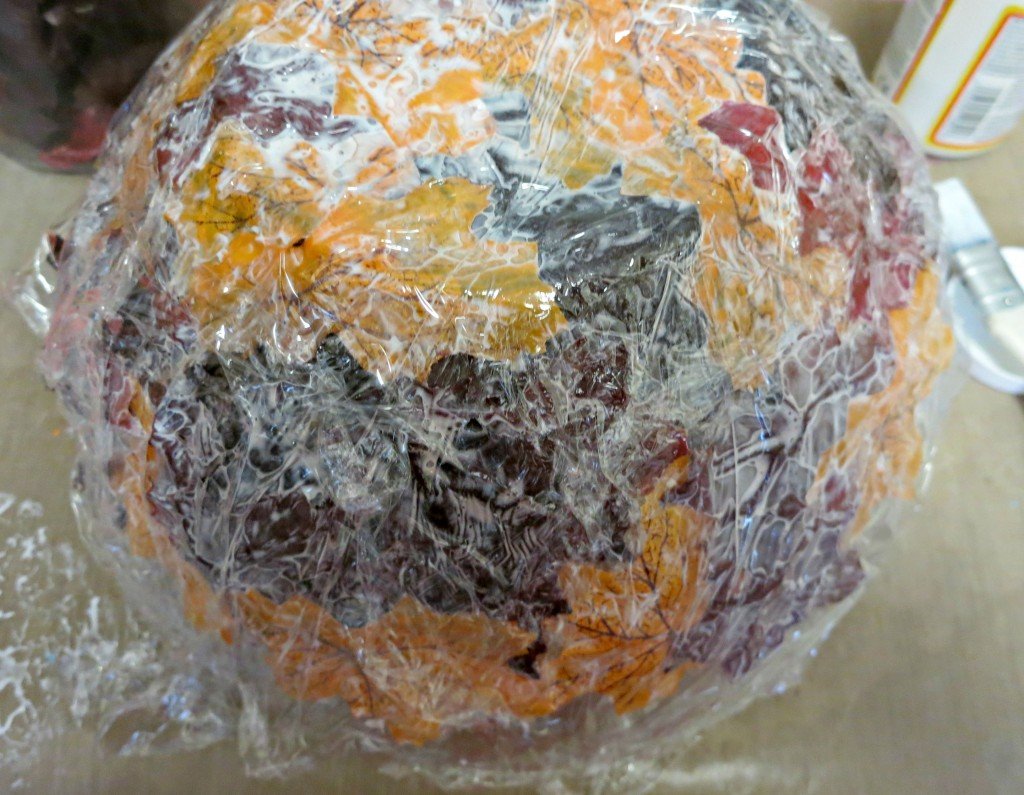
Step three: Because the leaves are not flat, they kept popping up and sliding around a bit. To hold them in place while the Mod Podge set, I covered the wet leaves with more plastic wrap. I pressed on the plastic wrap to smooth out the leaves and help them stick together. I placed the covered leaves in the sun for about 4 hours, then I carefully removed the outer layer of plastic wrap and let the leaves dry completely. You could probably leave the plastic wrap on while they dry, but it will extend the drying time considerably. Lift up the plastic wrap and place the leaf bowl inside the plastic bowl. Remove the plastic wrap and, if needed, let the project dry longer.
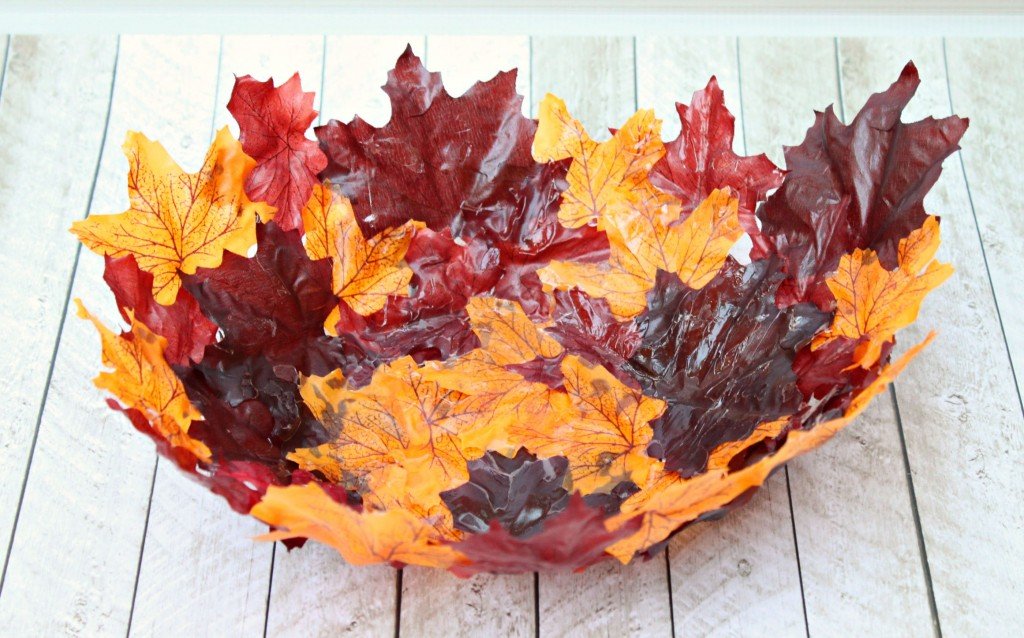
Step four: When the leaves were completely dry, I removed the leaf bowl from the plastic bowl. I sprayed them with an application of Krylon Triple Thick Glaze. Mod Podge tends to be slightly tacky when it dries, so the glaze helps cover up the stickiness. Also, the leaves are still very pliable, and the glaze made them a little firmer.
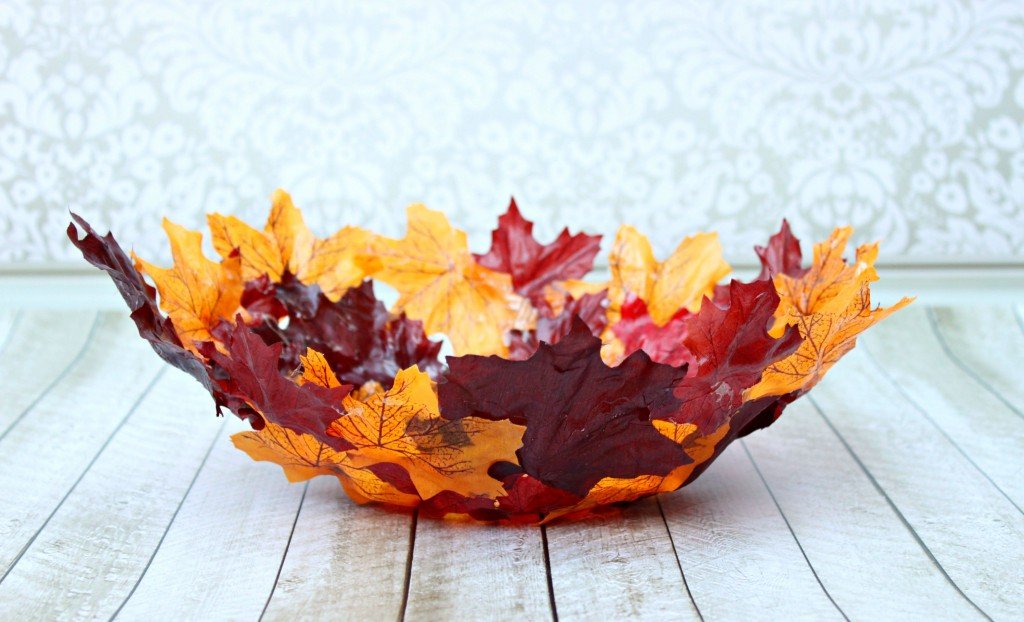
This DIY leaf bowl is so pretty! I filled mine with dried acorns. It would make a gorgeous addition to a side table or coffee table. It is very lightweight and pliable, so you can’t fill it with anything heavy. You could add some scented pot pourri to the bowl and use it to brighten up a room. How might you use your decorative leaf bowl this fall?
Leave a Reply