Make a Halloween shadow box this fall. This is a sponsored post.
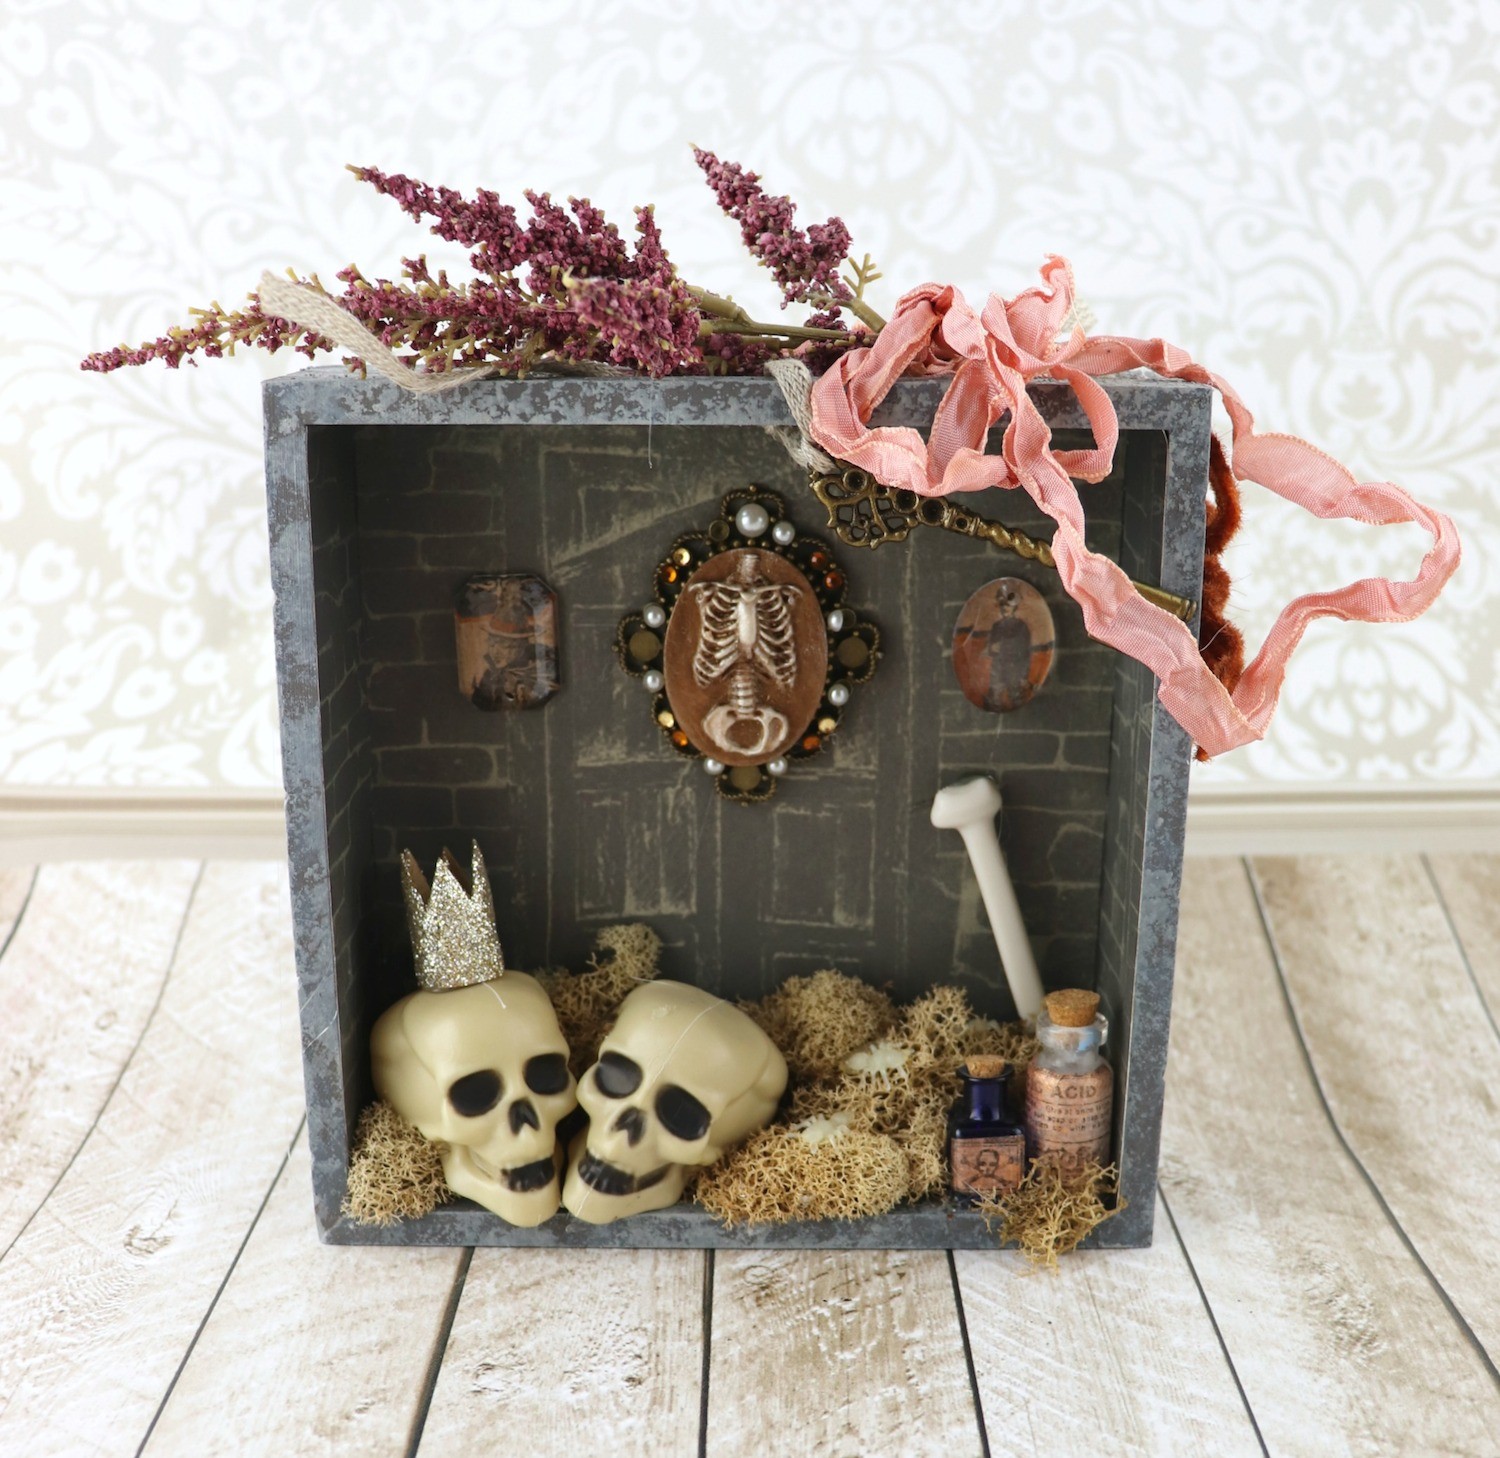
This spooky little shadow box is a fun project to make, and it’s a great decor piece, too. Use a variety of miniatures with your papercrafting supplies, like the Xyron sticker maker, to make this project. If you are like me, you probably already have lots of these little bits and pieces in your craft stash that are just waiting to be put to use!
Supplies Used to make a Halloween Shadow Box:
(affiliate links may be included)
- Small wood tray
- Xyron Creative Station
- Xyron Sticker Maker
- Paint
- Reindeer Moss
- Small skulls and bones
- Tim Holtz fragments and other miniatures
- Halloween themed scrapbook papers
- Glue gun
- Ribbon
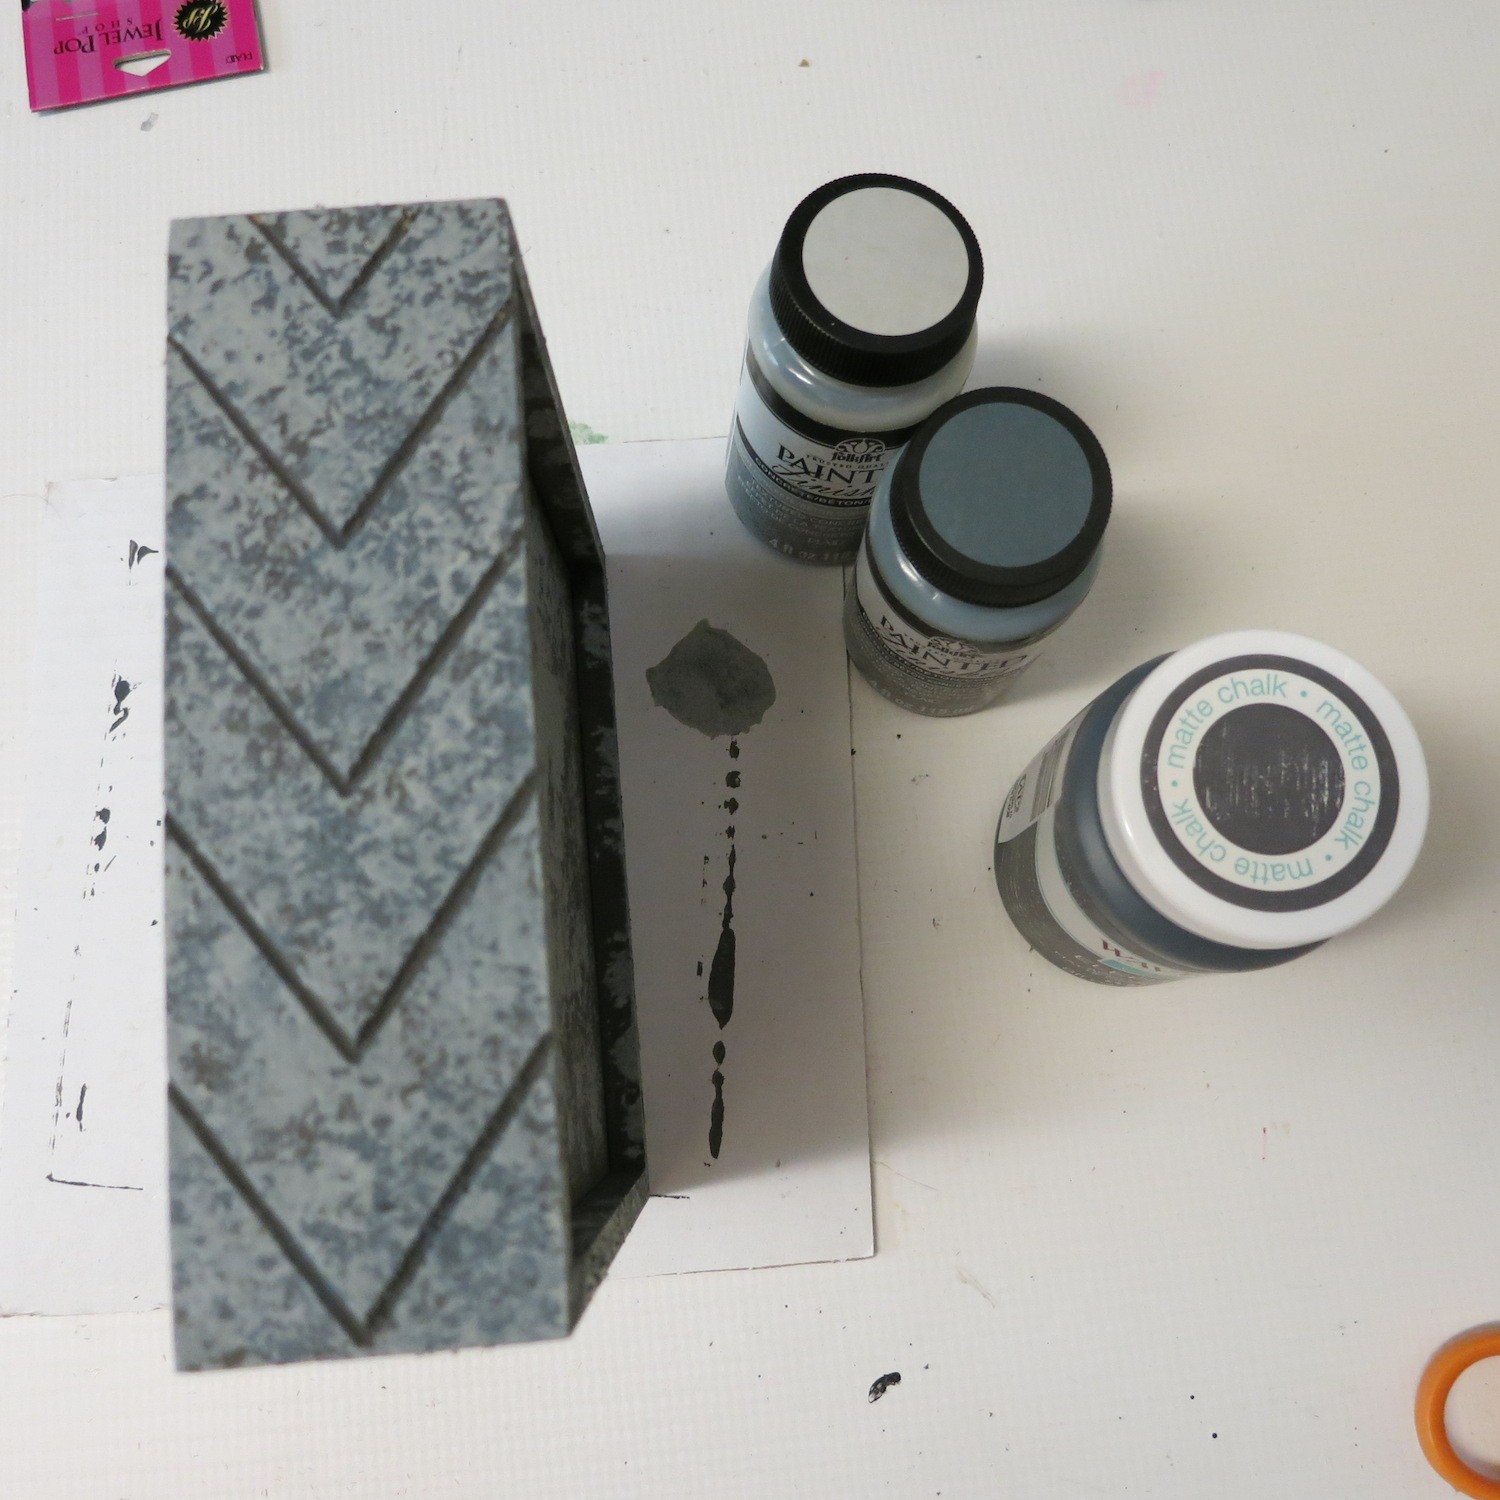
Start by painting the tray gray. I used a texture paint product by Plaid Crafts that is meant to create concrete textures. I used a sponge to dab the texture pains on the tray.
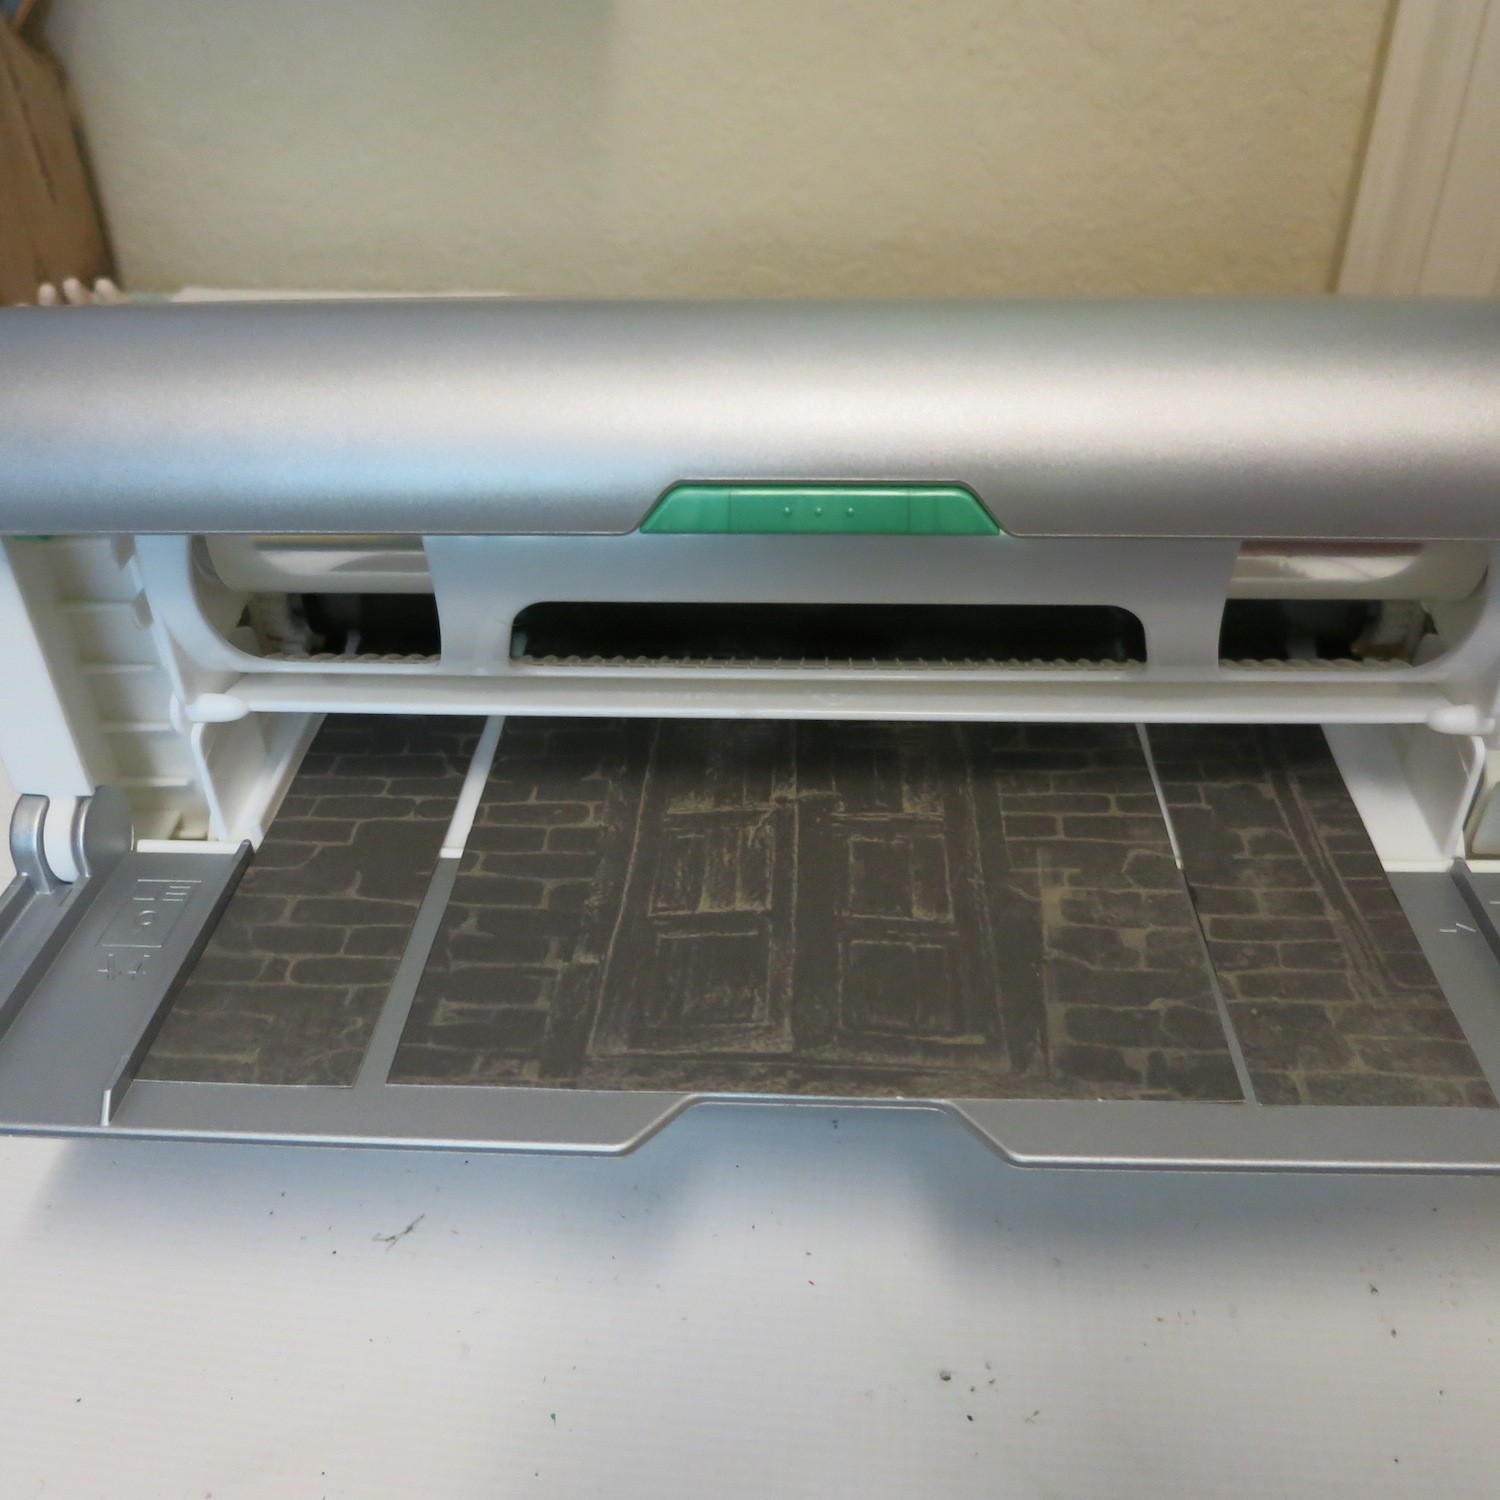
When the tray is dry, cut Halloween papers to fit in the back and sides of the tray. Add permanent adhesive to the papers using the Xyron Creative Station. Stick the papers inside the tray.

Place the clear fragments on Halloween paper and trace the shape. Roll the paper through the Xyron sticker maker, but put the adhesive on the front of the image.
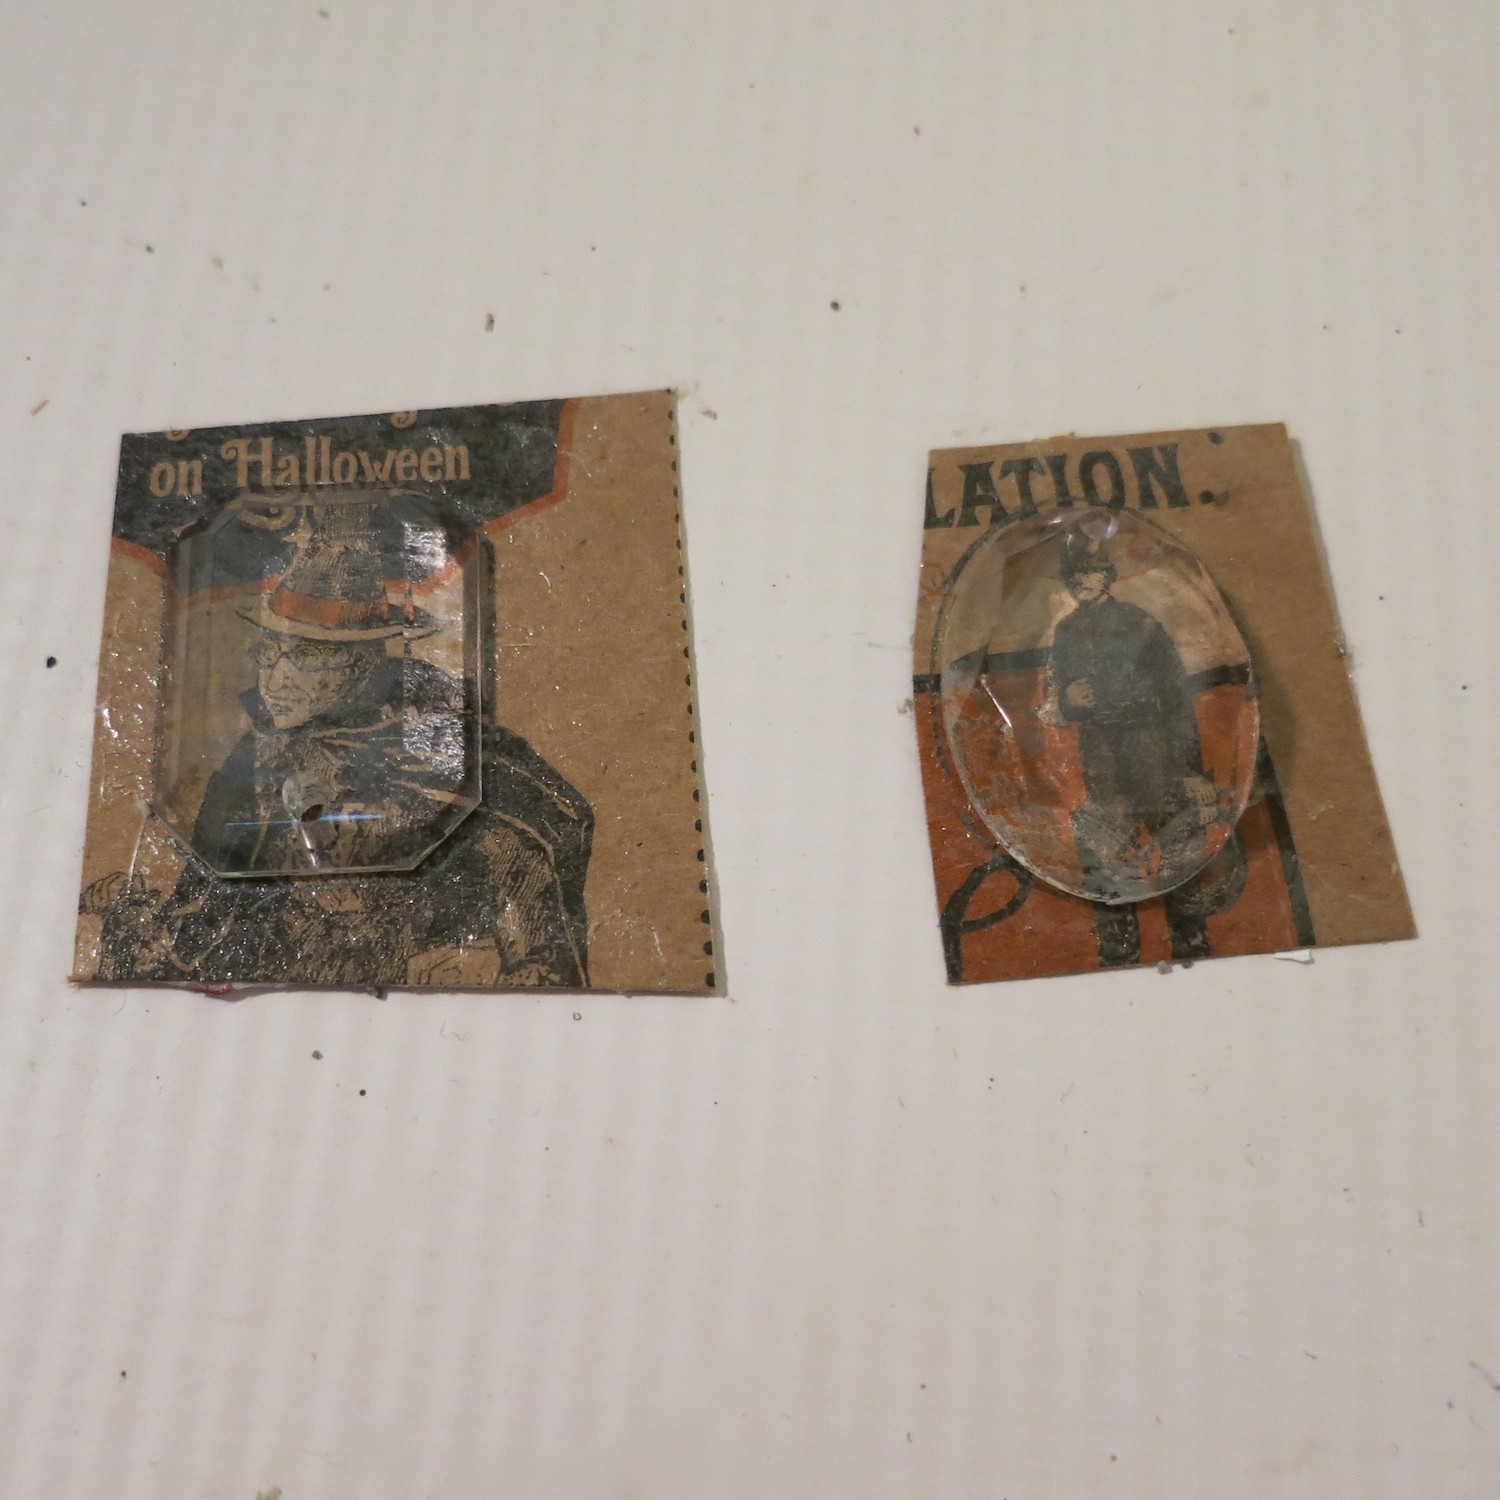
Press the clear fragment pieces onto the sticky paper, and trim off the excess.
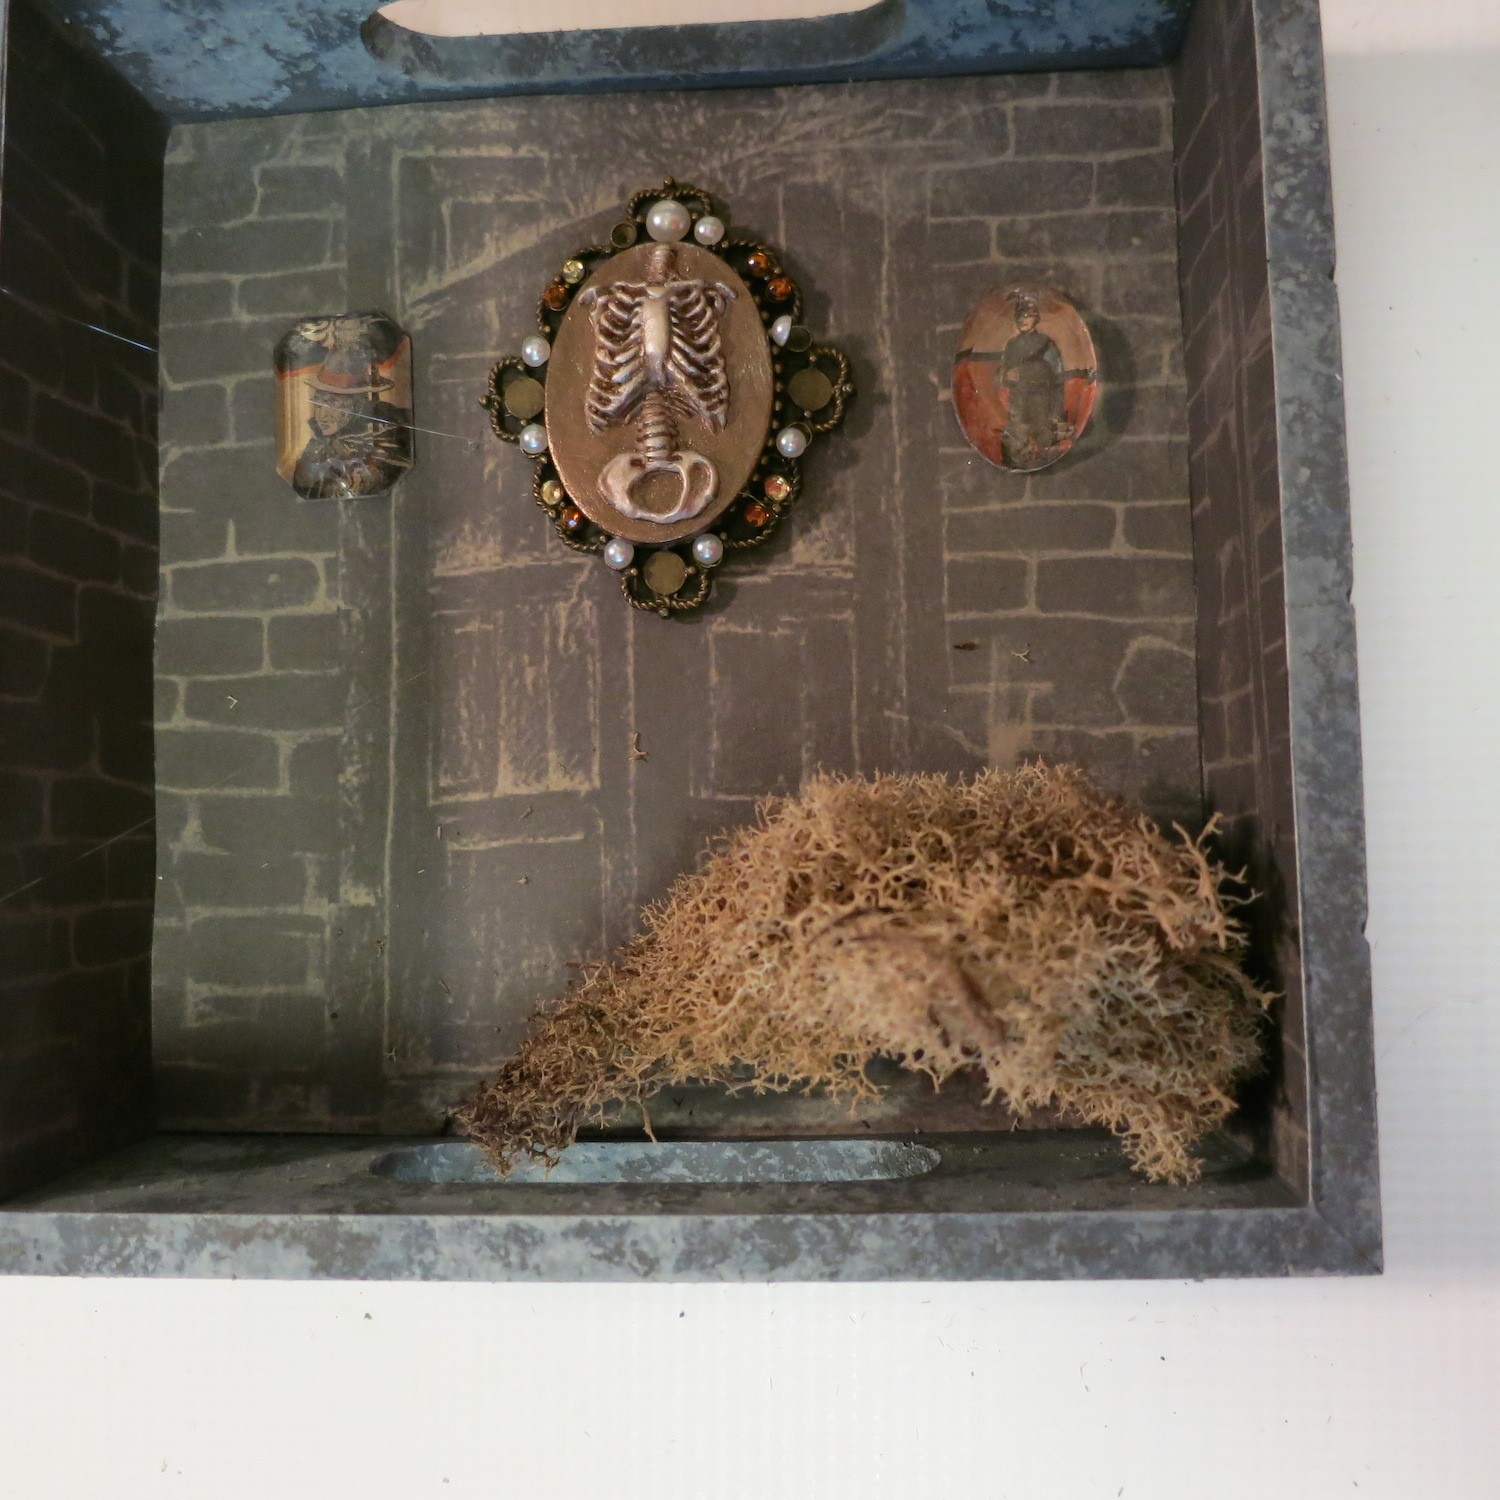
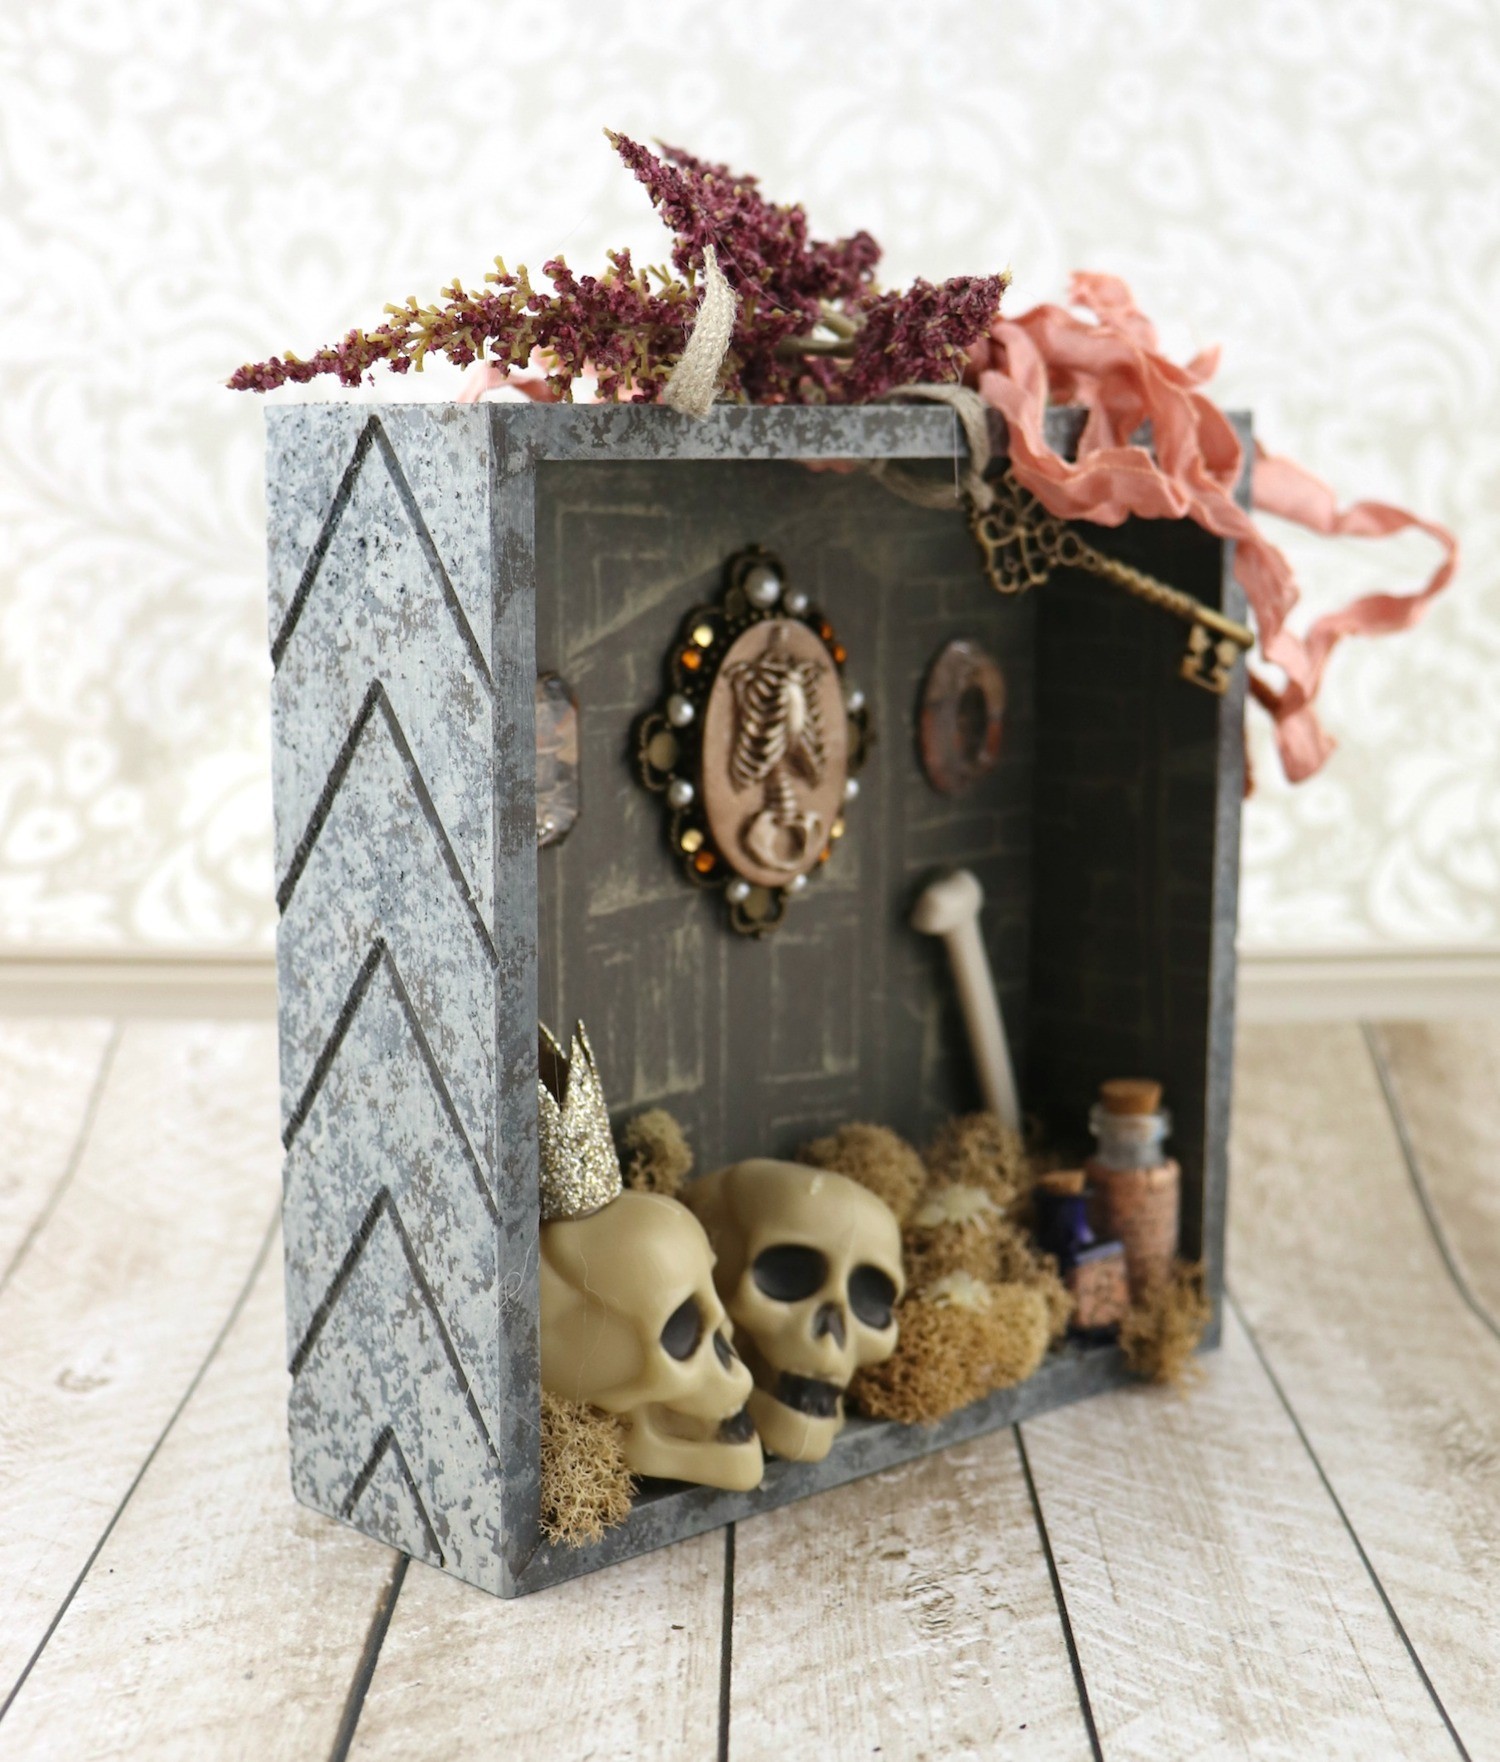
Hot glue the “framed photos” onto the “wall” of the shadow box. Hot glue reindeer moss on the bottom of the box.
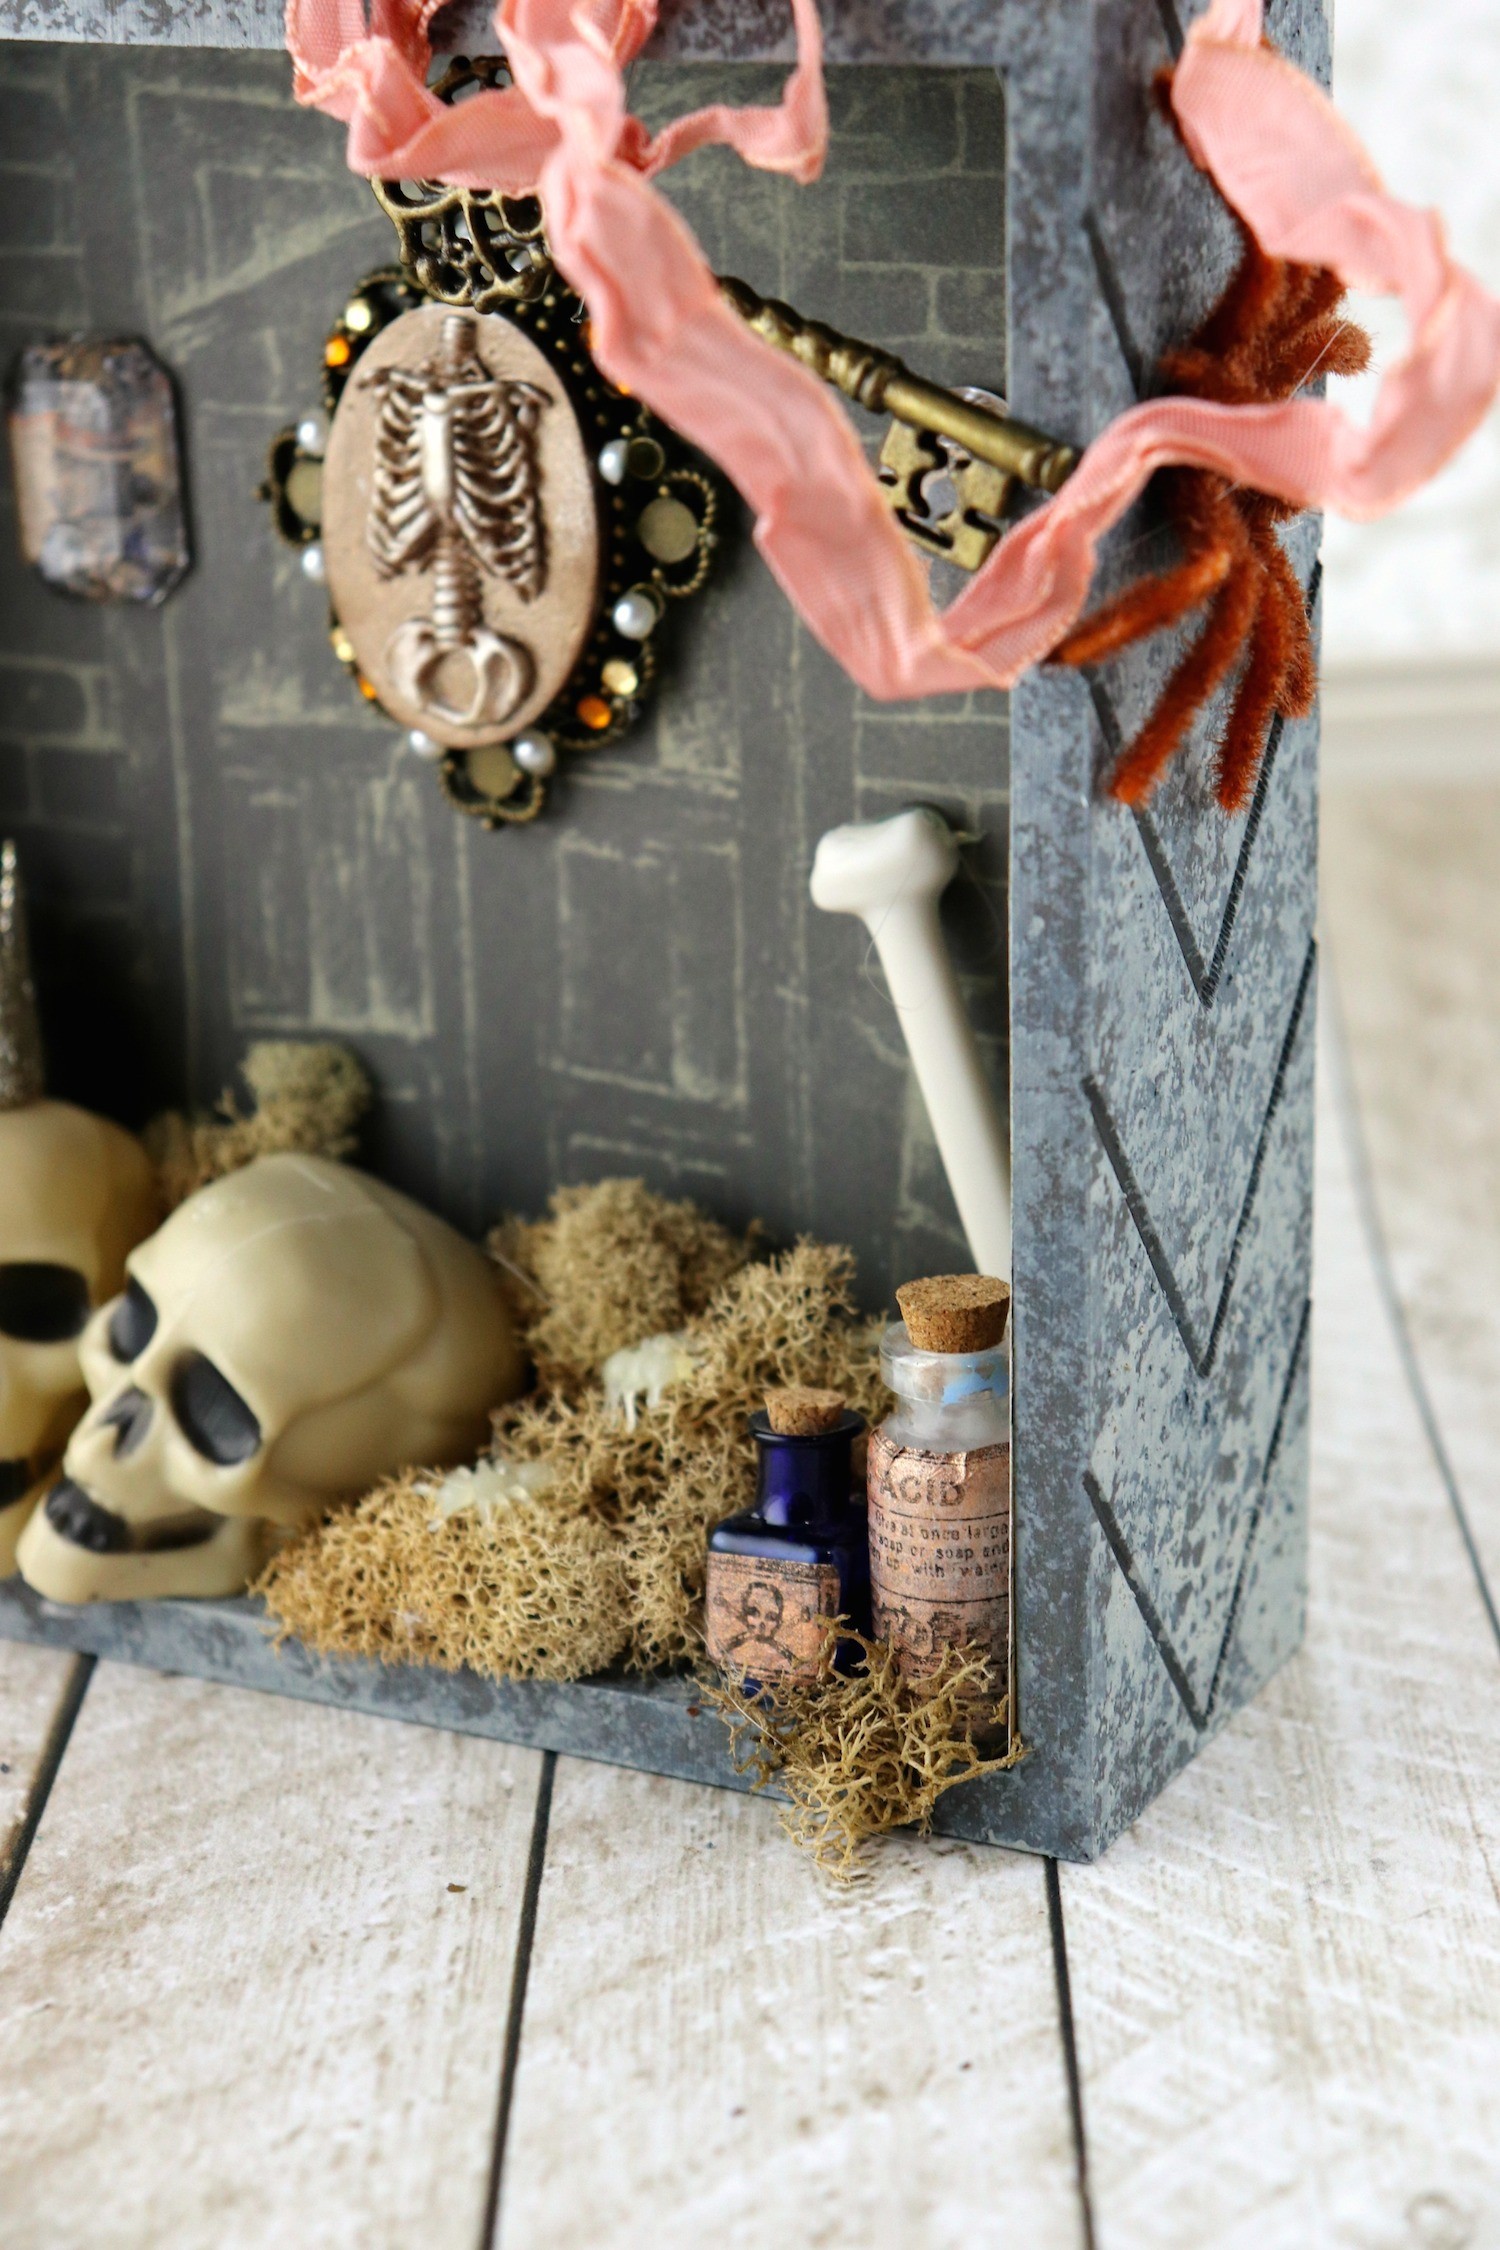
Have fun embellishing the Halloween shadow box with different items you have on hand. I added some bones, skulls, and tiny bottles that I embellished using stamps and Xyron’s sticker maker.
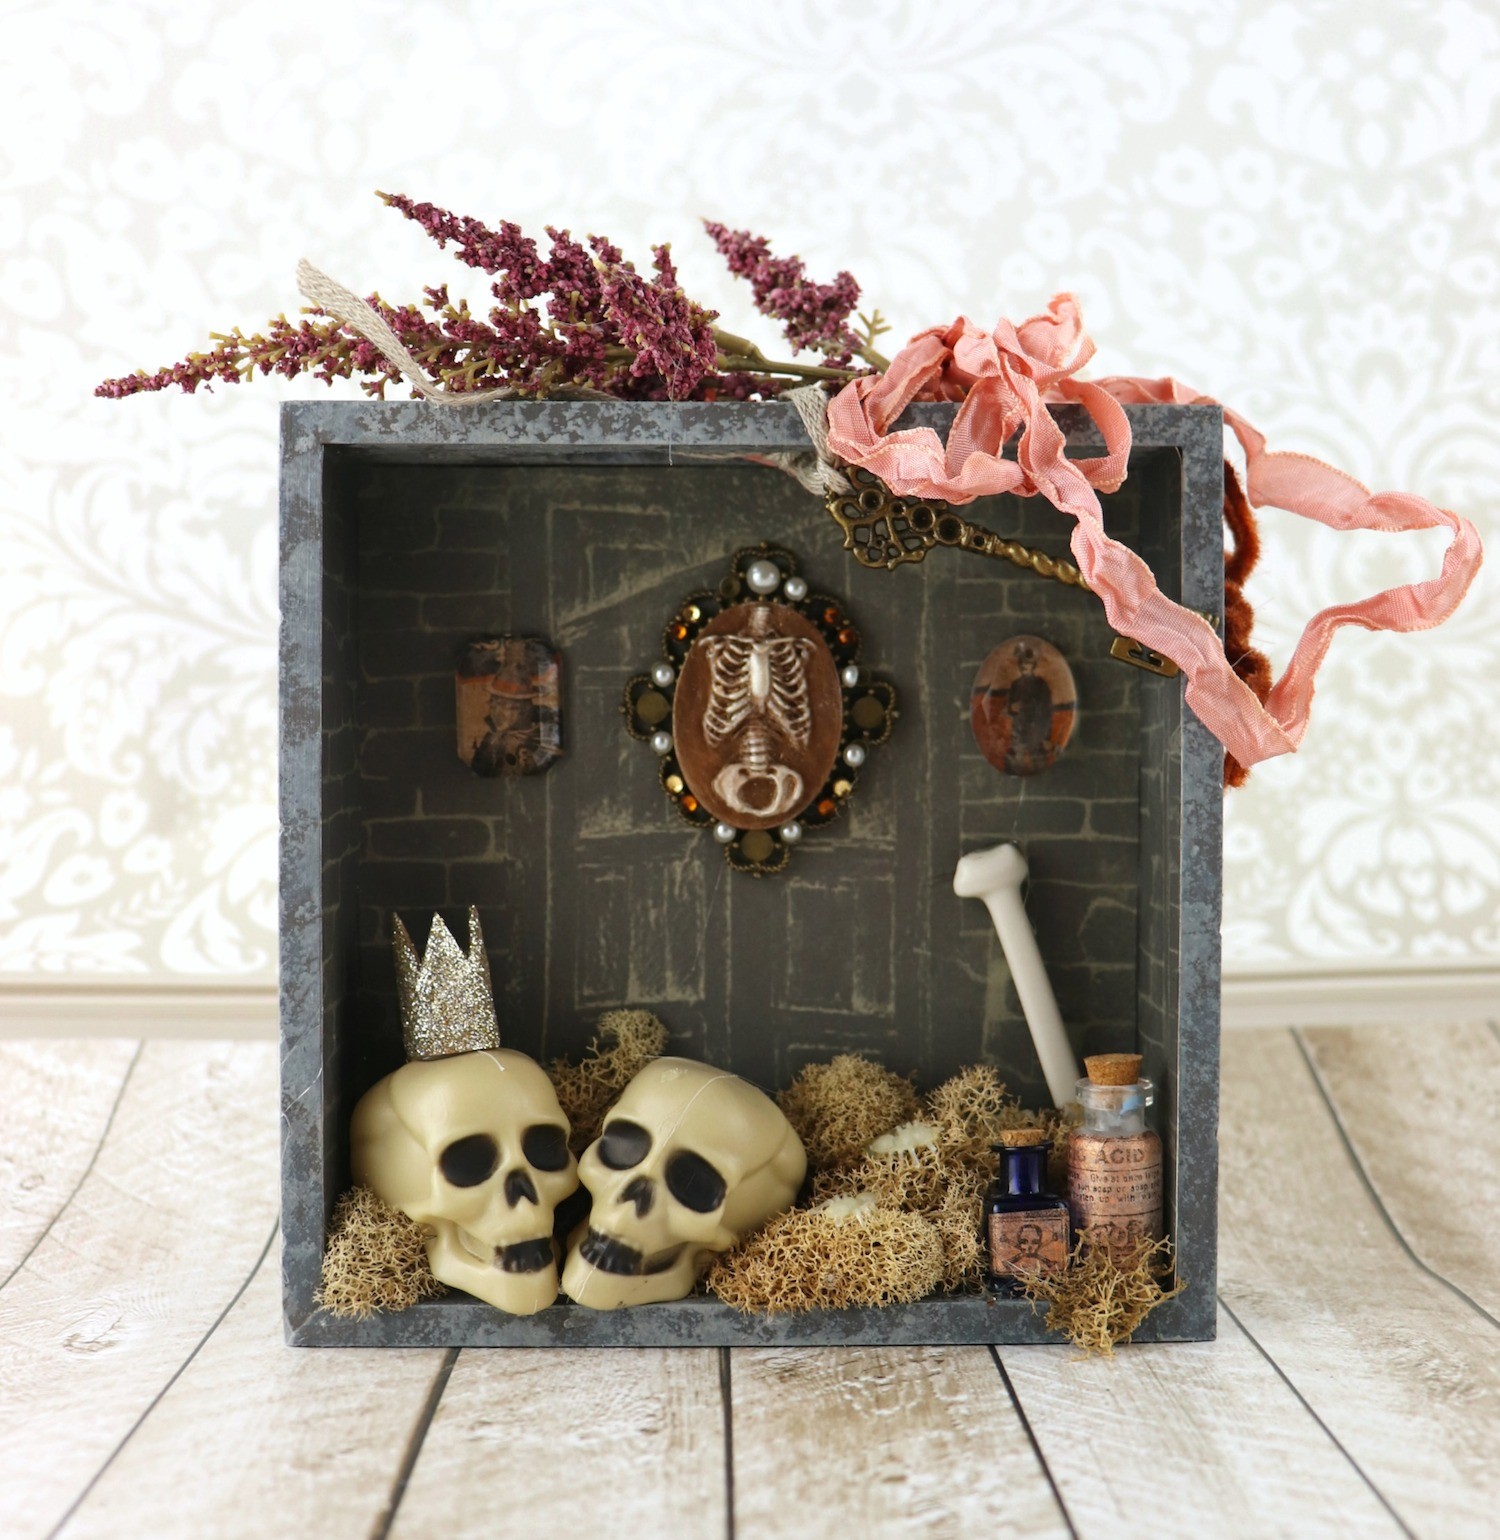
I finished off the spooky Halloween shadow box with some flowers, ribbon, and a vintage-looking key. Have fun crafting and creating mini decor this Halloween!
Leave a Reply