• Tutorials
  • About

Morena's Corner

Taking Time Out to Craft

Knock off Tray using Gel Medium Transfer Technique

Jun 21, 2012 by Morena 29 Comments

I fell in love with the Typography line at Target, especially the numbers tray.  I knew exactly how I would create my knock off:  using gel medium to transfer the numbers!  Read on to learn how quick and easy this process is!

13940464

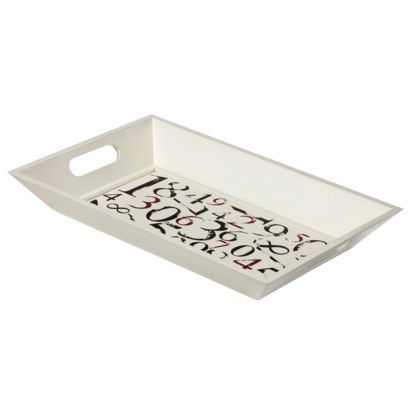
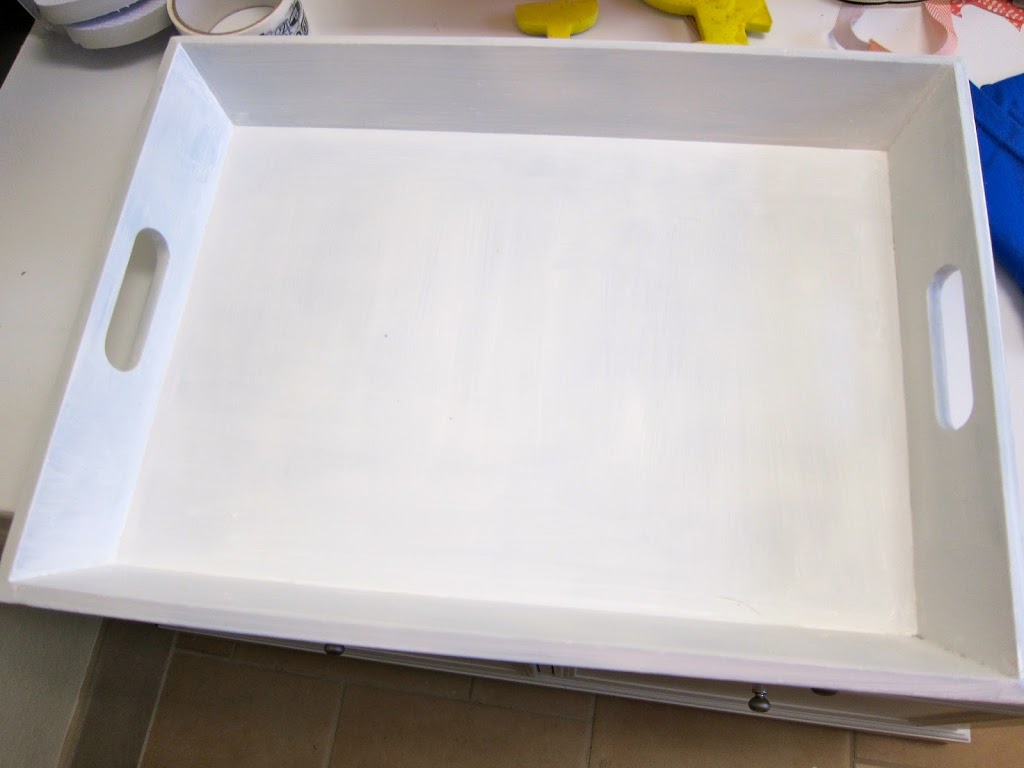
This is the tray I saw at Target.    I embarrassed my oldest son by whipping out my camera to take pictures of several items in the line.  Every time I do that he whines “WHAT are you doing?”  Ha!  Hey, kid, I can’t help when inspiration strikes!

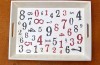
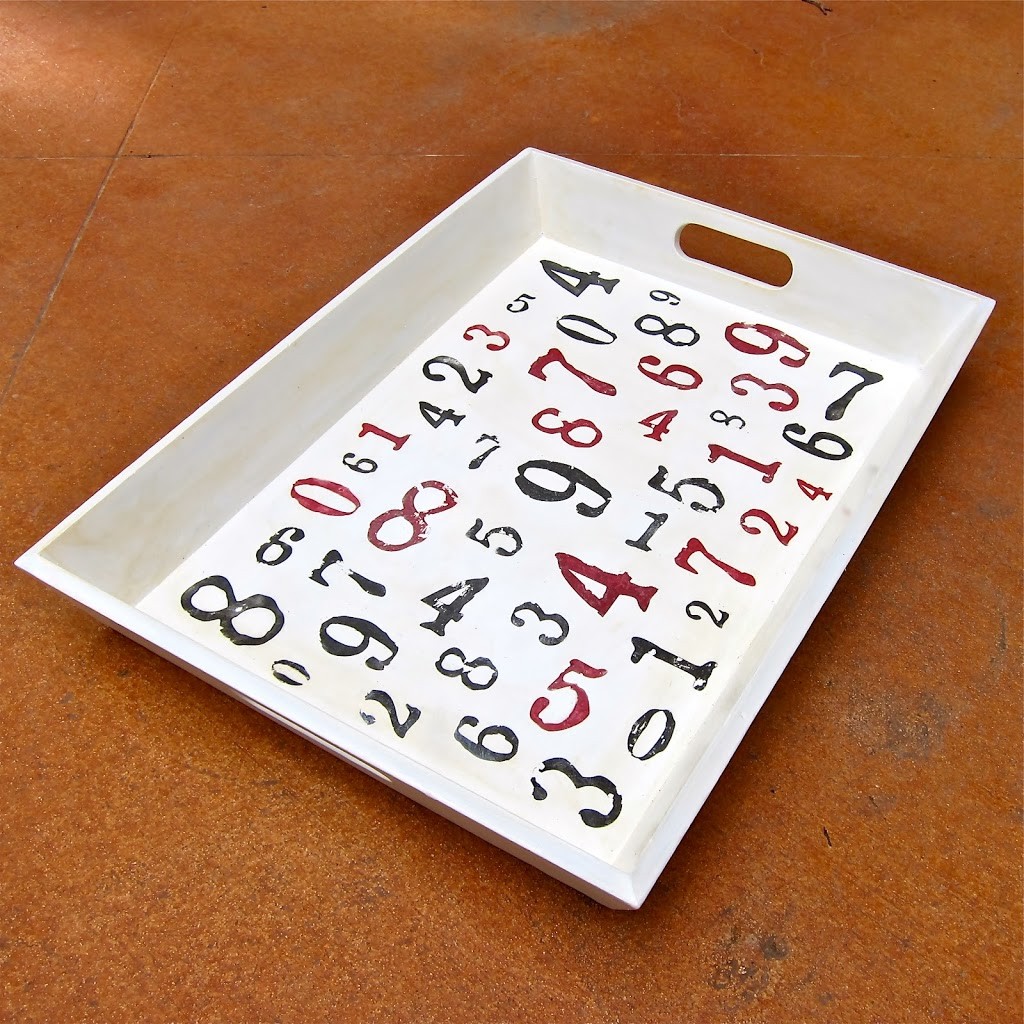
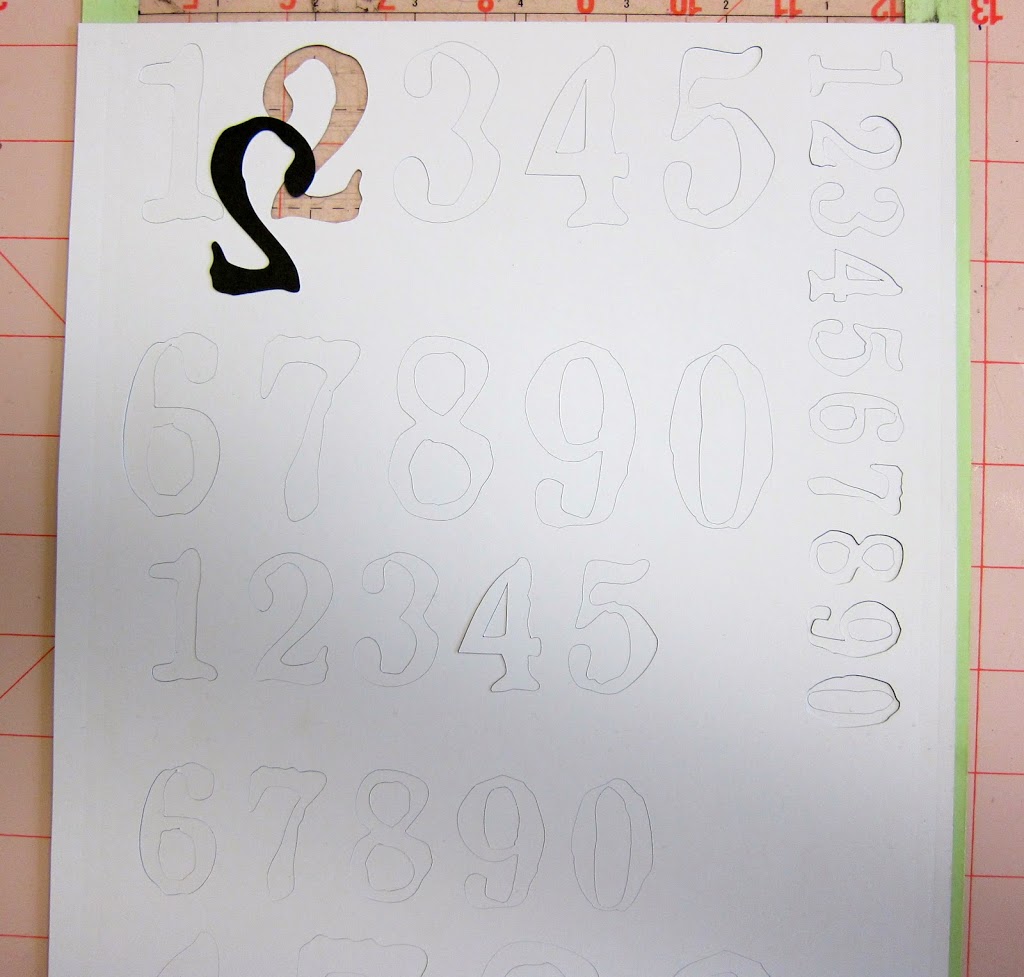
Here is my knock off.  Pretty close, right?  Would you believe I didn’t paint any of the numbers?


Several months ago I read about gel medium transfer.  I ran out to the craft store to buy some gel medium, along with some scraps of wood, to practice the technique.  It really is pretty simple, but if you are trying to transfer a photograph it takes some practice.  I have found that I like to use the technique with vintage images because it gives the appearance of something being well worn and aged, without having to do all the distressing you would with paint.  That’s why I thought it would be the perfect technique for this project.
 I started with a wood tray I had purchased at Goodwill previously for about $3.  It was a very bright turquoise color, so it took several layers of white chalkboard paint to cover it.  Acrylic paint would work, too, I just had a bunch of white chalkboard paint so I grabbed that.
Next, I cut my numbers out using my Silhouette.  I used black and red scrapbook paper from one of Jenni Bowlin’s paper packs.  I put the paper color side down on the cutting mat (see picture above).
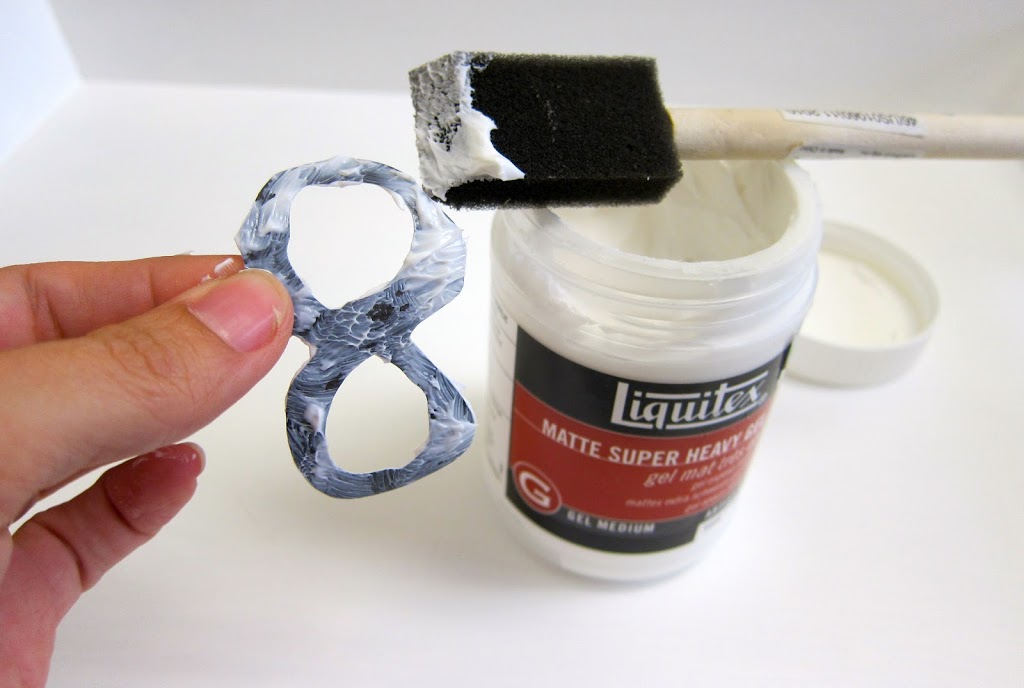
Next, I coated each number on the colored side with gel medium.  You want a thick coat.  I intentionally put less in some places so that the image would not transfer, since I was looking for a distressed look.  I then adhered the number, colored side down, onto the tray and smoothed it down.  Try to wipe away any excess gel that squeezes out.

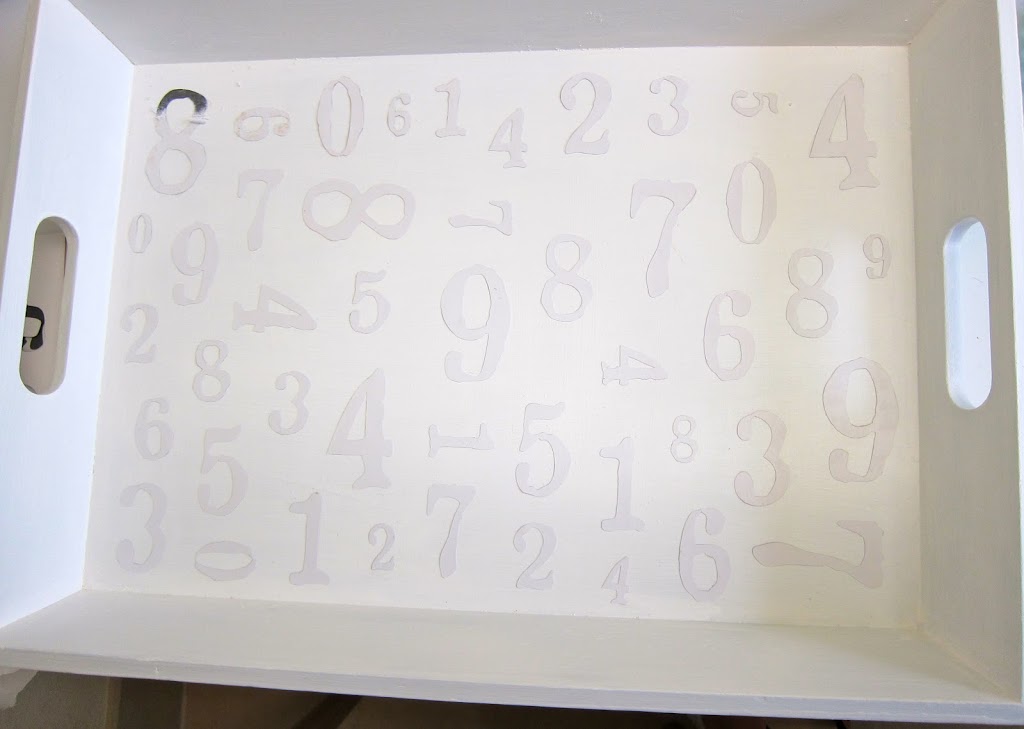
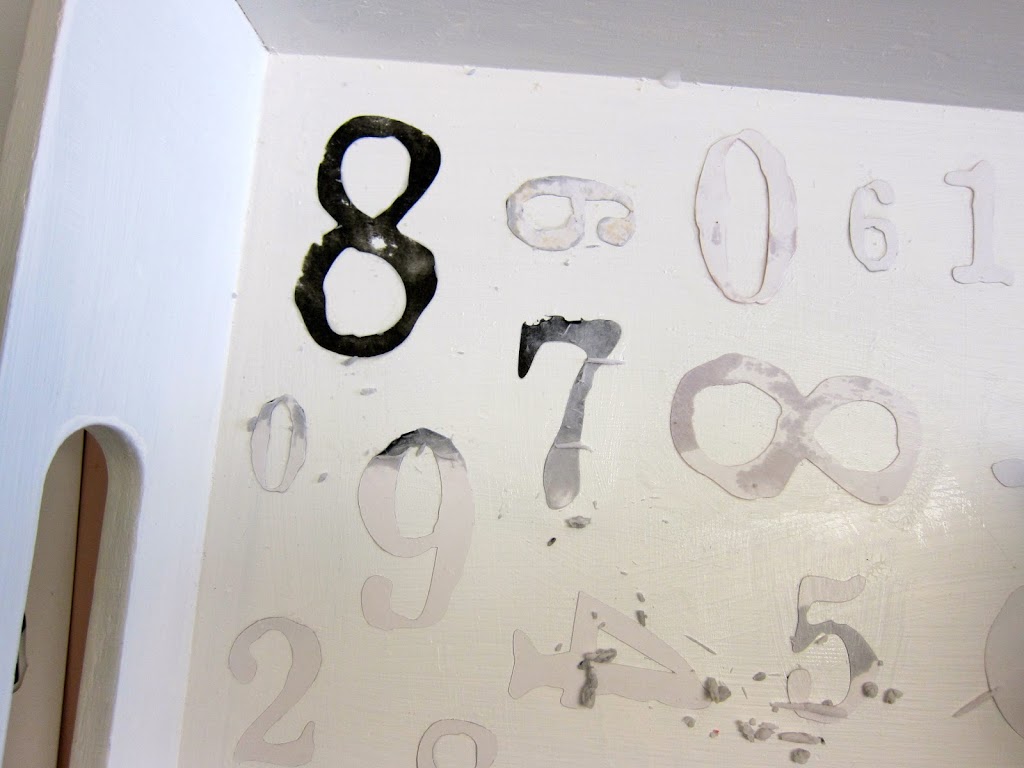
Once the tray was covered I let it dry overnight.  As you can see, the numbers all have the back of the paper (white side) showing, and the colored side “glued” down with the gel medium.

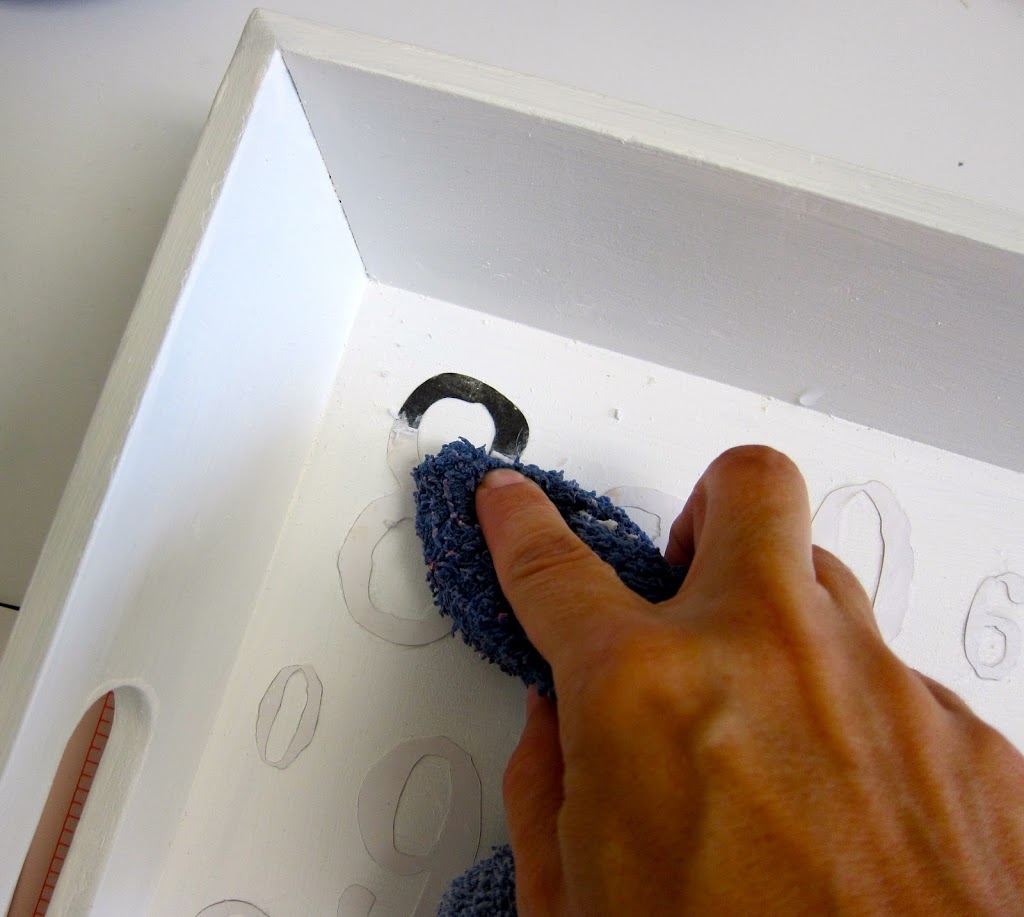
Here’s the fun part!  Wet a wash cloth and gently start to rub on each number.  The paper will peel away, but the ink is left in the gel medium on the wood tray.  Almost like magic.  🙂

Apply more pressure to wear more color away as desired, but don’t rub too hard or you might take the whole thing off!

I kept a spray bottle with water next to me so I could mist my wash cloth and continue.

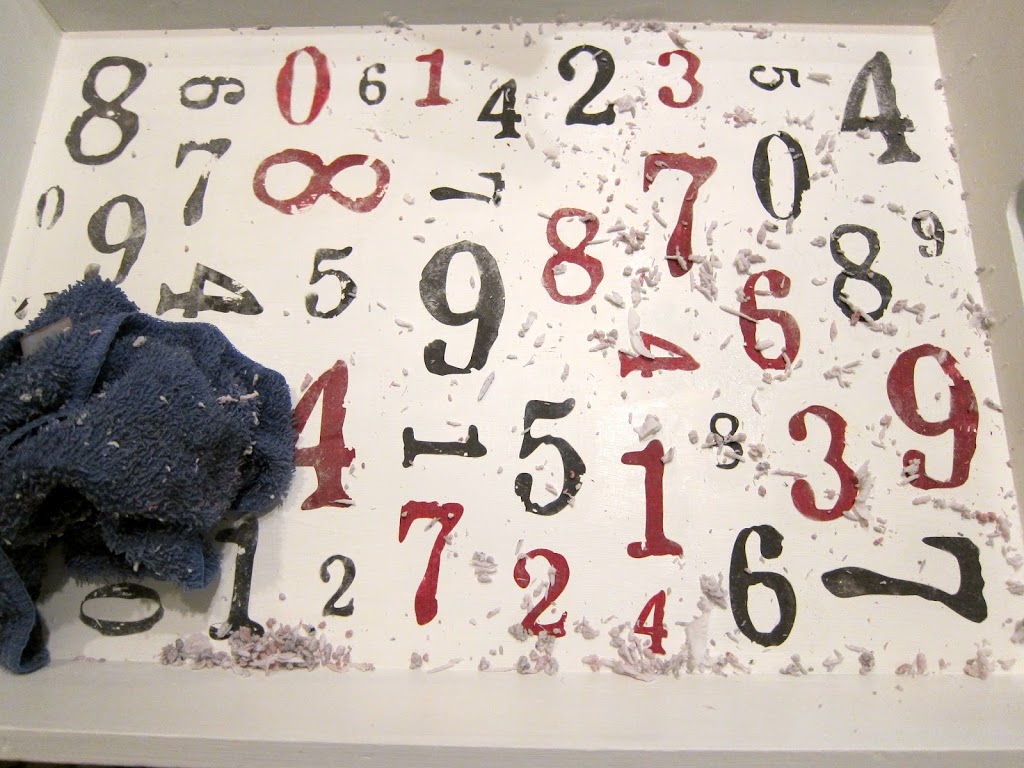
Here it is after all the “paper peeling” has been done.  Kind of messy.  I use a dry cloth to wipe the mess away.

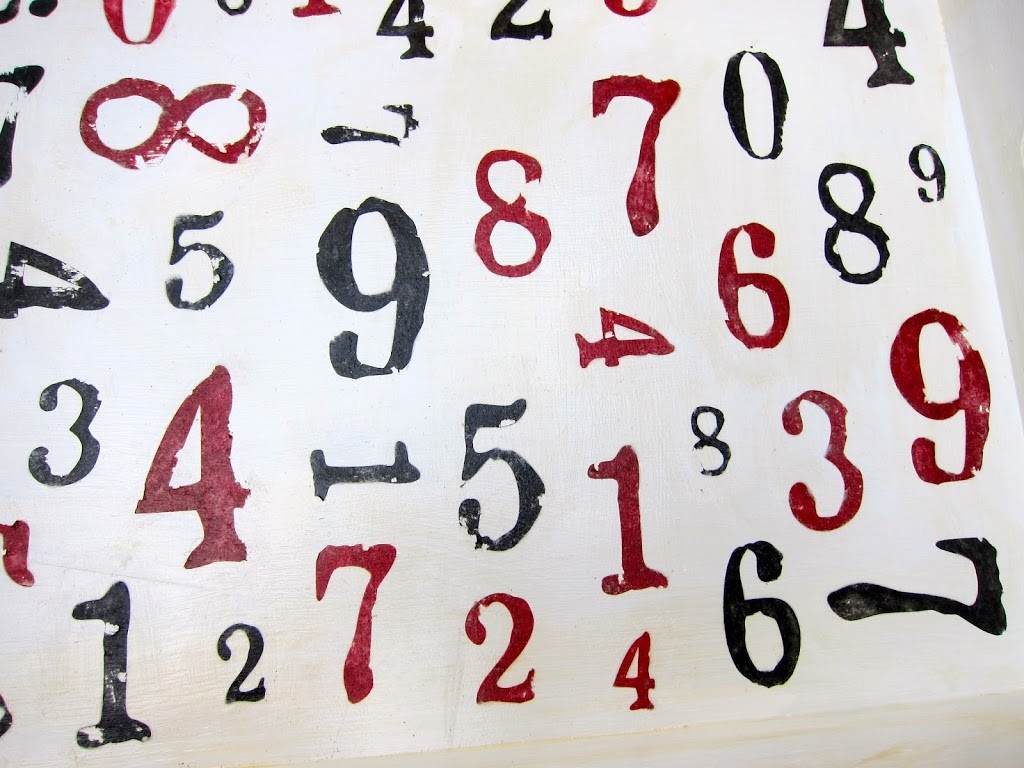
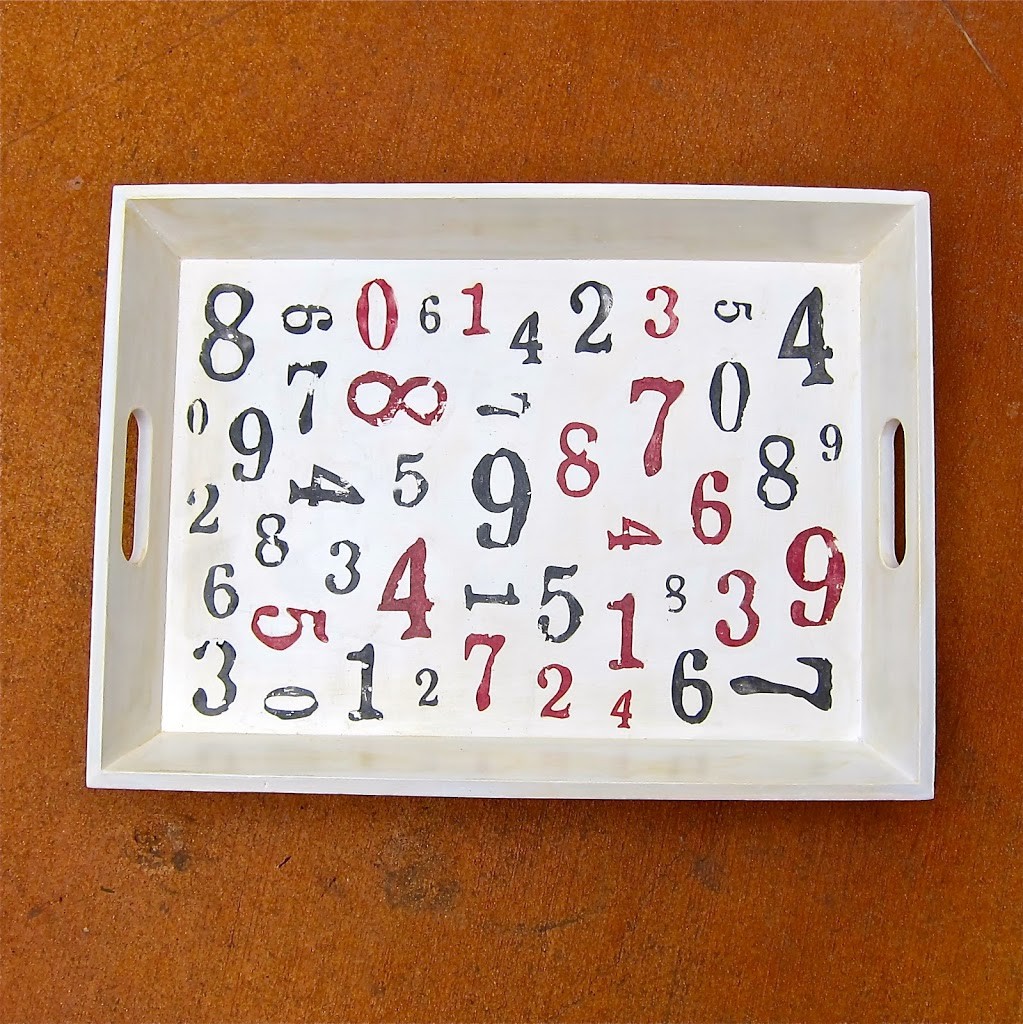
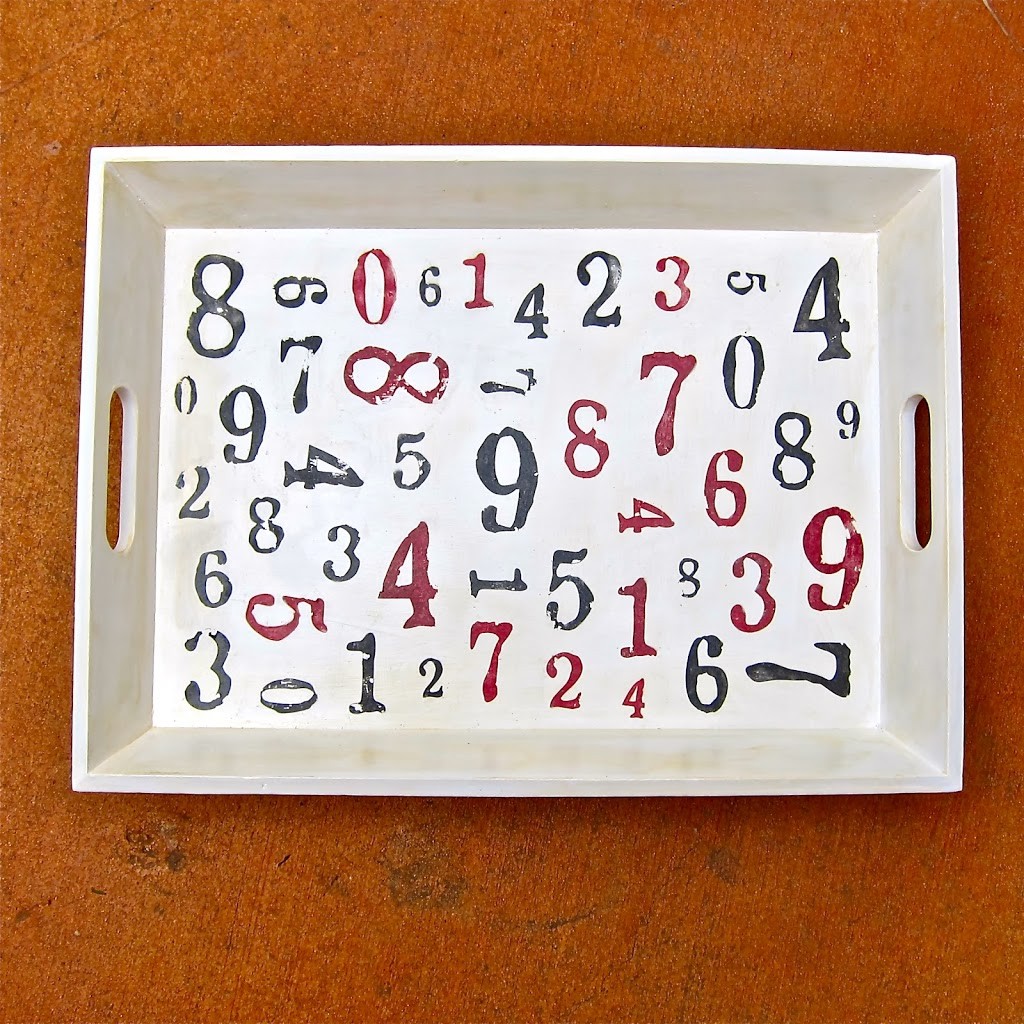
Here is a close up of the numbers.  I love that they look painted on and aged, even though I didn’t paint or distress a thing!

As a final step, I mixed a few drops of alcohol ink with Mod Podge to seal my project.  I wanted a matte finish, and I wanted my tray to look “old” (the white was too clean looking), and this is another trick I like to use.  After I mix the Mod Podge and ink (I used Ranger Ink’s Caramel) to the color I like, I brush it on, more in some places than others, to get a streaky “dirty” look.

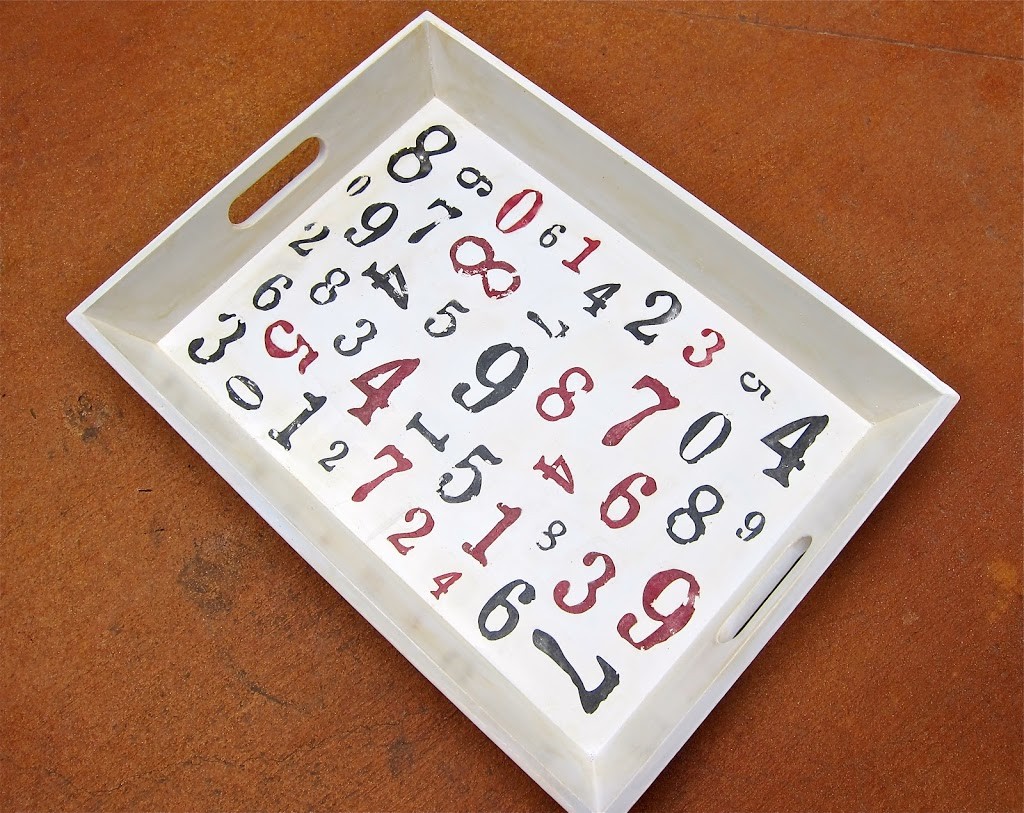
I absolutely love my new tray and can’t wait to use it!  This may not have been a very fast tutorial, but I hope you’ll agree that it is frugal and looks fabulous!  Who doesn’t love a good knock off?

To learn how to use this technique to transfer vintage images, please visit this post.

Art Supply Caddy from Recycled Items
Dollar Tree Easel Makeover

Comments

  1. Erika says

    Jun 21, 2012 at 6:16 AM

    This tray is Awesome and the tutorial is very good, I will certainly try it very soon. Thank you for sharing such a great project, it looks wonderful.

    Reply
  2. Kristin@ A Vintage Fairy says

    Jun 21, 2012 at 3:45 PM

    great ink tip with the mod podge! i have mixed glaze with it, but not ink. i will have to try that! your newest follower

    Reply
  3. Misha says

    Jun 21, 2012 at 6:37 PM

    Cool project! Pinning for later…

    Reply
  4. amy c @ thisheartofmineblog.com says

    Jun 22, 2012 at 7:05 PM

    oh my goodness, i love this!! isn’t image transfer fun? great job. this turned out fabulous!

    Reply
  5. {northern cottage} says

    Jun 23, 2012 at 10:43 AM

    pretty neat girlie! Now I just have to get my hands on a cutter! xo xo

    http://www.NorthernCottage.net

    Reply
  6. Melissa @ No. 2 Pencil says

    Jun 24, 2012 at 3:03 PM

    This turned out so cute! Love it!

    Reply
  7. Meredith @ Wait Til Your Father Gets Home says

    Jun 24, 2012 at 7:21 PM

    I love this tray! So cute :o)

    I’m your newest follower too!

    Reply
  8. Tami Marie says

    Jun 24, 2012 at 10:15 PM

    Hi there,

    Thank you so much for coming by The Things We Find Inside

    You have such a lovely, creative blog. I am your newest GFC follower. Look forward to seeing more of your creations. 🙂

    Tami

    Reply
  9. Tyesha says

    Jun 25, 2012 at 1:09 AM

    OMG! I love this!

    Reply
  10. Jana@Transformations From the Heart says

    Jun 26, 2012 at 2:29 AM

    Very Cute project. Turned out great and looks so much like that one from Target. You did a fabulous job recreating it.

    Reply
  11. Debbiedoo's says

    Jun 28, 2012 at 2:30 AM

    This comment has been removed by a blog administrator.

    Reply
  12. Johnnie says

    Jun 28, 2012 at 5:39 PM

    I love that you die cut numbers from scrapbook paper for your gel transfer. I had not thought of doing that. I love gel transfer, but always use a laser jet print of the design I want to transfer. This is great for scrap busting and when I don’t want to run out and grab a laser print. I also love the alcohol ink mod podge trick. Very cool.

    Johnnie
    Printable Decor
    Saved By Love Creations
    Decor 2 Adore{able}

    Reply
  13. House Revivals says

    Jul 2, 2012 at 12:12 PM

    Love it! Such a great idea.

    Reply
  14. Homa Style says

    Jul 2, 2012 at 6:48 PM

    I want to try this technique. I have the gel medium and a workshop full of wood and several great pictures. You would think I could get it together! Thanks for your inspiration.

    Reply
  15. Ange says

    Jul 2, 2012 at 9:44 PM

    LOve the project and the tutorial, thanks so much for sharing it with all of us.

    Reply
  16. cheltenhamroad says

    Jul 3, 2012 at 1:14 PM

    Wow! Looks great and now I have to go find myself some gel medium to experiment with. Thank you!

    Reply
  17. DIY Show Off says

    Jul 24, 2012 at 1:07 AM

    Love it! You made it look so easy. Great tutorial and amazing result!

    Reply
  18. Carlisle Dekerlegand says

    Jan 11, 2013 at 9:29 AM

    I plan to have a basement remodeling some time this week and this looks like a great idea for a wallpaper. Come to think of it, it can actually match our trays, too! Thanks!

    Reply
  19. Anonymous says

    Jan 12, 2013 at 9:04 PM

    How is it possible that the transferred numbers aren’t backwards on the tray?? Did I miss something? Seems you would need to start with a reversed design in order to have the ink side transfer properly.
    Cute idea though!

    Reply
  20. Morena Hockley says

    Jan 12, 2013 at 11:36 PM

    I should have been more clear…sorry! Yes, the numbers will need to be reversed. I just cut the numbers with the white side of the paper up (see the picture) so I wouldn’t have to fool with reversing my image. 🙂

    Reply
  21. Tammy J says

    Aug 23, 2013 at 4:37 PM

    This is spot on awesome. I love the tutorial. Very good and great pix’s too.
    Your tray turned out wonderful. TFS

    Reply
  22. Linh C. says

    Aug 23, 2013 at 4:24 PM

    Great project! You’re right on about using this technique to get the “aged look” without having to try to age it/distress it later.

    Reply
  23. Kathy says

    Jul 2, 2016 at 2:54 PM

    Please can you let me know where to get this tray. I have been searching for this for some time, I need this size 18 x 24 in unfinished wood. I look forward to hearing from you.

    Reply
    • Morena says

      Jul 2, 2016 at 8:50 PM

      I believe the one I used is from Ikea. Their online store shows the KLACK tray measures 15 x 23. Have you checked Michaels or Hobby Lobby? HL shows a 16 x 24 inch tray on their site. Hope that helps!

      Reply

Trackbacks

  1. Personalized Wall Hanger with Hook says:
    Feb 27, 2015 at 5:24 AM

    […] 6.  Seal with Mod Podge Antique Finish.  (Or tint your MP like I did here.) […]

    Reply
  2. The Chair - Morena's Corner says:
    Jul 12, 2015 at 10:06 AM

    […] challenge.    I have been experimenting with using gel medium to add images to wood.  (Click HERE to learn how to transfer images with gel medium.)  I painted gel medium onto the chair image from […]

    Reply
  3. Photo to Wood Transfer: Video Tutorial - Morena's Corner says:
    Mar 29, 2016 at 7:49 AM

    […] by wood transfer projects.  I’ve experimented with several different applications:  cutting scrapbook paper, using vintage images from books,  and transfers to fabric, but my favorite is transferring […]

    Reply
  4. How to Transfer a Photo to Wood - Morena's Corner says:
    Apr 6, 2016 at 5:52 PM

    […] so much fun and surprisingly easy to do.  I’ve transferred images to fabric and even on to painted surfaces.  Give this a try, and you’ll find yourself looking for more ways to apply this […]

    Reply
  5. Transfer Image To Wood Without Gel Medium – Wood Working Idea says:
    Oct 3, 2019 at 4:32 AM

    […] Download Image More @ http://www.morenascorner.com […]

    Reply

Leave a Reply Cancel reply

Your email address will not be published. Required fields are marked *

This site uses Akismet to reduce spam. Learn how your comment data is processed.

Yellow & orange challenge

Wood Pumpkin Basket Tutorial

People Aren’t Socks: A Book about Adoption

Make a shabby chic heart and learn my secret to making paint crackle! This pretty piece of decor is a fun way to make your own distressed decor.

Shabby Chic Heart DIY

DIY Pendant Ornaments for Christmas

lollipop ornaments

Lollipop Decor DIY: 12 Days of Crafts

Repurpose a Suitcase into a No-Sew Pet Bed

DIY Ruler Framed Chalkboard

DIY Spooky Shadow Box Decor for Halloween

Halloween Goblets DIY: Painted Glass Partyware

Halloween Goblets DIY: Painted Glass Partyware

party animal stickers

Party Animal Stickers and Speech Bubble Labels

DIY Colorful Lounger for Kids

skulls and flowers decor

Skulls and Flowers Decor: Gothic Florals DIYs

free printable wonderland tags

Alice in Wonderland Printable Tags

Coffee Mug Hanger made from a Craft Pallet

make a tropical cake topper

Tropical Cake Topper DIY with Flamingo

Pokemon Inspired Costume

Make Bony-Legged Treat Bowls

Last Minute DIY Gift: Snowman Mason Jar

Storage Cabinet Makeover: From Drab to Fab!

Morena is a participant in the Amazon Services LLC Associates Program, an affiliate advertising program designed to provide a means for sites to earn advertising fees by advertising and linking to amazon.com.

Copyright © 2023 · Pretty Creative on Genesis Framework · WordPress · Log in