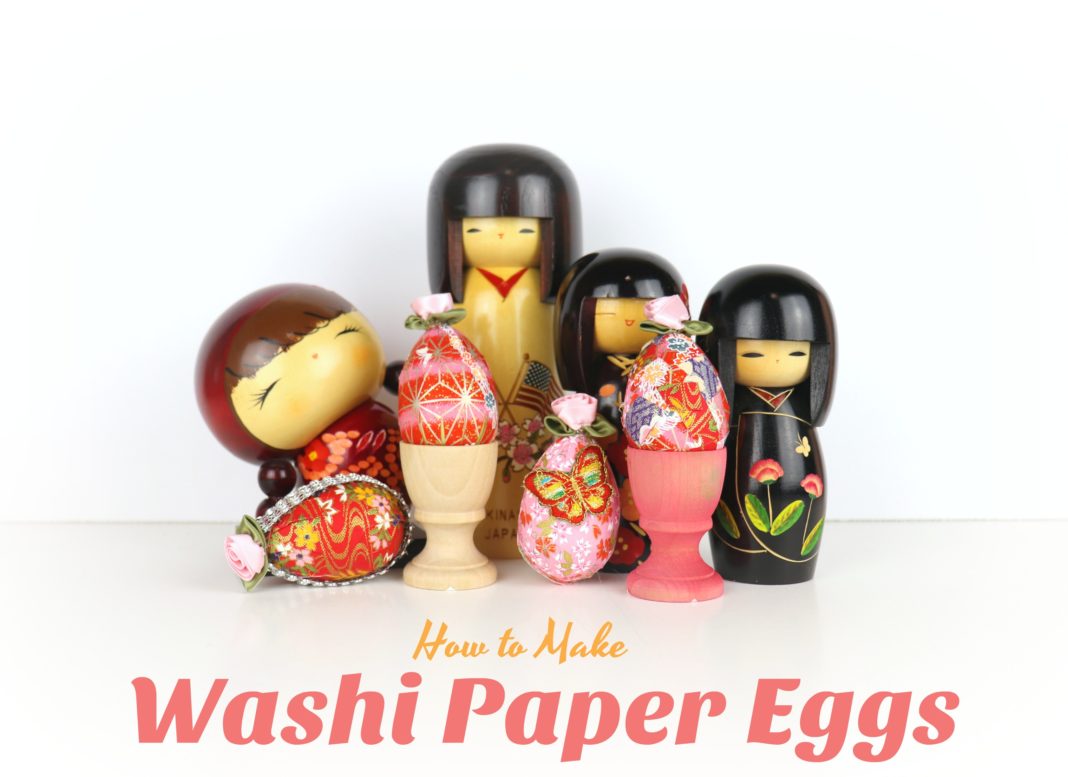
Make washi paper eggs to create springtime decor. This is a sponsored post with Xyron.
I had the incredible fortune of being able to live in Okinawa, Japan, for three years. When we first got on the island I had a ton of free time on my hands. I had left my job as a public school assistant principal to accompany my husband to his first duty station with the Navy. We were eagerly awaiting the adoption of our first child, so I decided not to look for a job since we had no idea when we would get notice of our referral. I was in limbo in paradise.
I filled my days by immersing myself in the local culture. Afternoon teas with my landlady. Shopping excursions at my local hundred yen store. Taking loads of classes offered on base. From language lessons to cooking classes to craft classes, I soaked it all up. Ineviteably, the craft classes were my favorite ones. I was introduced to washi paper, a traditionally handmade paper that is beautifully decorated. I fell in love with it. Washi paper is used in multiple Japanese traditional crafts, and one of my favorite classes was where we used a decoupage style process to decorate eggs.
This project is fairly true to what I learned in Japan with one notably less messy exception: I used my Xyron Creative Station instead of liquid glue. This cut down on the mess and made the project much quicker since I didn’t have to wait for glue to dry! Here’s how to make washi paper eggs.
Supplies Used to Make Washi Paper Eggs: (affiliate links included)
- Yuzen Washi Paper 5.5″ x 5.5″, Japanese Chiyogami Washi Paper 30 Sheets
- Xyron Creative Station Lite (5 Inch with 3 Inch Option)
- Plastic Eggs
- Various Embellishments
- Measuring Tape
- Xyron Sticker Maker XRN150 “X” 1.5 inch
Measure the length of the egg from the top to the bottom. This is how tall your paper should be trimmed. Mark it on the back of the washi paper.
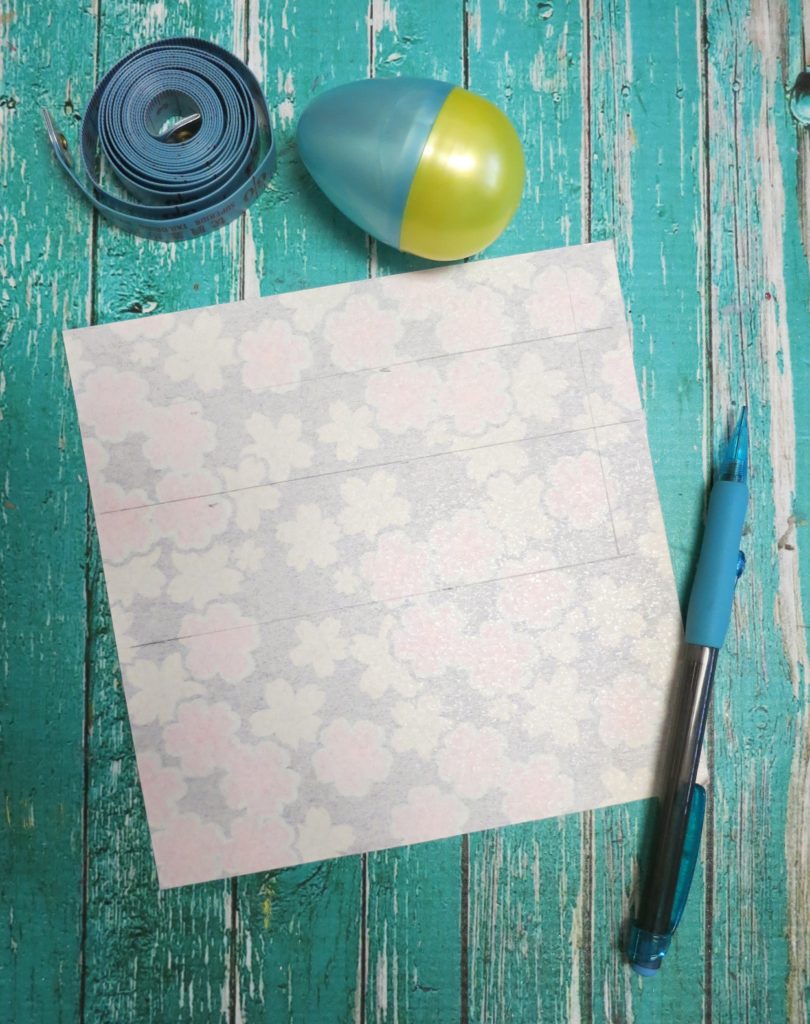
Measure the circumference of the egg. This is how wide your paper will be. Use a pencil to draw this on the paper back.
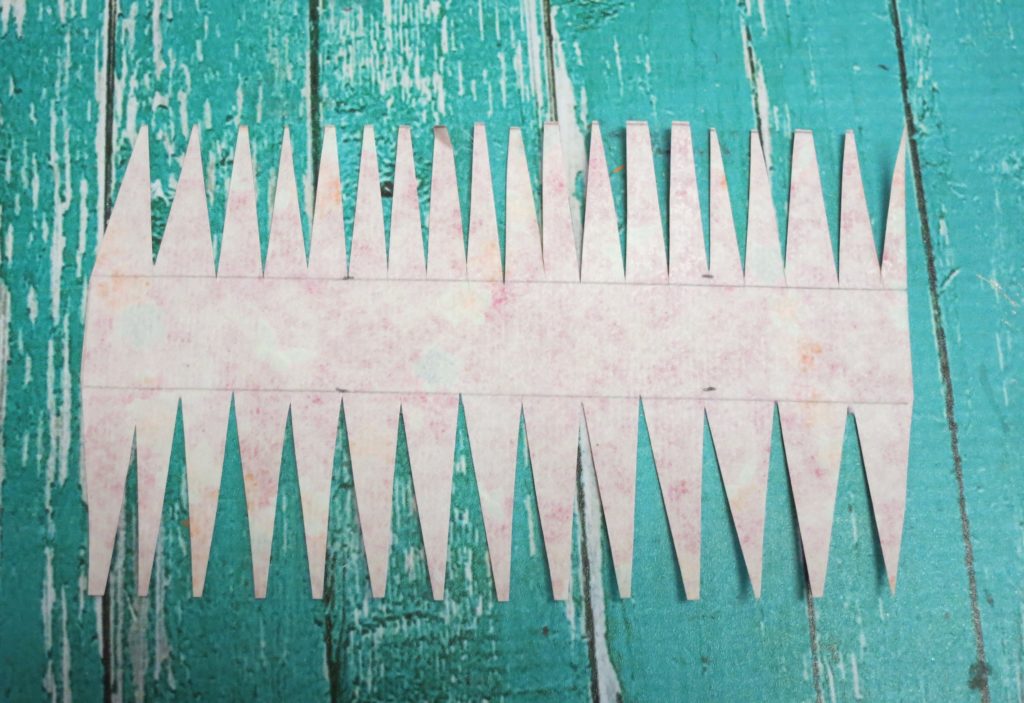
Draw a line where the widest part of the egg is. Draw lines one centimeter above and below this line.
Cut thin, narrow “v” shapes going from the edge of the paper to the lines marked in the last step. To do this correctly, I should have used my ruler to measure and draw perfectly spaced lines. I’m a bit of a lazy crafter and cut corners here. 
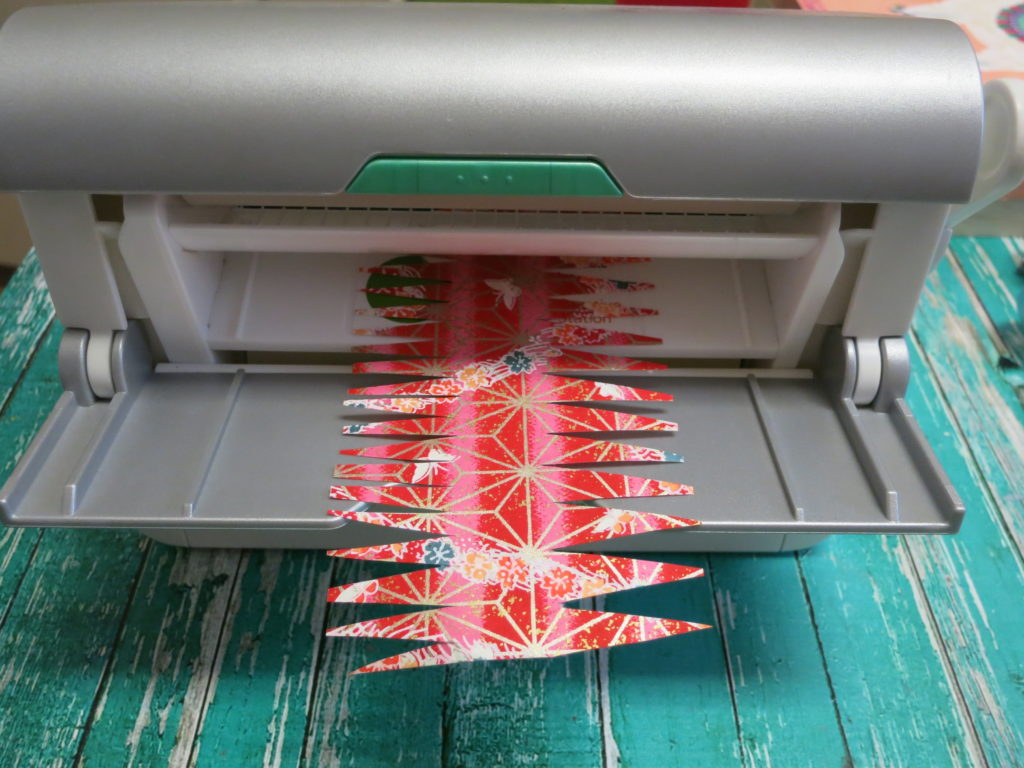
Place the cut washi paper in the Xyron Creative Station to turn the paper cut into one big sticker.
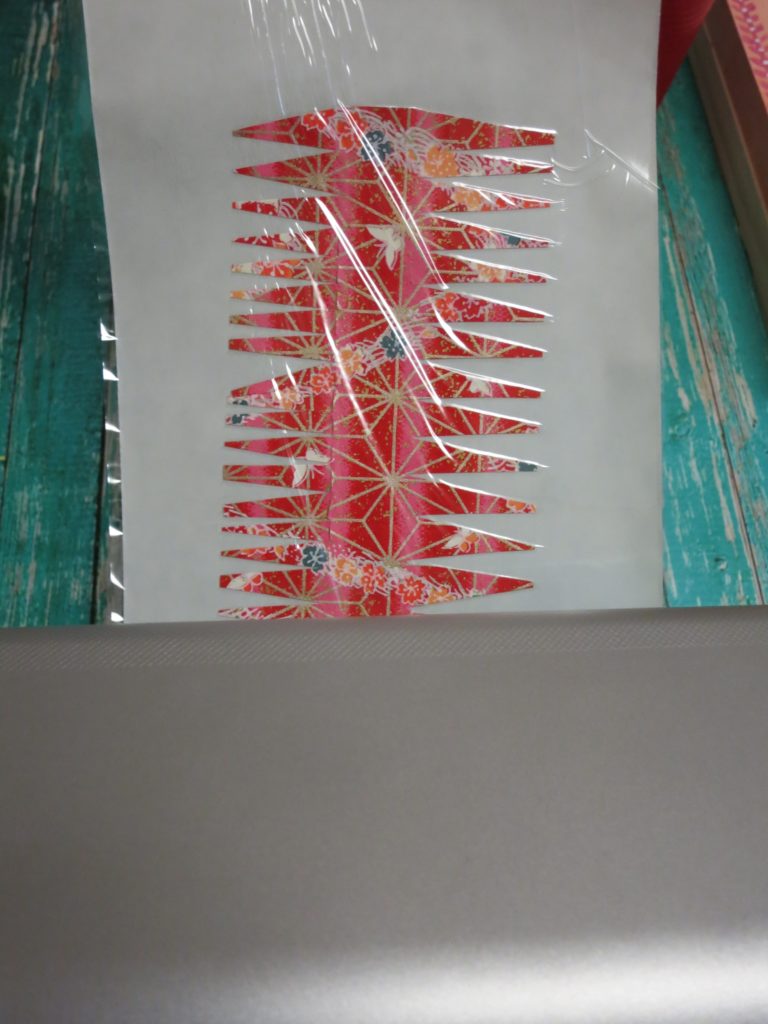
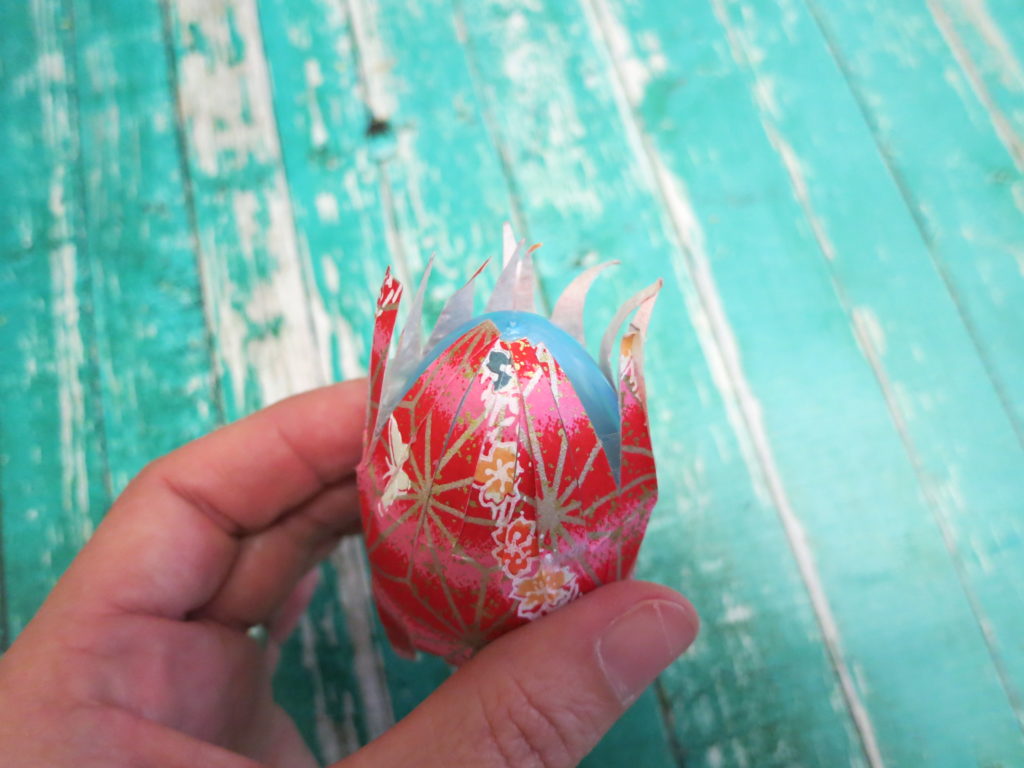
Peel the paper off the backing and wrap the center of the paper around the widest part of the egg. Press it down.
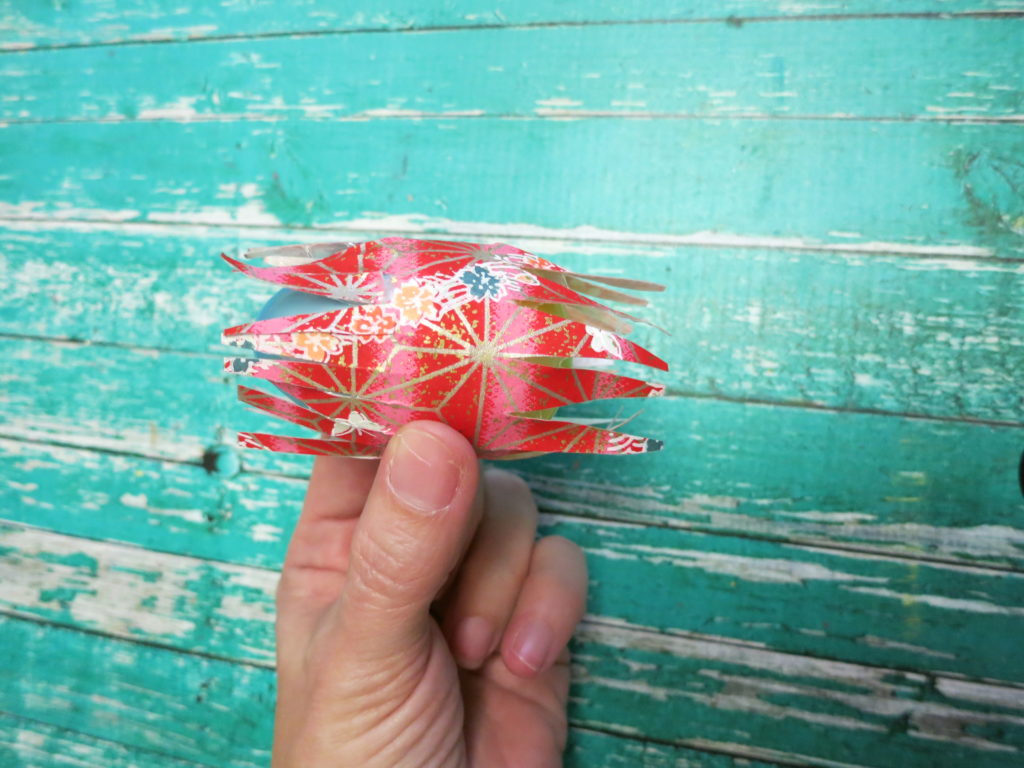
Fold each triangle down one at a time. Continue until the egg is covered. Press and smooth out any bumps in the paper.
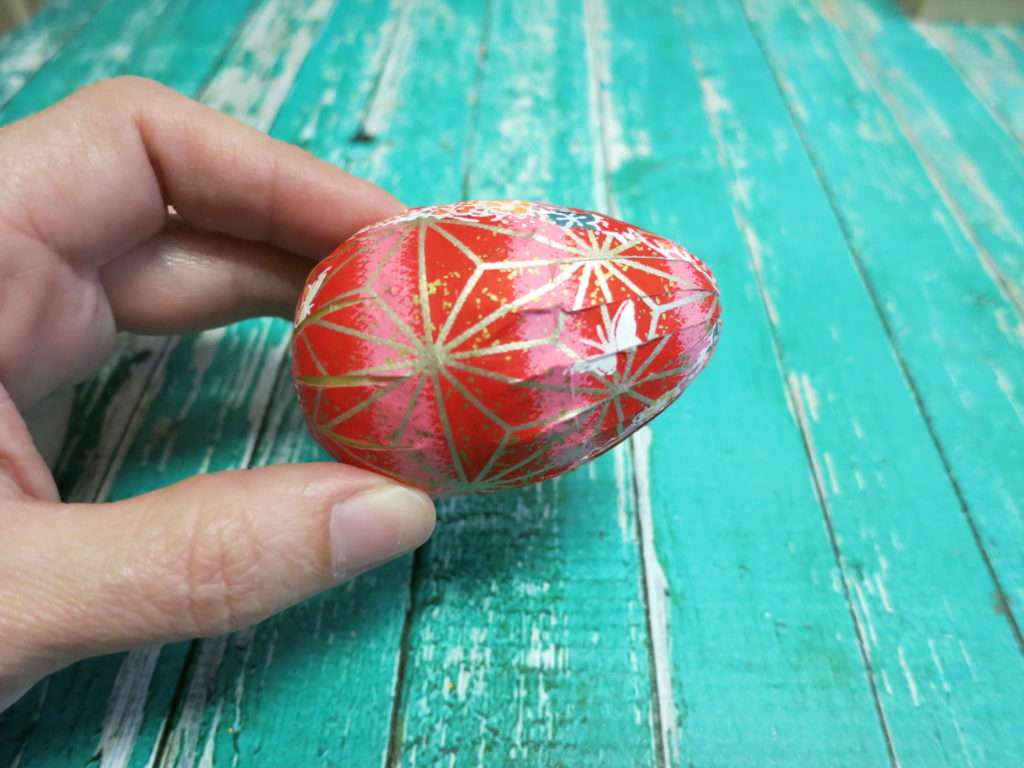
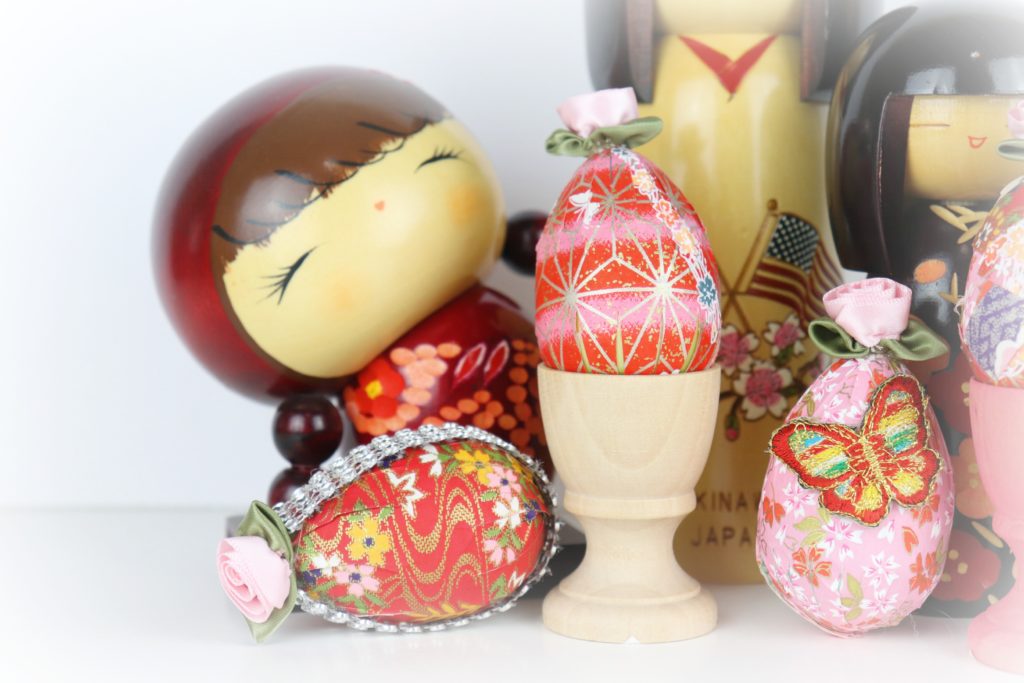
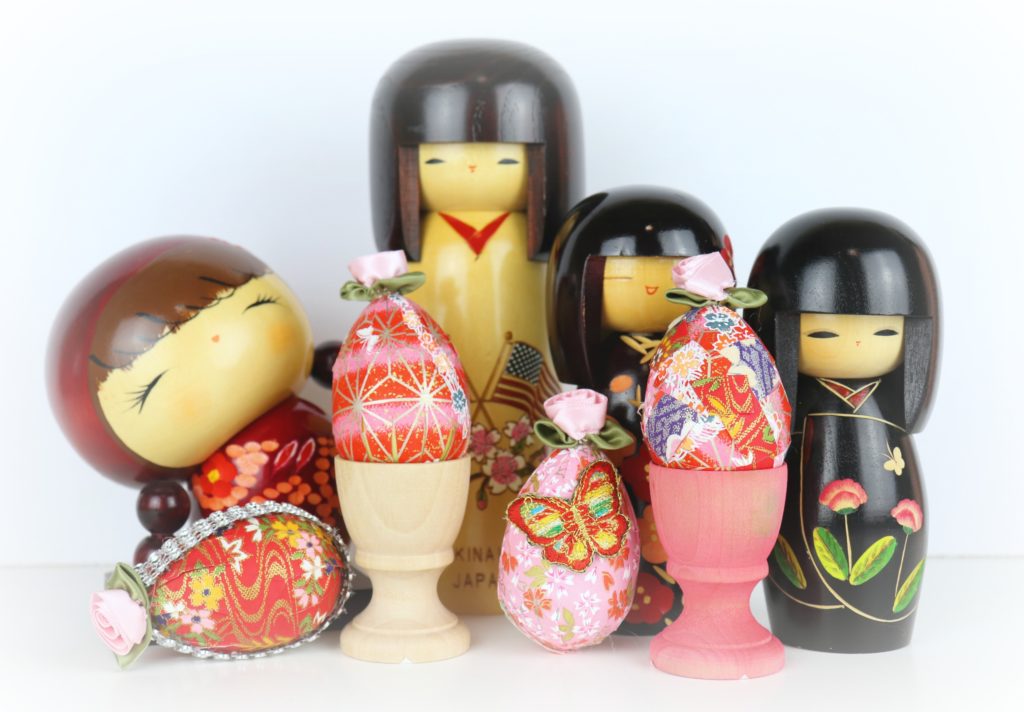
Since you don’t have to wait for glue to dry, you can immediately start decorating your eggs! Add fabric flowers, lace, rhinestones, and anything else that makes you happy. Gather all your eggs to create unique handmade decor this spring.

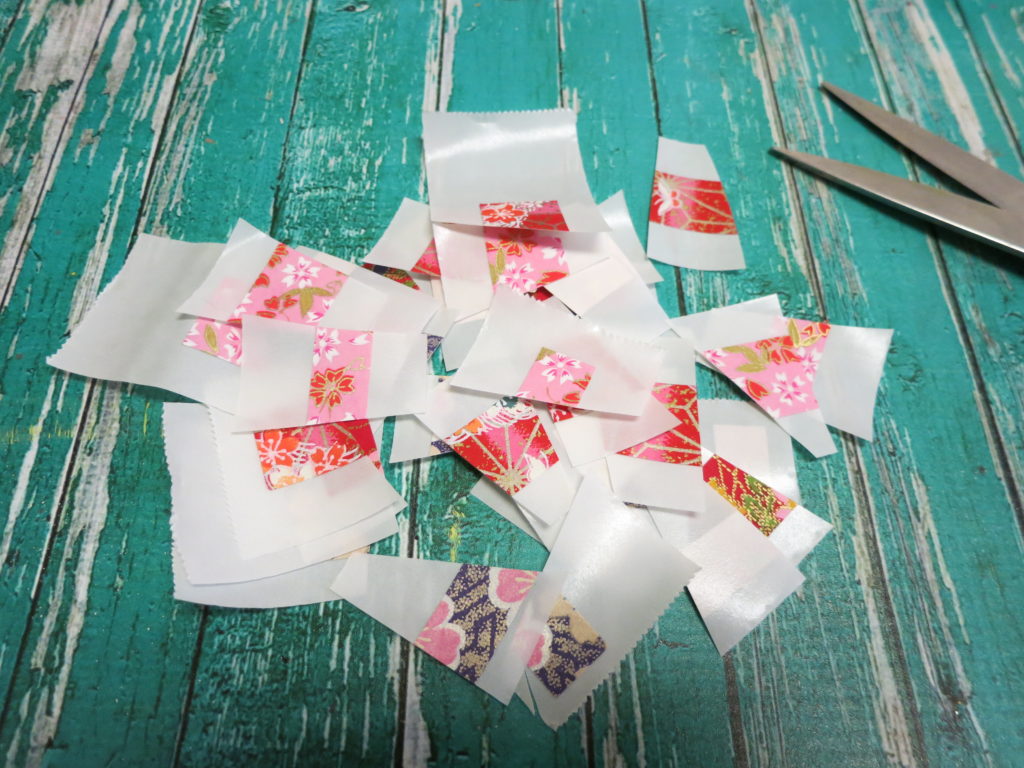
Because I love washi paper too much to throw away the scraps, I rolled my remnants through my Xyron sticker maker and cut them into small pieces. I created a patchwork like finish on one of the eggs. Quick and colorful! Have fun crafting washi paper eggs this spring!


Leave a Reply