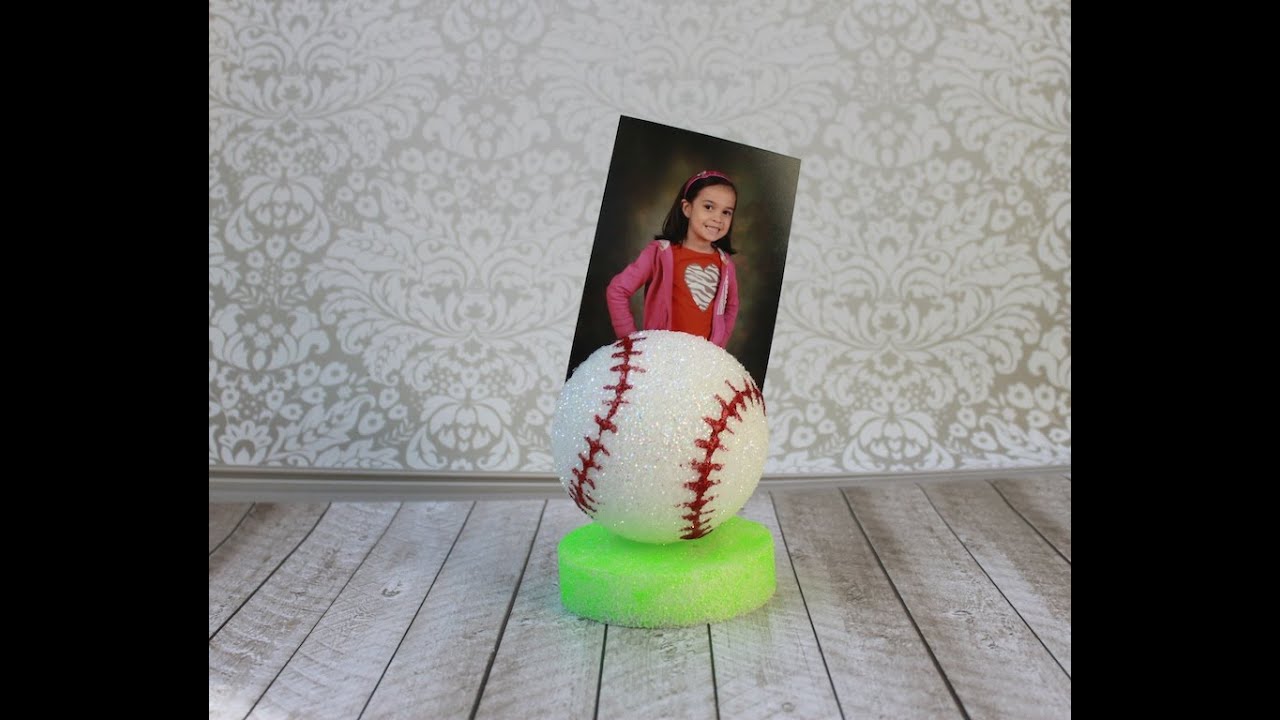
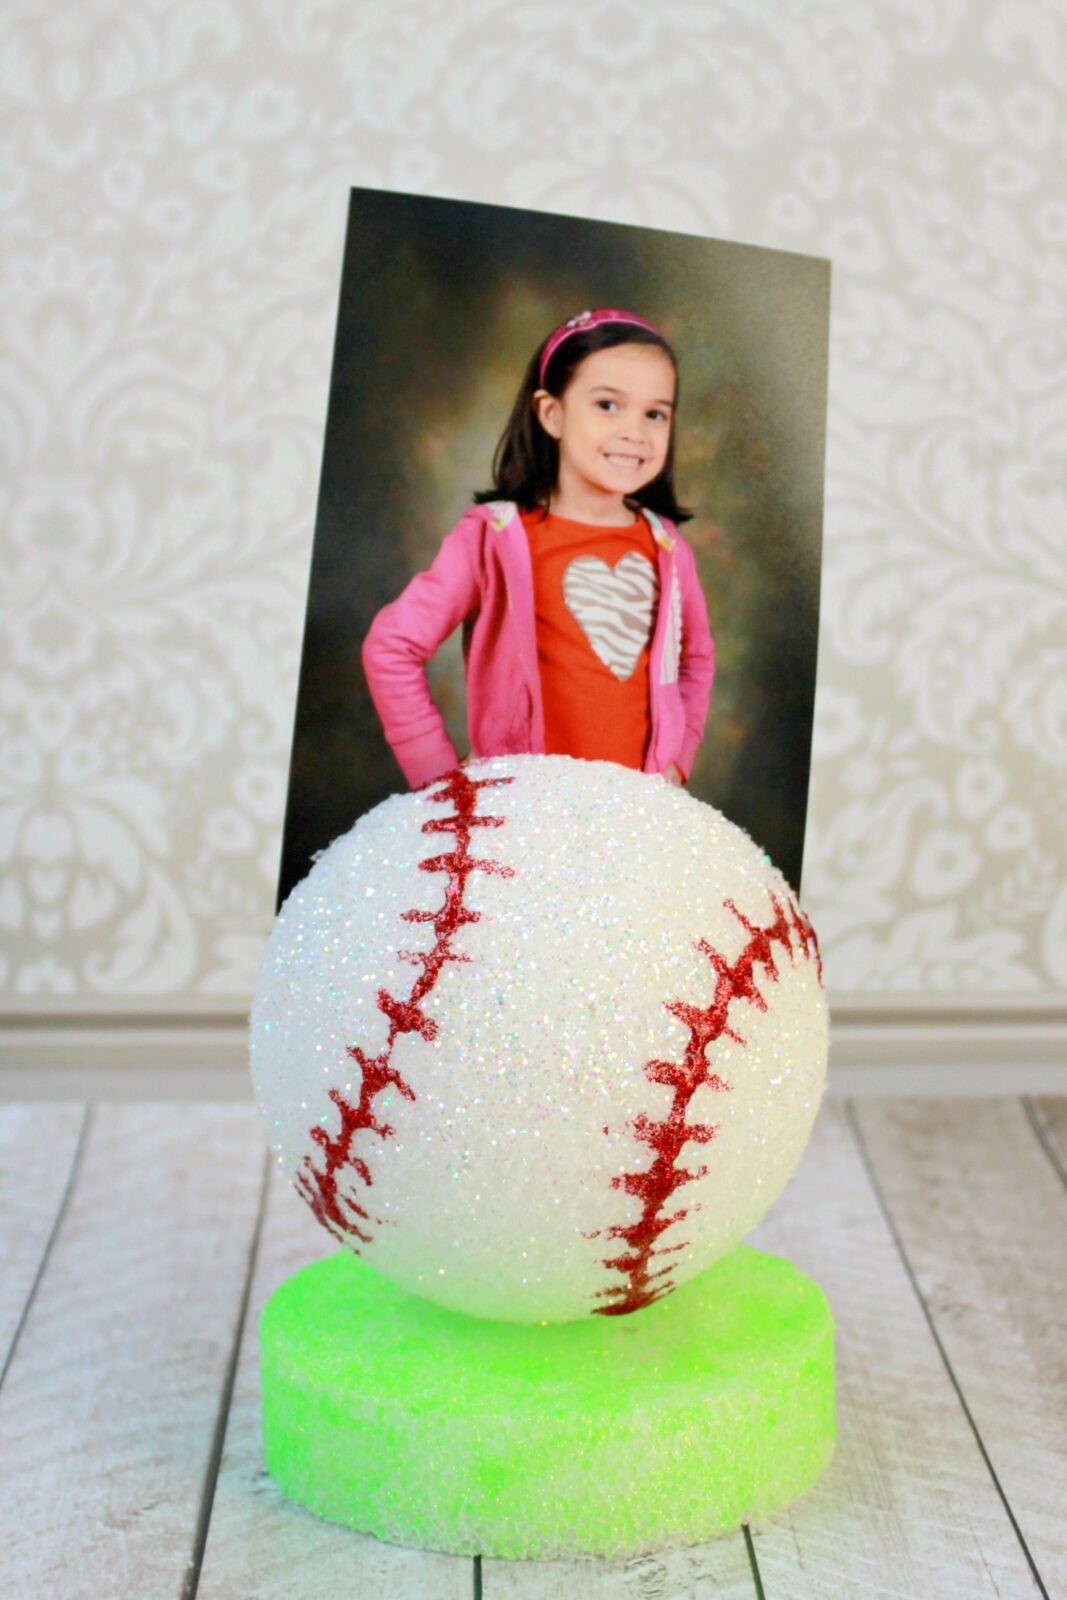
This baseball photo holder is a fun and easy craft for kids to make!
A few years ago I was thrilled to have the opportunity to contribute crafts to Hands on Crafts for Kids. Their site is jam packed with loads of fun craft projects to make with kids. If your kids are getting restless this summer, the Hands on Crafts for Kids site has lots of fun projects to keep them occupied. Teachers will love these activities, too!
I don’t have step by step photos for this project, but the short video above has everything you need to know to make this cute project.
Supplies Used to Make the Baseball Photo Holder:
- Round styrofoam ball
- Circle Styrofoam
- Green glitter Elmer’s Glue
- Clear or white glue
- Iridescent or white glitter
- Red Glitter Glue Pen
- Plastic knife
- Toothpick
Paint the base styrofoam piece with green glitter glue. This will look like a grassy field for the baseball to set on.
Cut a slit in the center of the ball. Kids can use a plastic knife to do this on their own, or an adult can help. The cut should be just wide enough and deep enough to hold a photo or memento.
Paint the ball with clear or white glue. Sprinkle the wet glue with white glitter. Let it dry.
Use the red glitter glue to draw the laces on the ball. Start by making the letter “c” on both sides of the cut section of the ball. Then make small dash lines or the letter “v” on the line. You can also use a red permanent marker instead of the glitter glue pen.
Use a toothpick to attach the ball to the stand. Stick one end of the toothpick in the ball, add a dot of glue to the other end and stick it into the base.
This fun baseball photo holder could also be used for holding ticket stubs, messages, notes, or anything else you want to display! For more fun kids crafts, check out my complete listing in the tutorials section.
Leave a Reply