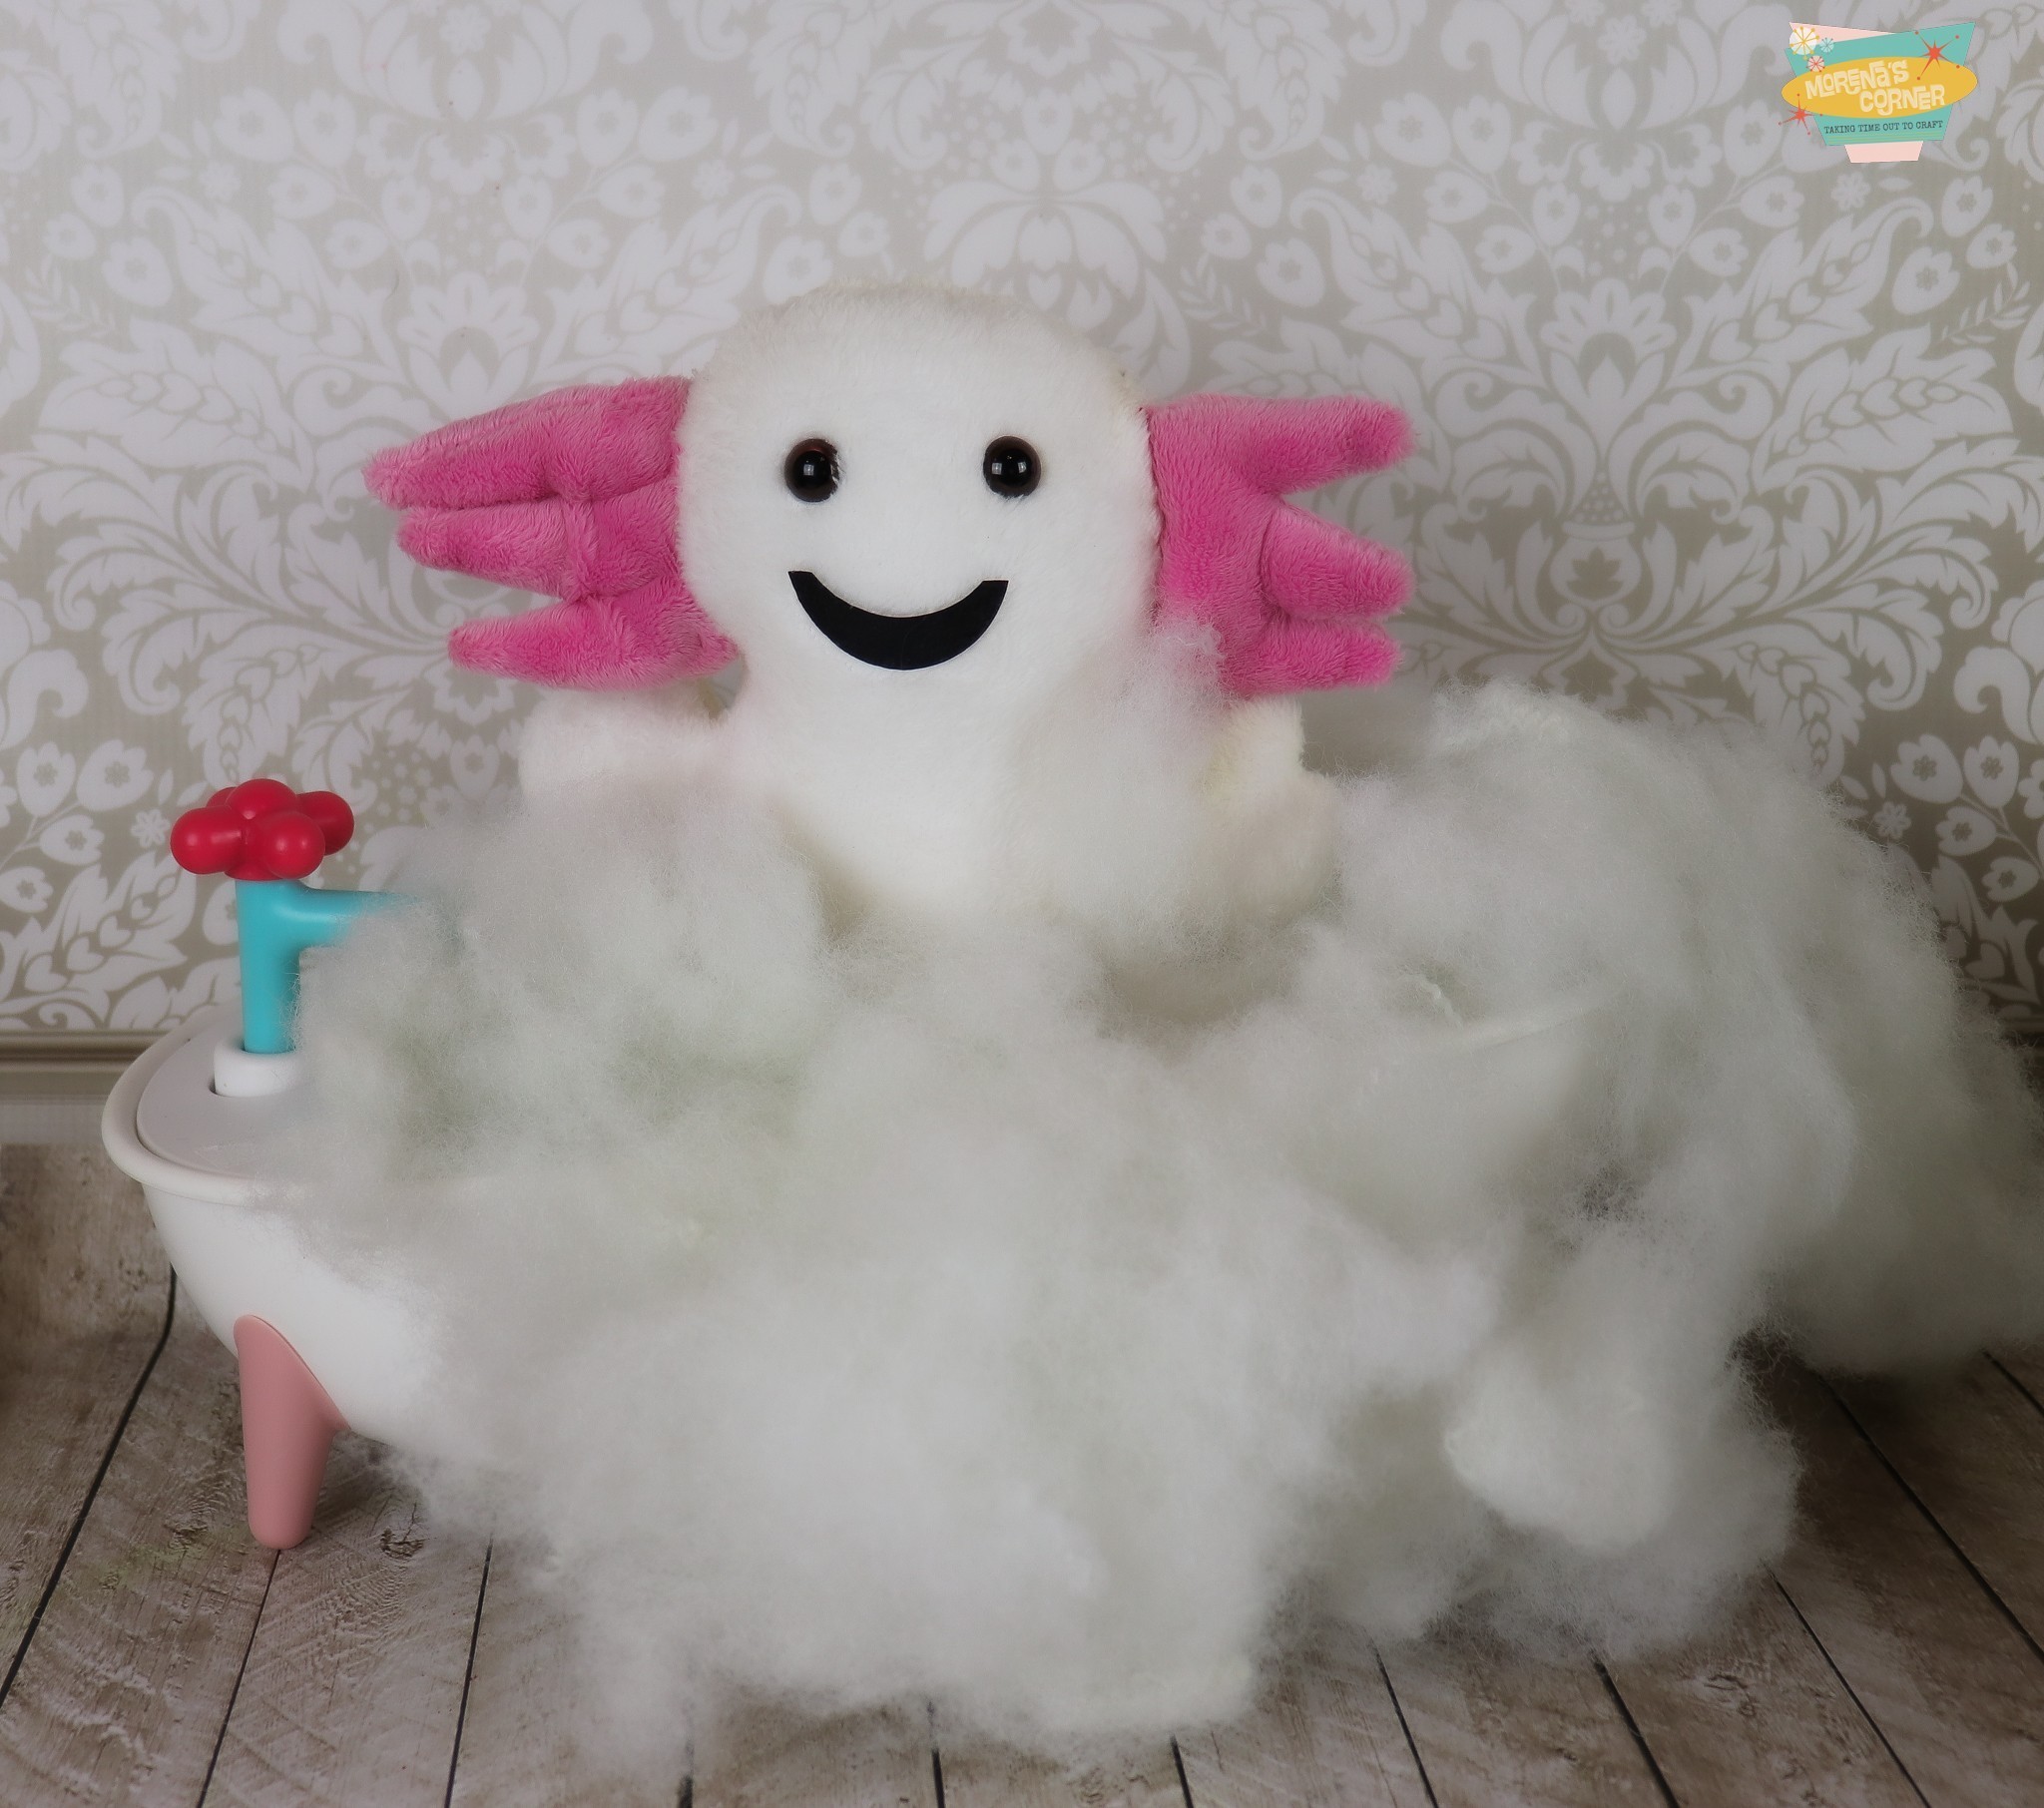
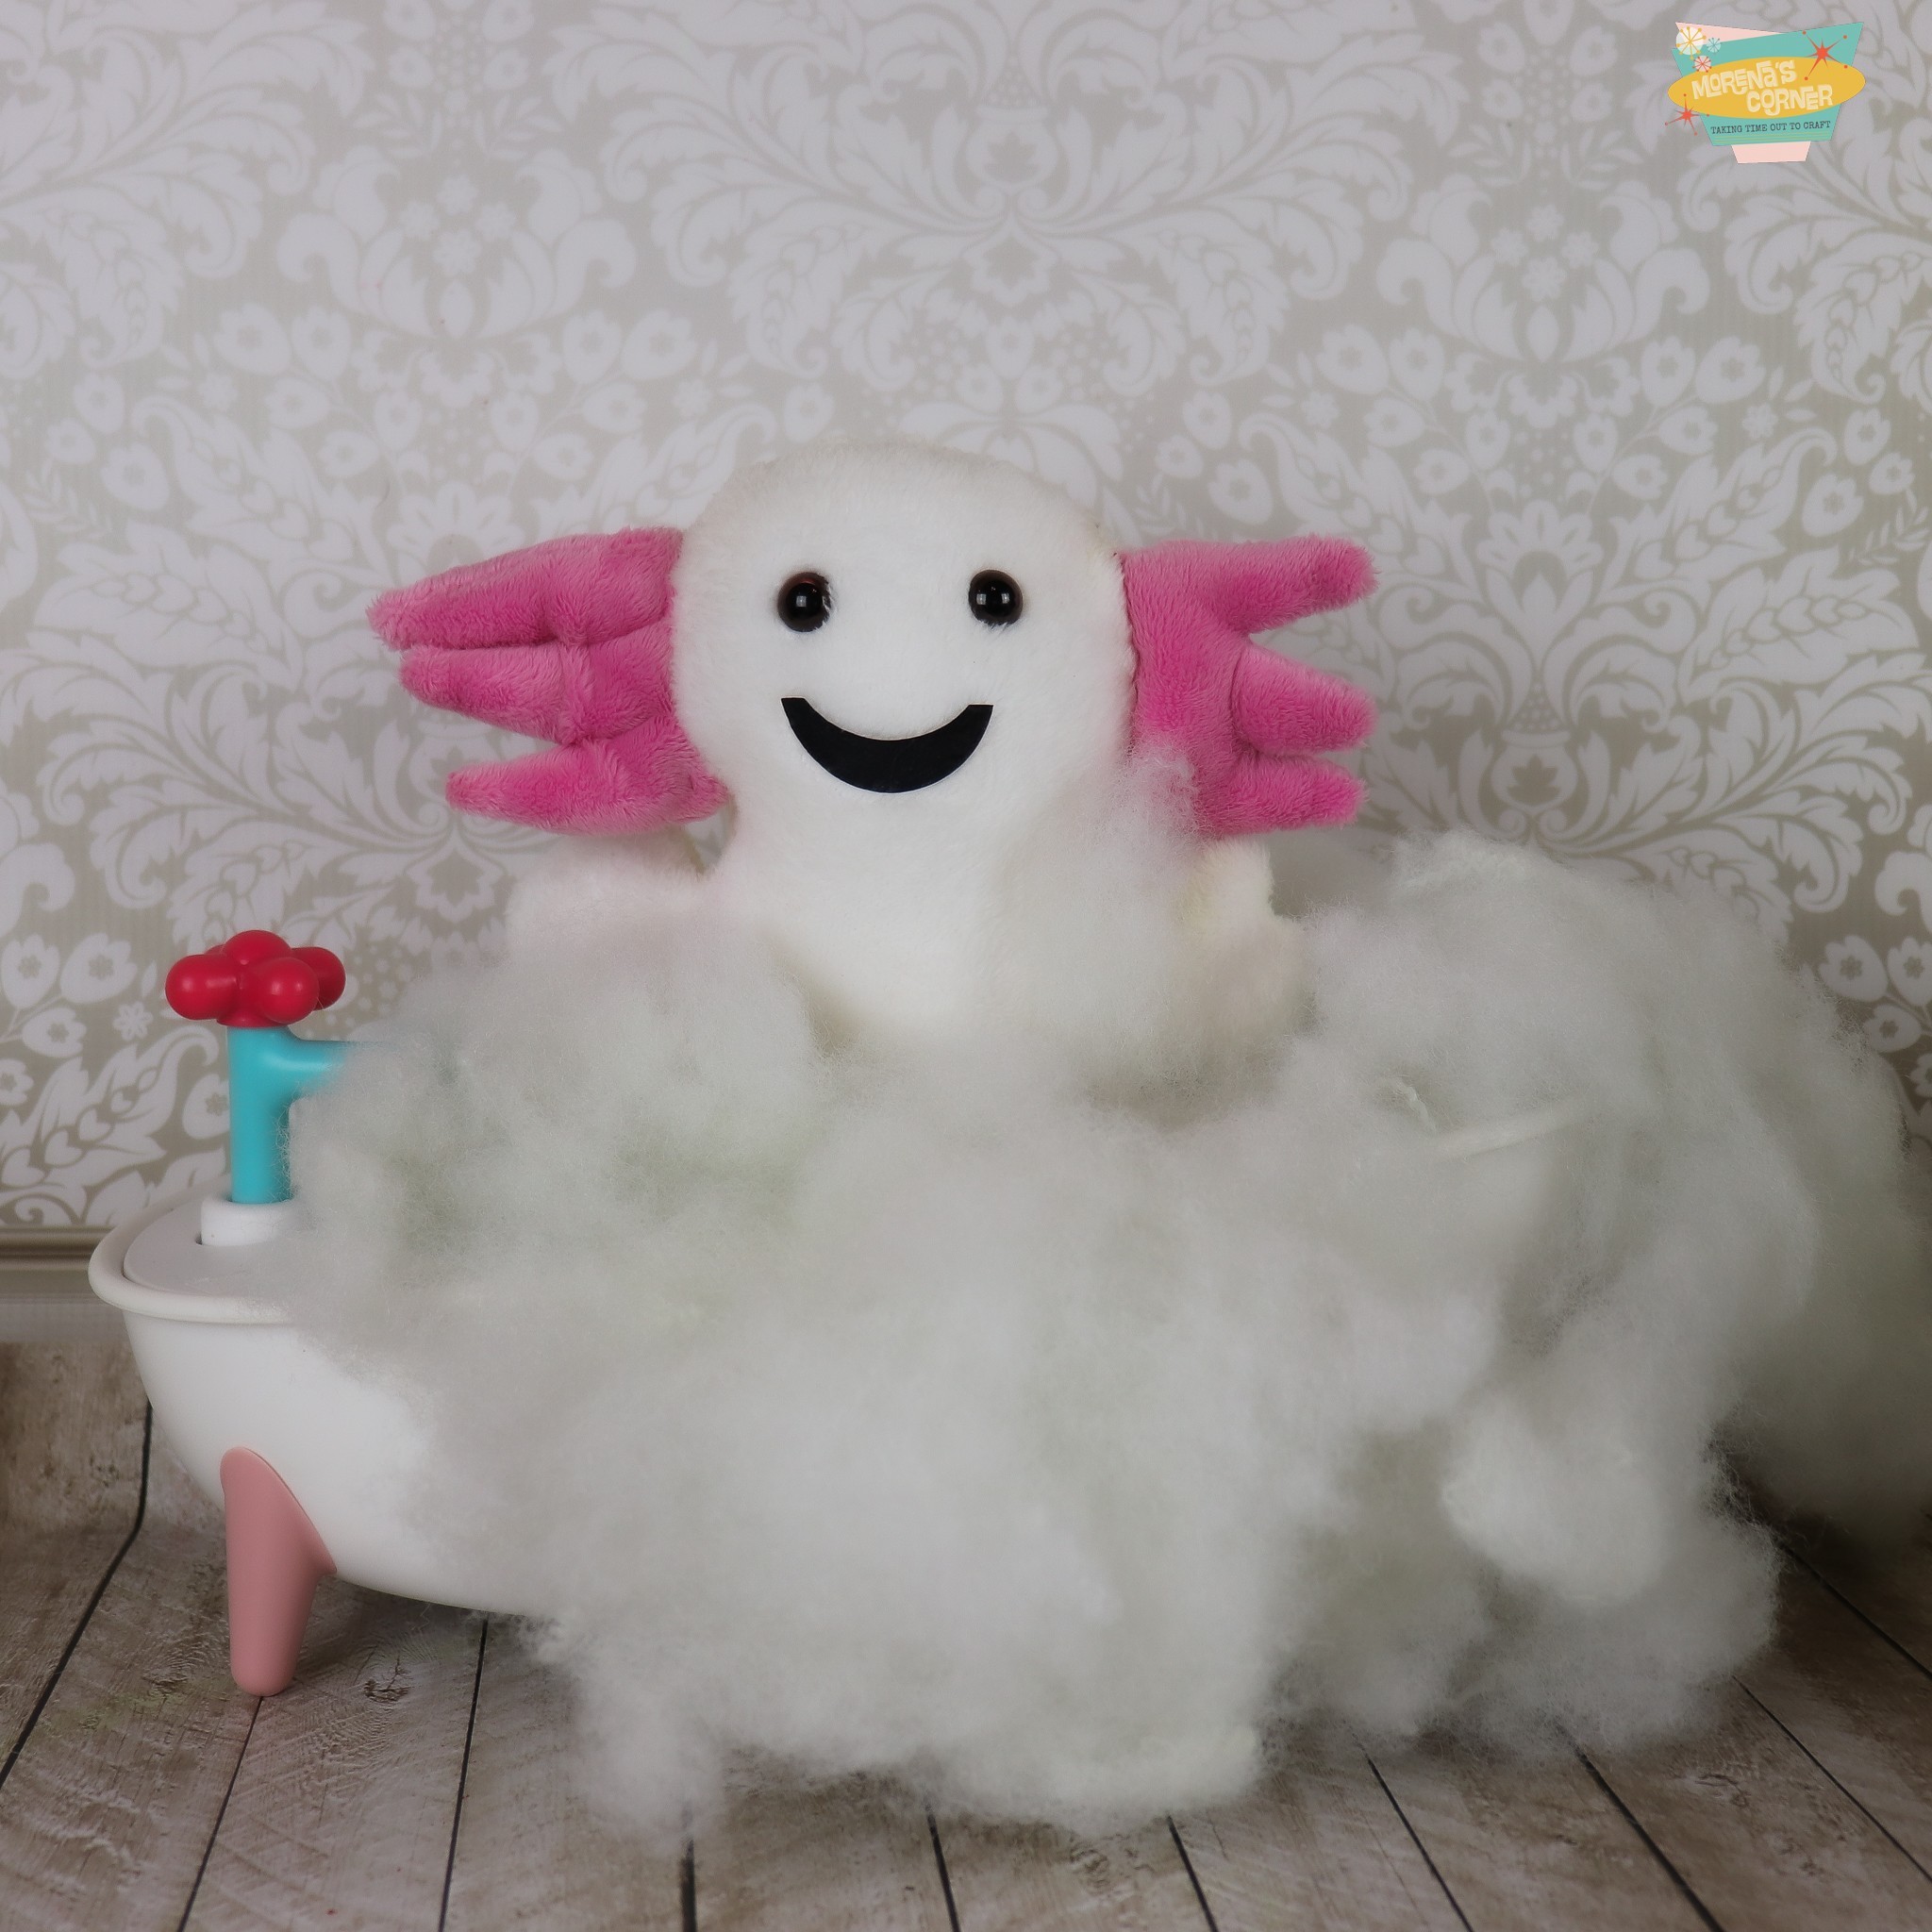
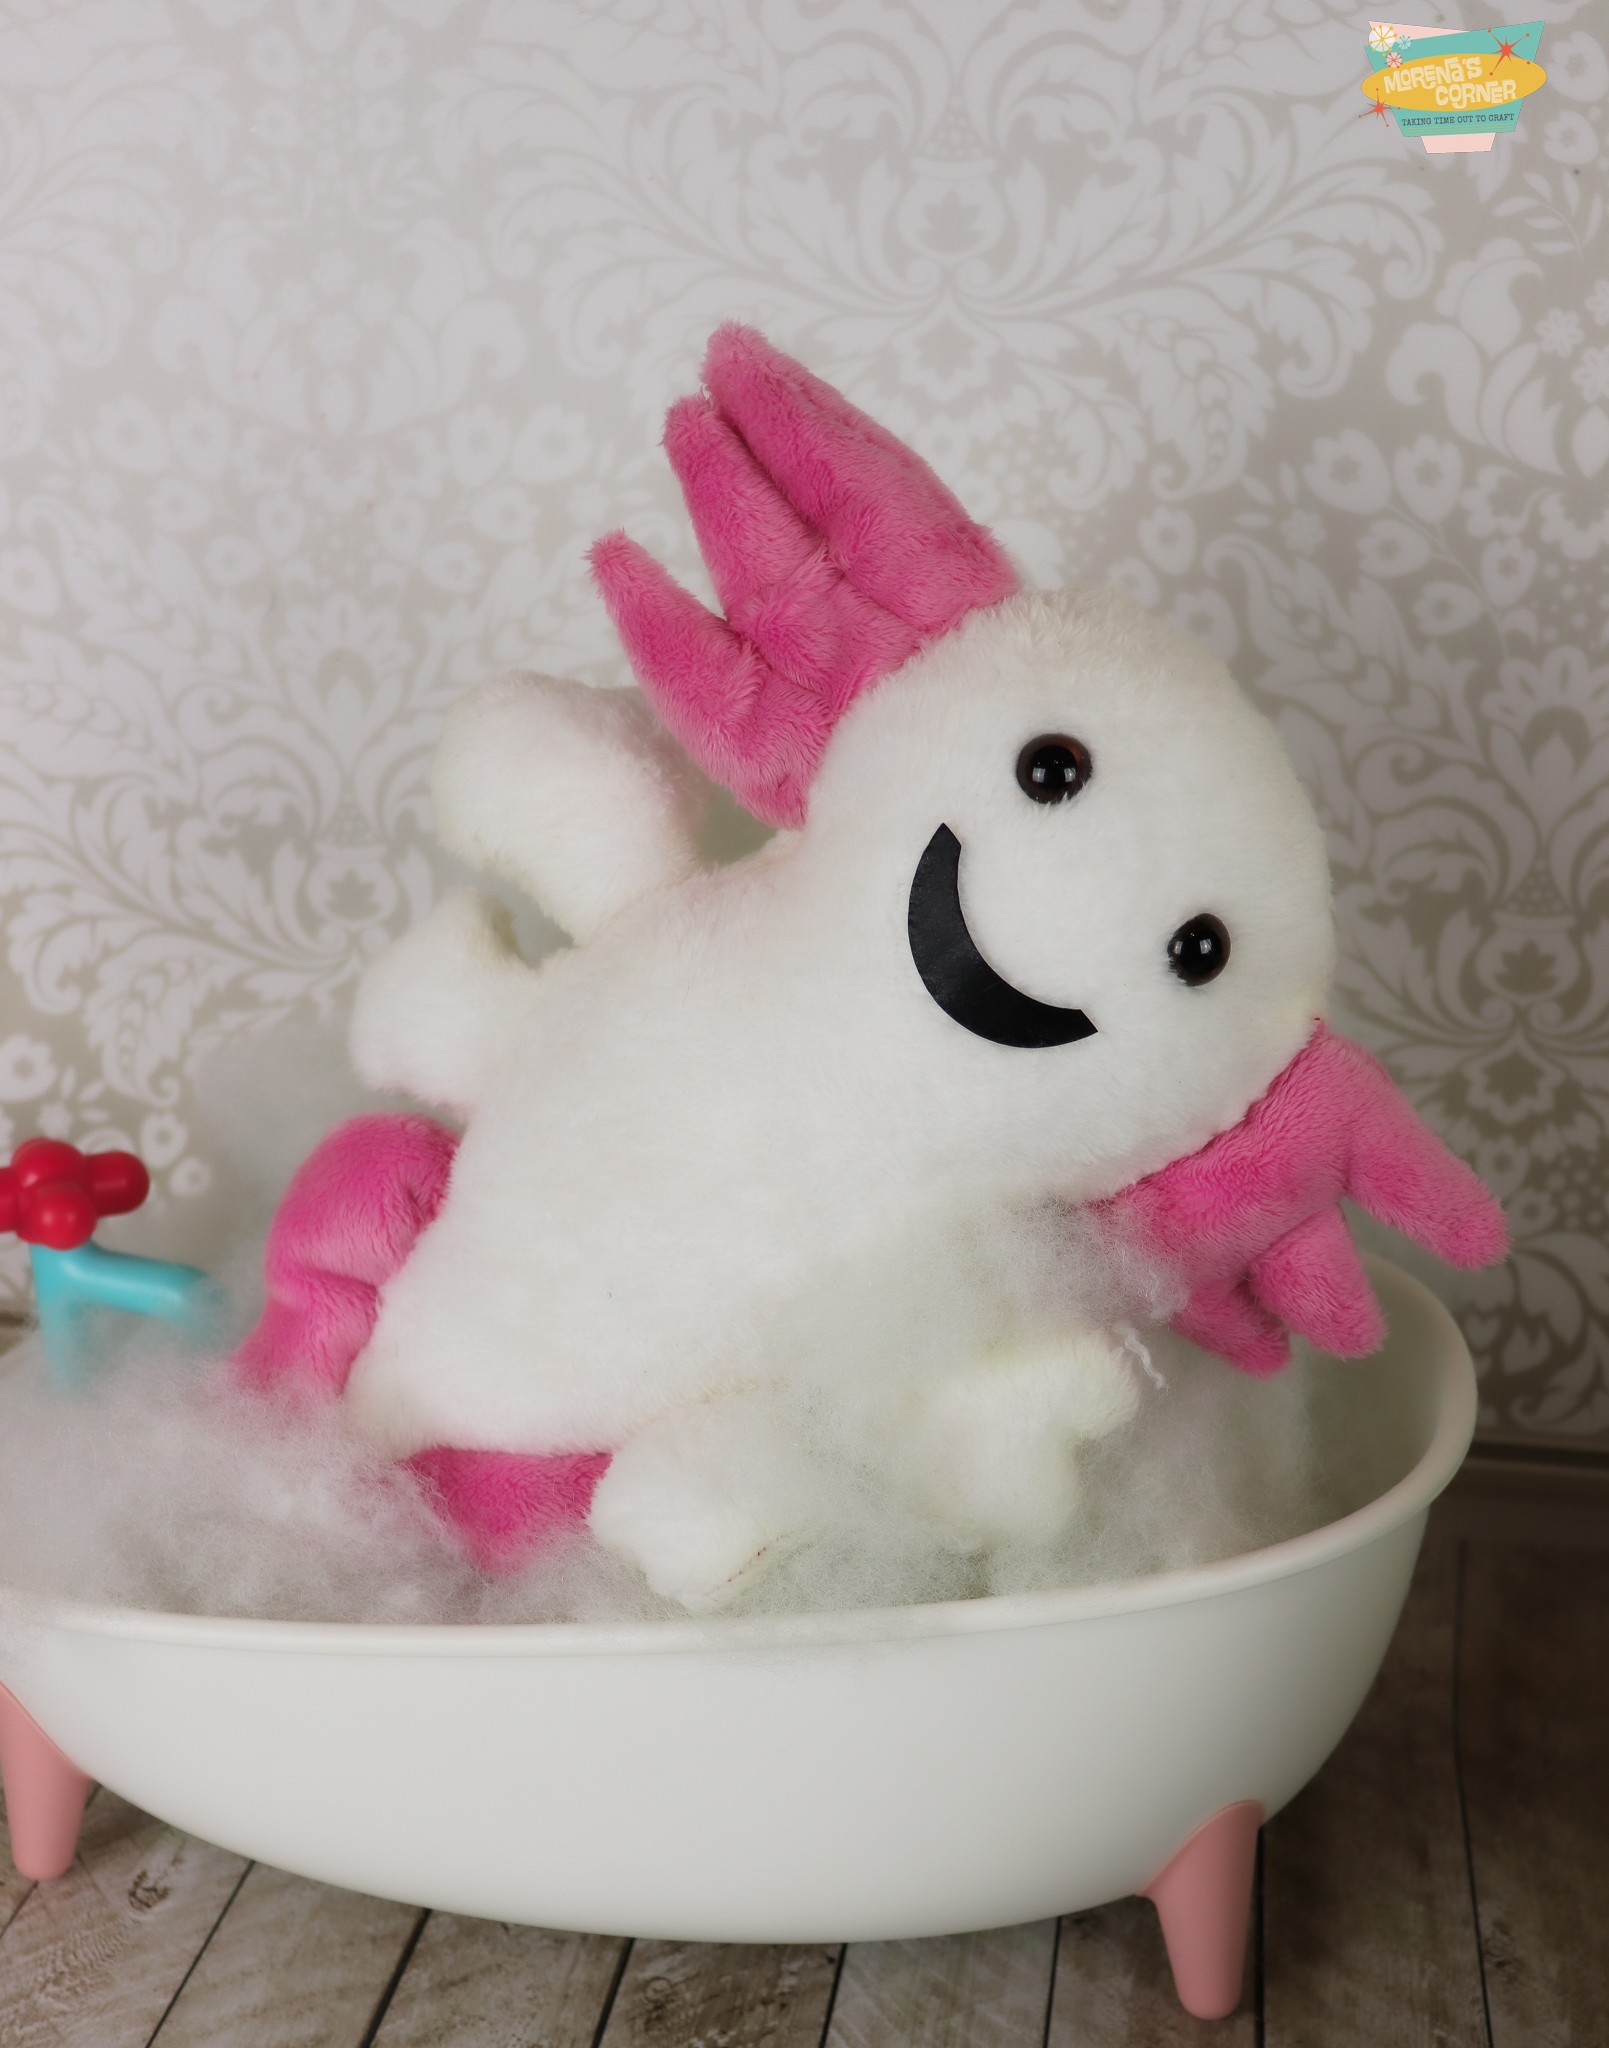
Grab a bag of Poly-Fil Fiber Fill and follow this adorable axolotl plush tutorial with me!

Last summer I was THRILLED to share that the four patterns I had designed for Fairfield World’s 12 ounce bags of Poly-Fil had made their debut at Hobby Lobby Stores. You can see my four plushies with the matching patterns in store in this short video:
I’ve had a few questions about the axolotl plushie, which seems to be a favorite, so I made a short video tutorial that shows exactly how to make this adorable stuffed toy with Poly-Fil.
Axolotl Plush Tutorial Supplies
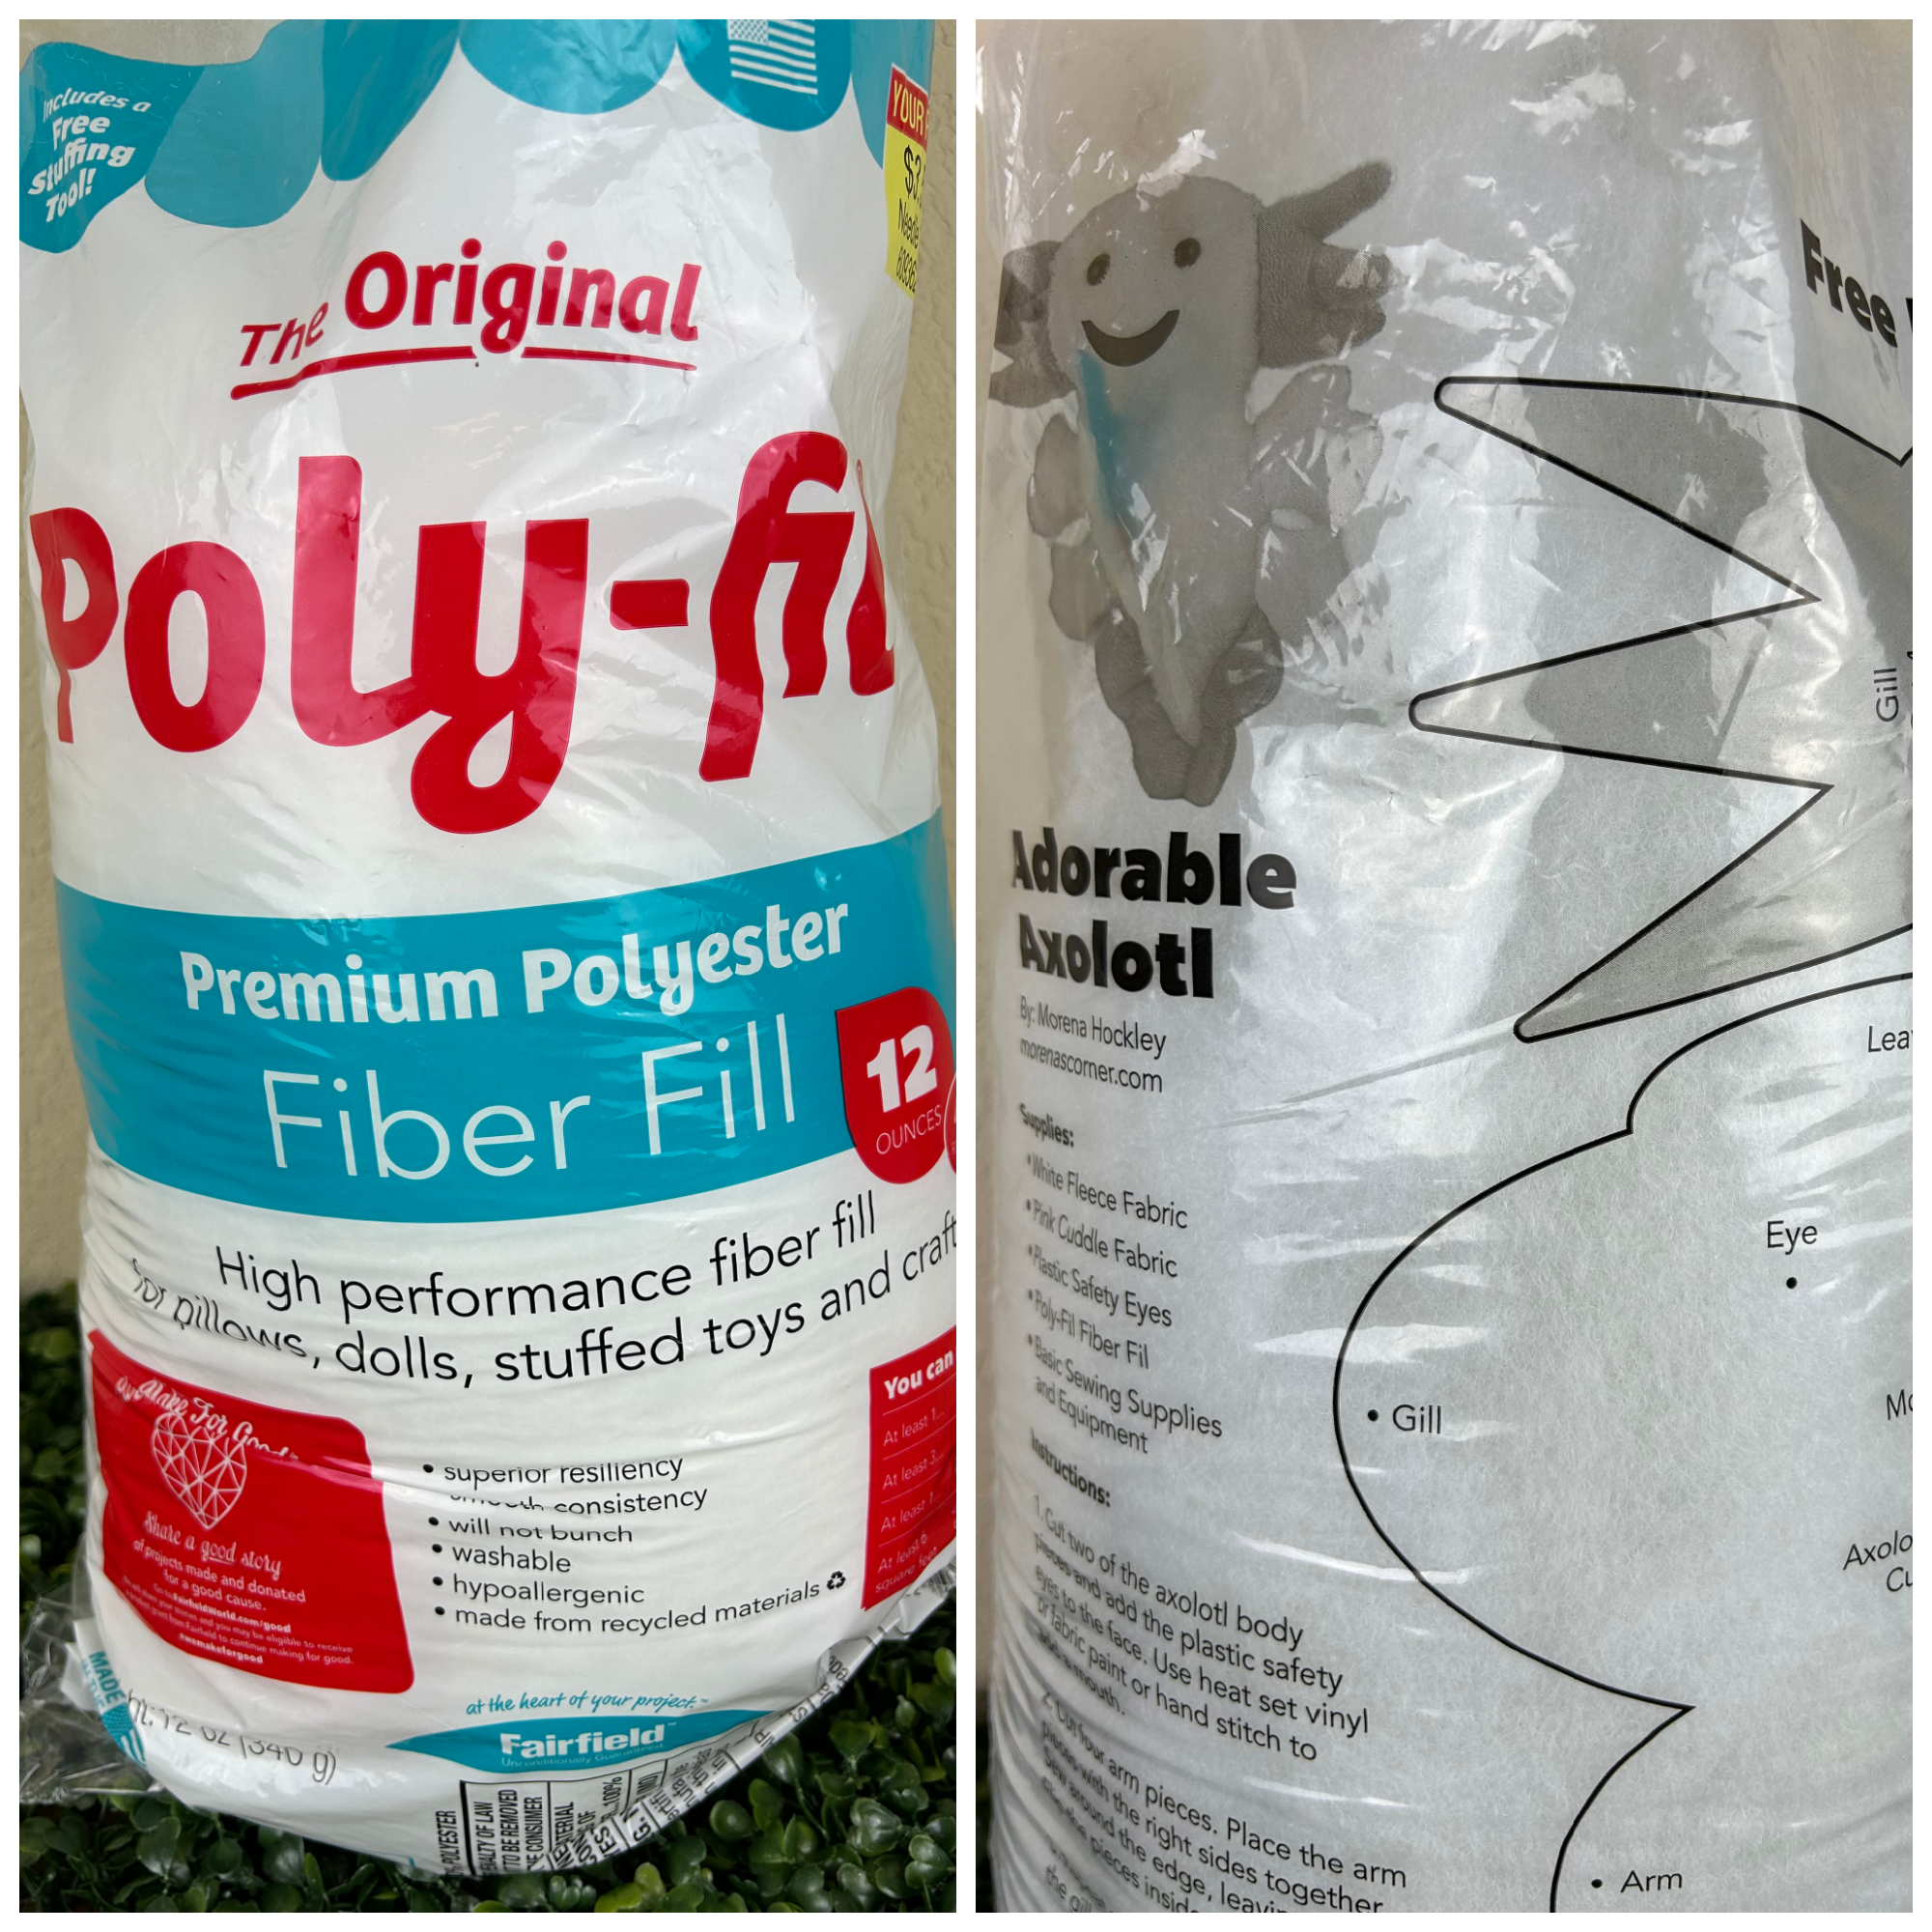
- Poly-Fil Fiber Fill 12 oz bag at Hobby Lobby with Free Pattern
- White Minky Fabric
- Pink Minky Fabric
- Safety Eyes
- Heat Set Vinyl (black)
Notes: You can use any fabric you like; I’m just sharing what I used. If you prefer to hand sew these you can blanket stitch the edges so you won’t have to flip the pieces inside out.
Instructions:
- Cut two of the axolotl body pieces out. Before sewing, add the plastic safety eyes to the face. Use heat seat vinyl, felt or fabric paint to add a mouth if desired.
- Place the arm pieces with the right sides together. Sew around the outer edge, leaving
the end open. Flip the pieces inside out. - Repeat step one with the leg pieces, the fringe for the head, and the tail piece.
- Fill the arms, legs, and head fringe with Poly-Fil fiber fill.
- Place a very small amount of Poly-Fil in the tail piece.
- Start with the tail at the end of the axolotl. For beginners it will be easier to pin the tail inside the top and bottom pieces with the right side of the fabric showing. Hand stitch the pieces together to close the plush end. If using a sewing machine, I found it easier to pin one side of the tail in place and sew that edge closed. Then roll and tuck the other side of the tail inside, pink it, and sew. See the video for more detail.
- Next add the bottom legs (the smaller ones) and hand stitch or sew in place. Repeat with the upper arms and then the head gills.
- Stitch or hand sew around the edge of the body, leaving an opening at the top of the
head. - Flip the axolotl plush inside out (if needed) and fill the body and head with Poly-Fil. Hand stitch the opening at the top of the head closed.
Have fun crafting and creating your own adorable axolotl plush DIY!
Leave a Reply