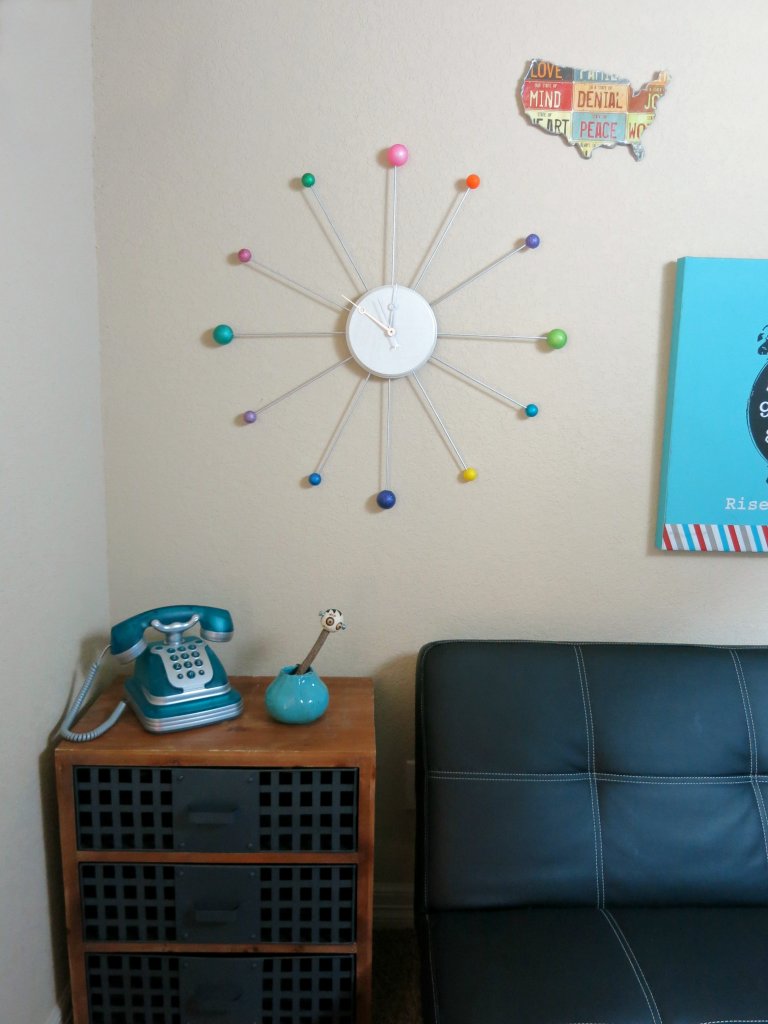
This DIY atomic retro clock is a budget friendly way to create decor. This project is perfect for photo opps, party or dorm decor!
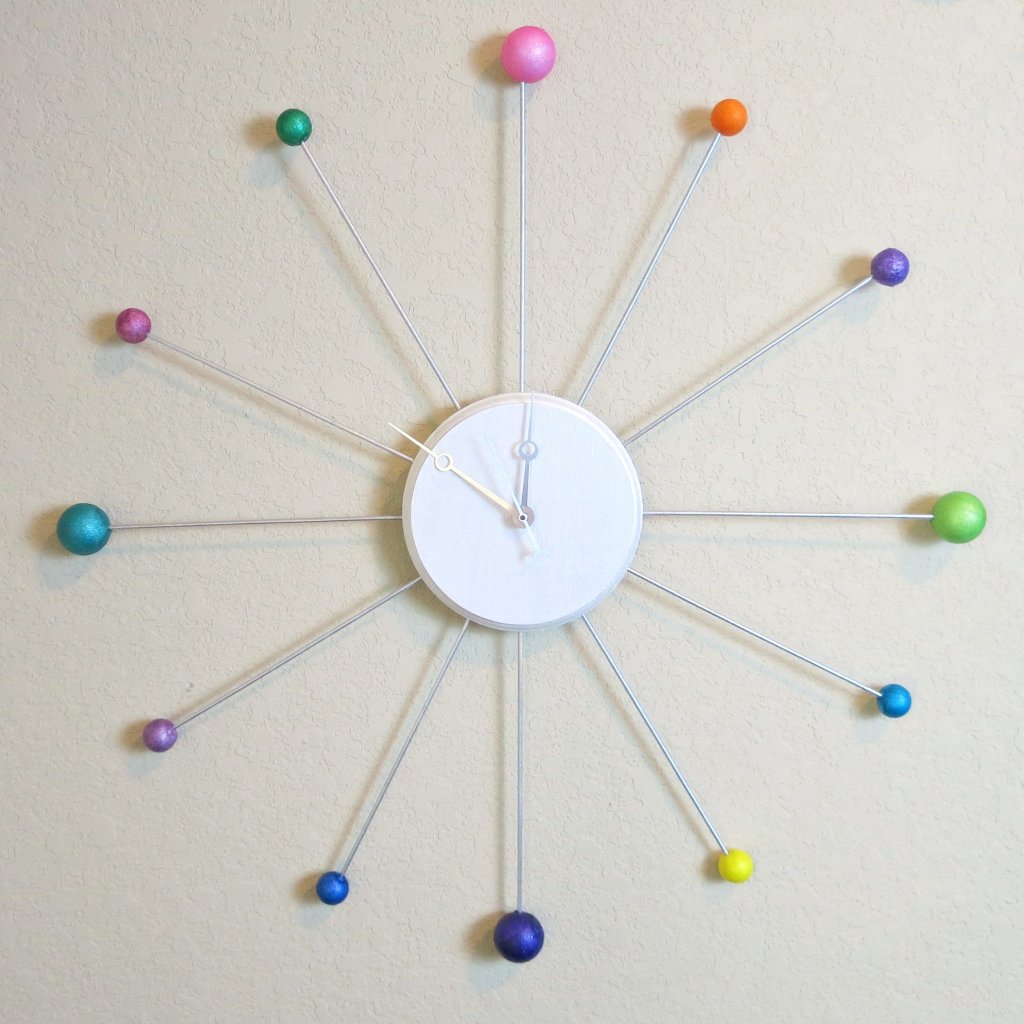
If you’re as crazy about retro designs and mid century modern styling as I am, then you’re going to love this project! I made an “atomic” wall clock that’s colorful, shiny, and makes an impact.
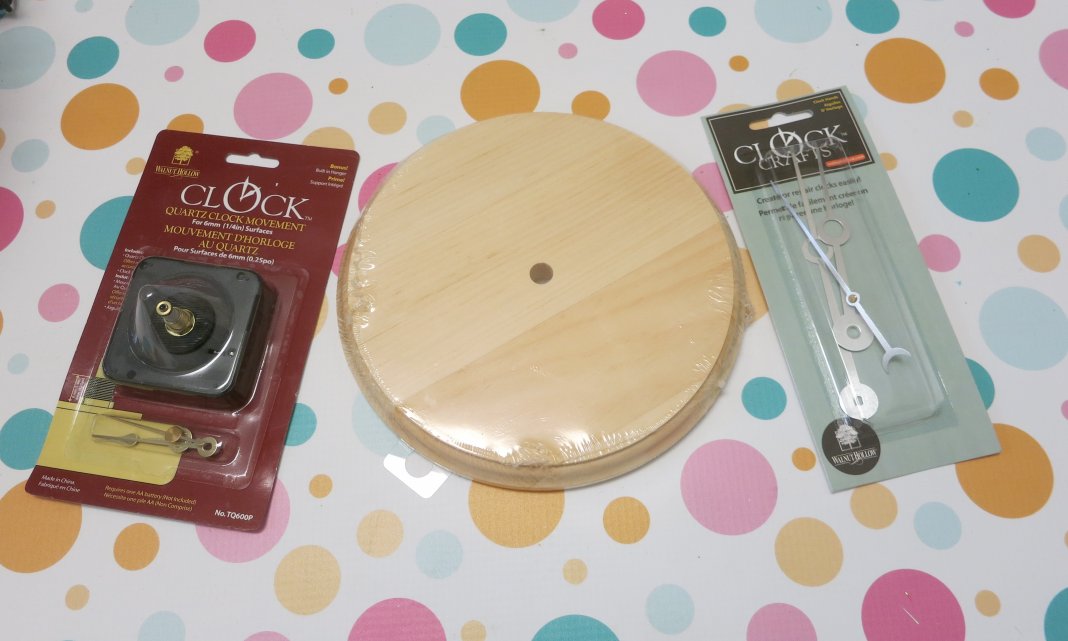
DIY Atomic Retro Clock Decor Supplies
- Small Unfinished Wood Clock Round
- Clock Gear and Hands (DIY Kit)
- Paint: White paint, silver paint, and Glamour Dust paint in various colors
- Dowel rods (12 inches long)
- Styrofoam balls (4 two inch, 8 one inch)
- Woodburning tool
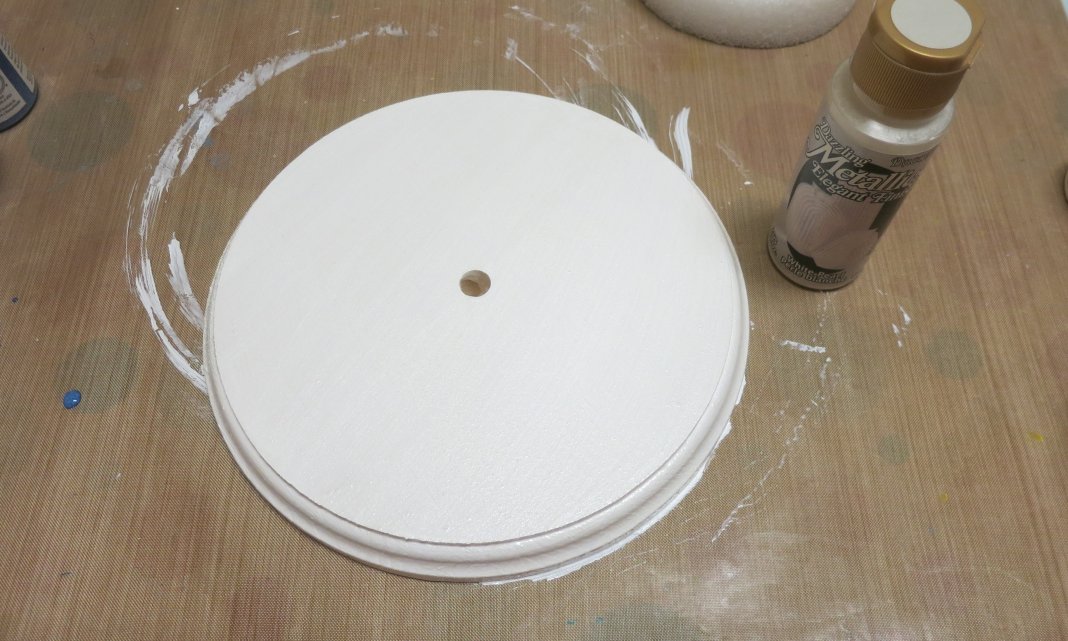
Paint the face of the clock with white paint. When it dries, add some shine to it by painting over it with a Pearl Lustre paint.
Paint the twelve dowel rods silver.
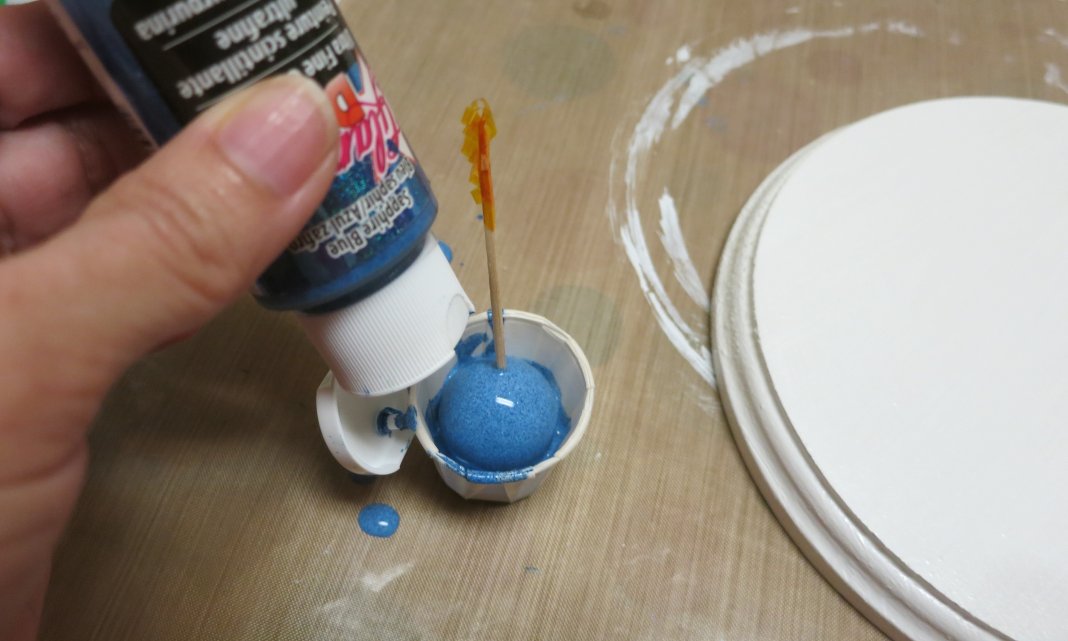
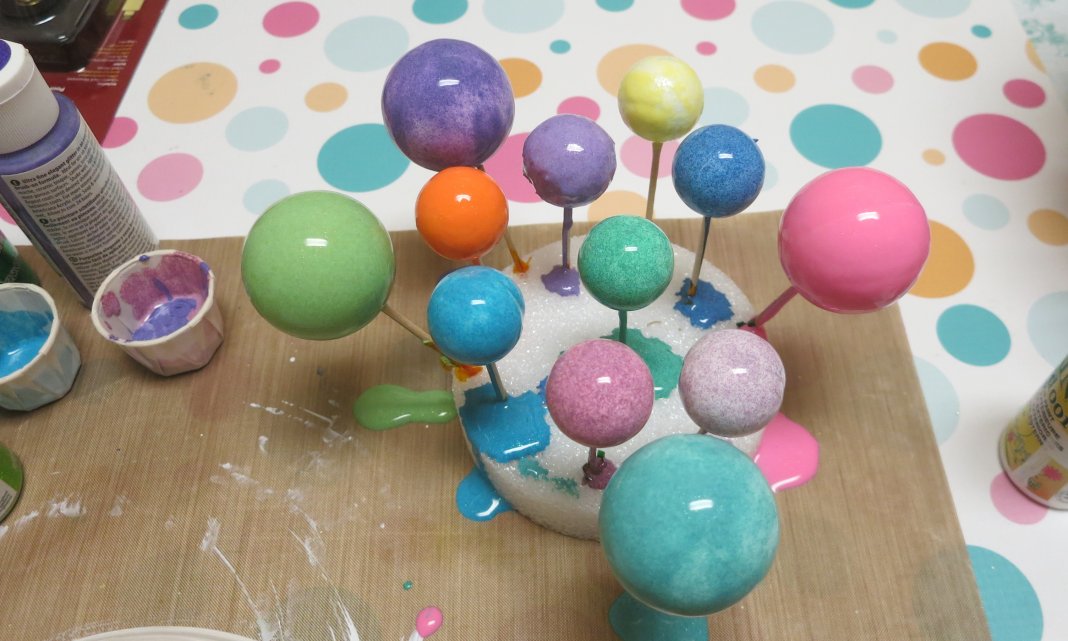
Paint each of the styrofoam balls with the Glamour Dust paint. To make this as easy as possible, I insert a toothpick into the base of the ball. Holding the ball over a small cup, I pour the paint all over it to cover the surface. Let the excess drip off, then place then toothpick in a styrofoam disk so the ball can dry. Repeat as needed.
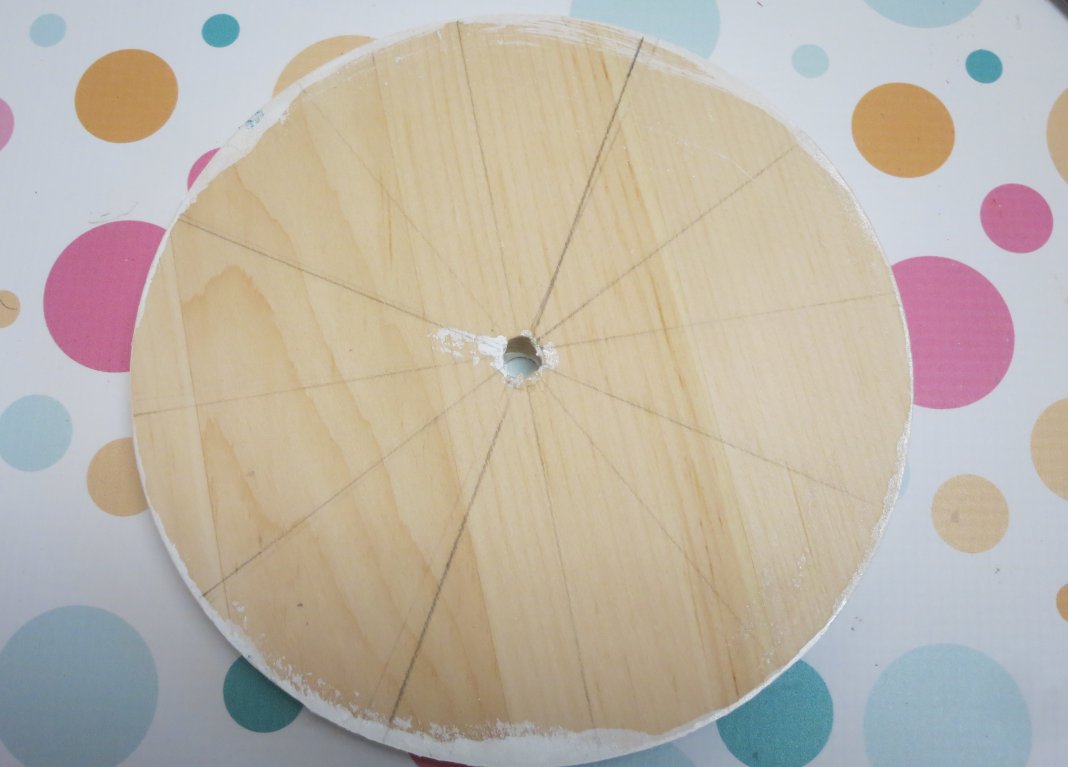
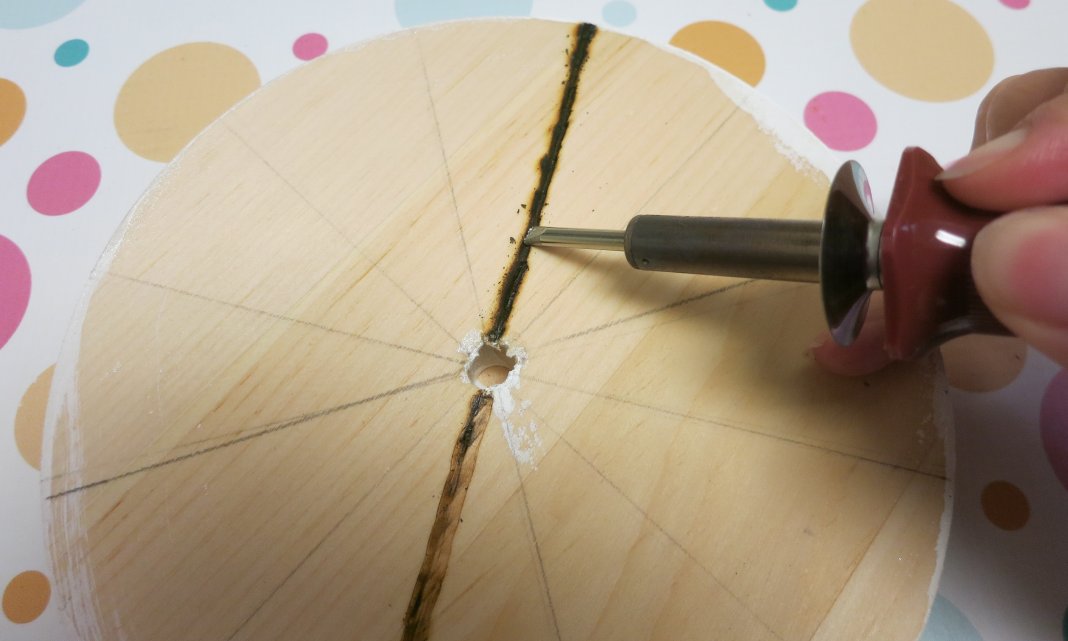
Use a pencil to mark lines on the unpainted back of the clock. Trace the lines wuth the woodburning tool. Repeat until the lines are as wide as the dowel rods.
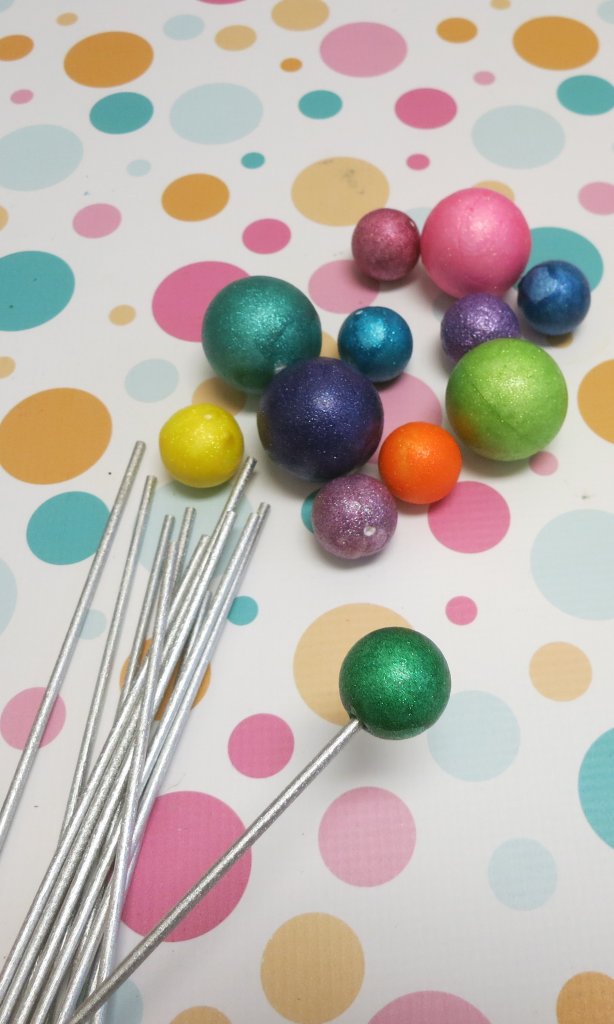
Skewer the colorful balls onto the ends of the dowel rods.
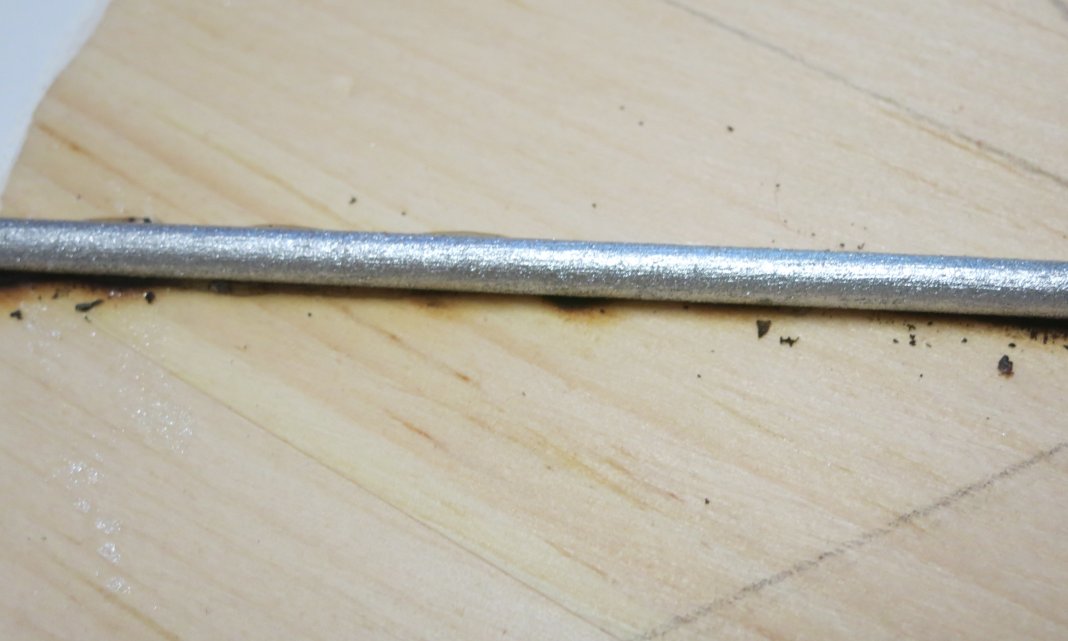
Glue the dowel rods into the lines you created. This way the rods will be evenly sized and won’t roll around the back of the clock.
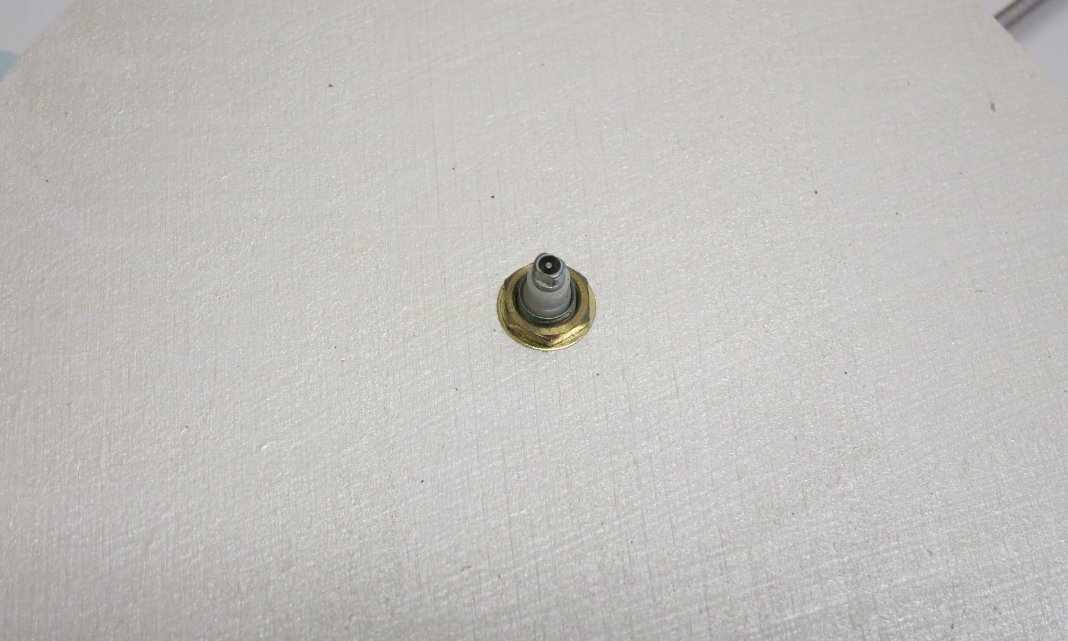
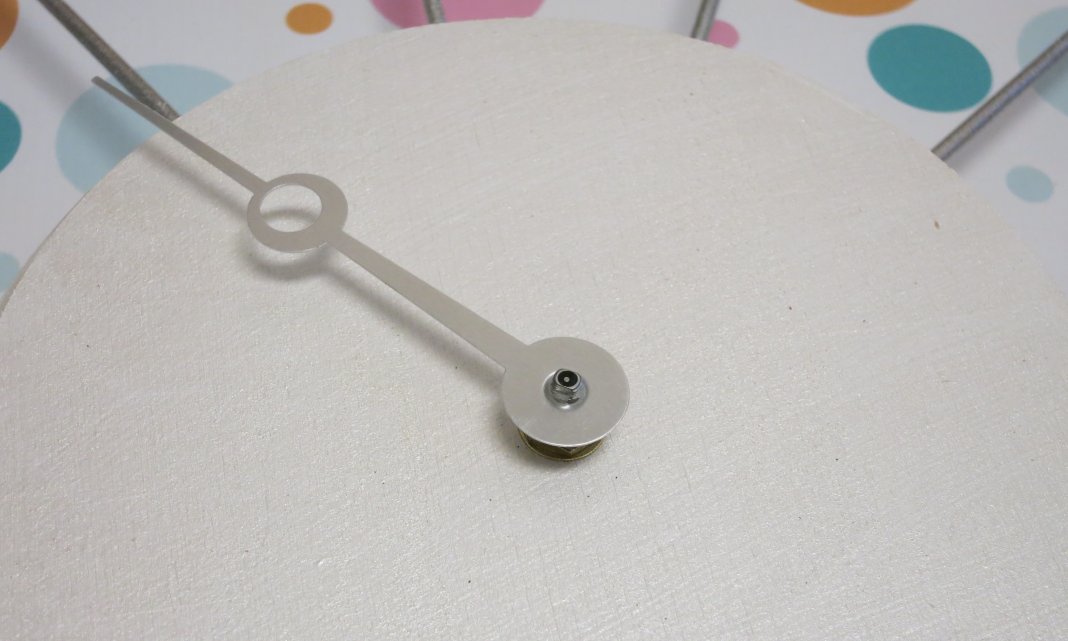
Follow the easy to understand instructions on the back of the clock gear to assemble the clock. First, place the mechanism in the back of the clock. Slide the minutes hand on, followed by the hour hand. Finish with the seconds hand. The clock gear comes with a hanger already in it, so all you have to do is add a battery before hanging up the clock.

I’ve seen this style clock retail in the hundreds of dollars. I was able to create my own for much, much less! Have fun crafting and creating your own clock for your space!
Leave a Reply