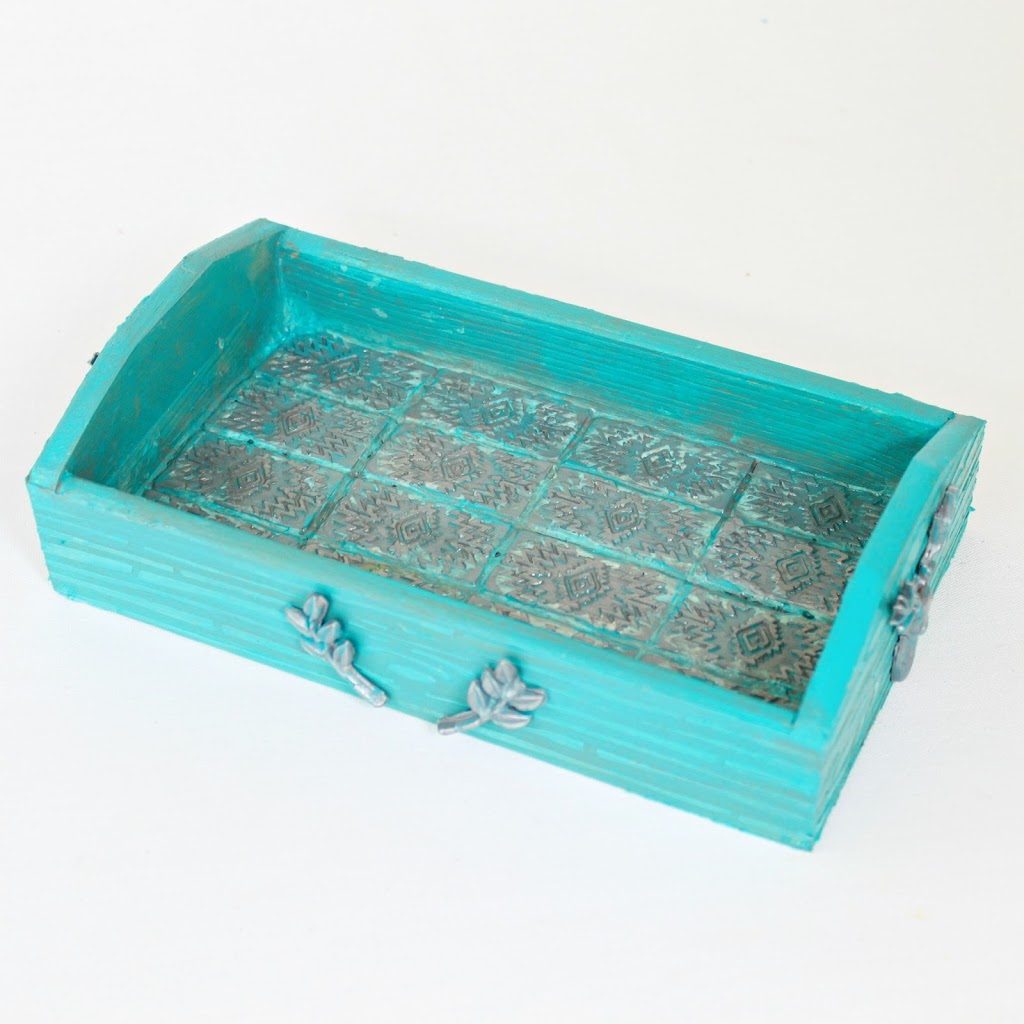
This colorful decorative piece was inspired by turquoise jewelry. When I first saw these amazing Mod Melts molds with nature shapes and geometric designs, I knew I wanted to try to create something that reminded me of southwestern art. I combined several different Plaid Craft products to create this jewelry tray.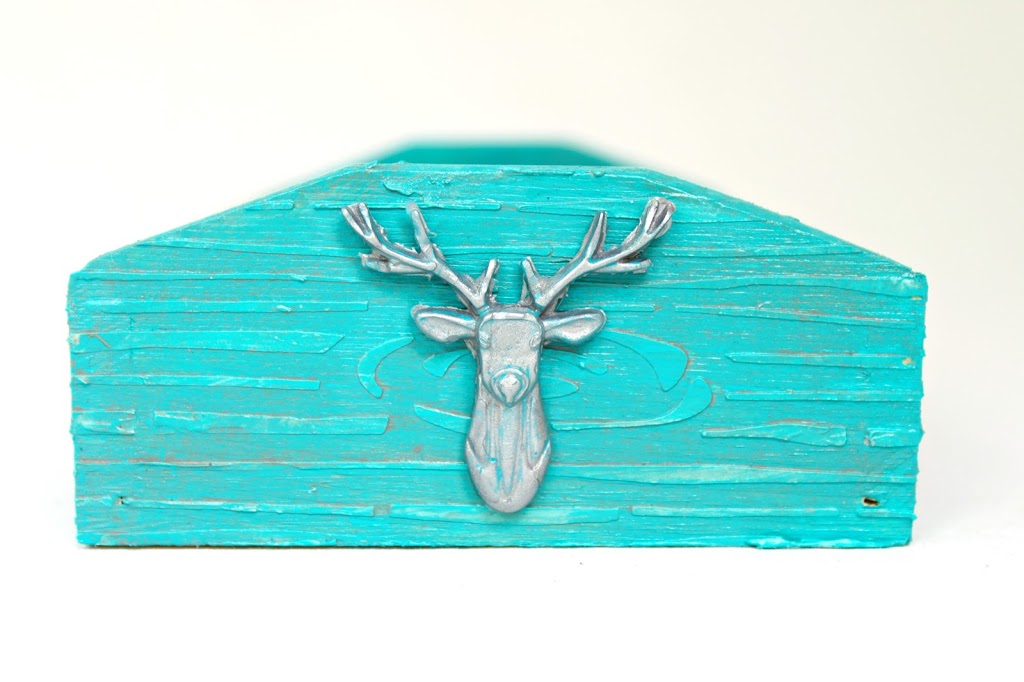
Supplies Used to make the Jewelry Tray: (affiliate links included)
-
- Darice Pine Wood Serving Trays
- Mod Podge Collage Clay, Vanilla White
- Mod Podge Stencil in Woodgrain
- Mod Podge Mod Melts, Metallics
- Mod Podge Mod Mold: Mystical Forest and Patterns
- Glue Gun
- Turquiose Paint
- Darice Pine Wood Serving Trays
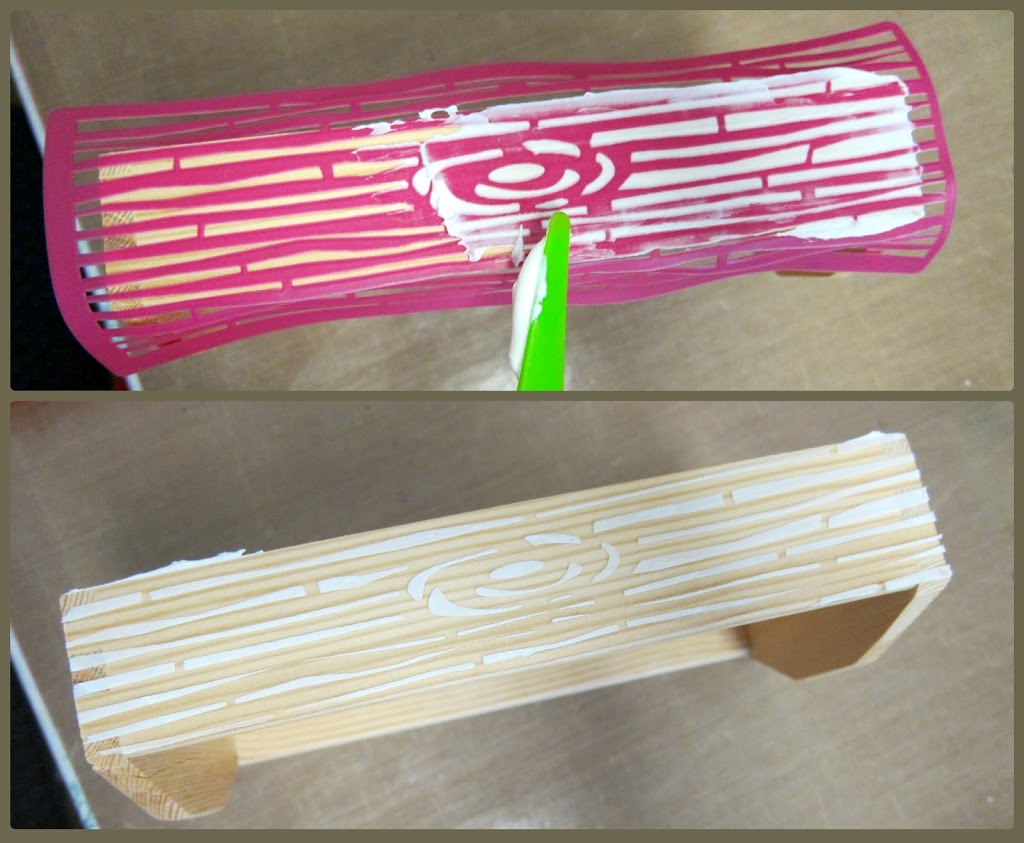
Step one: Place the stencil on the side of the wood tray. Use a palette knife to smooth collage clay over the stencil. Repeat this process until the box is covered with the wood grain design. Set the jewelry tray aside to dry. (For more information about collage clay and how to use it, check out my post HERE.)
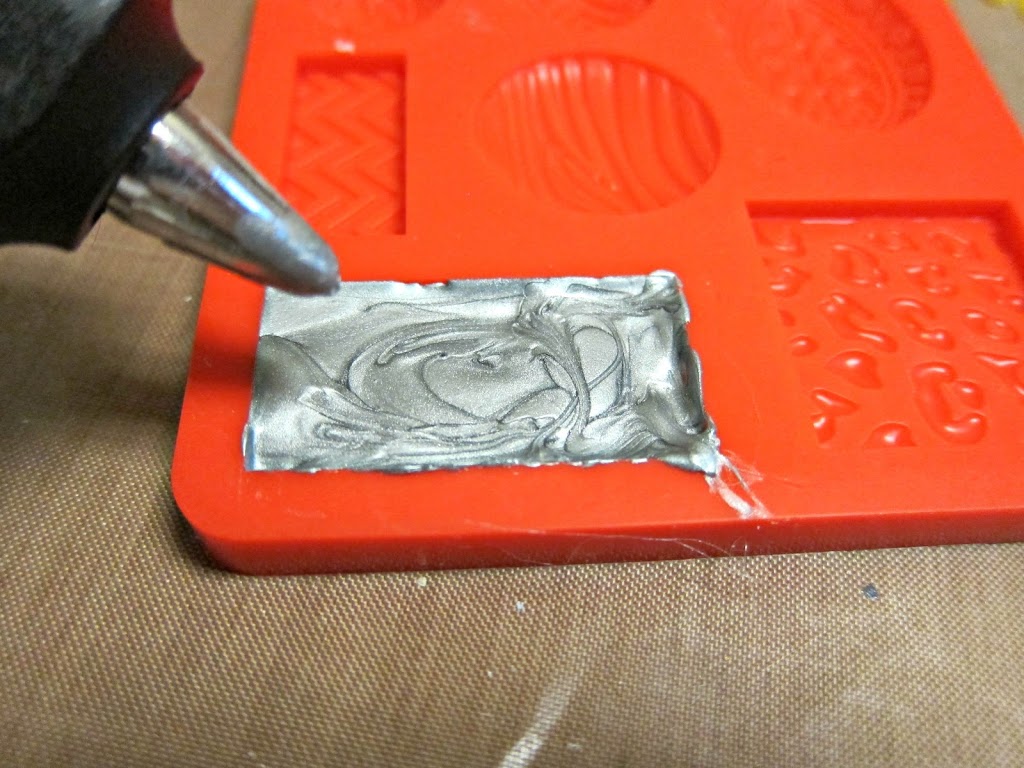
Step two: Use silver Mod Melt sticks to make the pattern square, the deer head, and the leaves. For more detailed information about Mod Melts and how to use them, please visit THIS post.
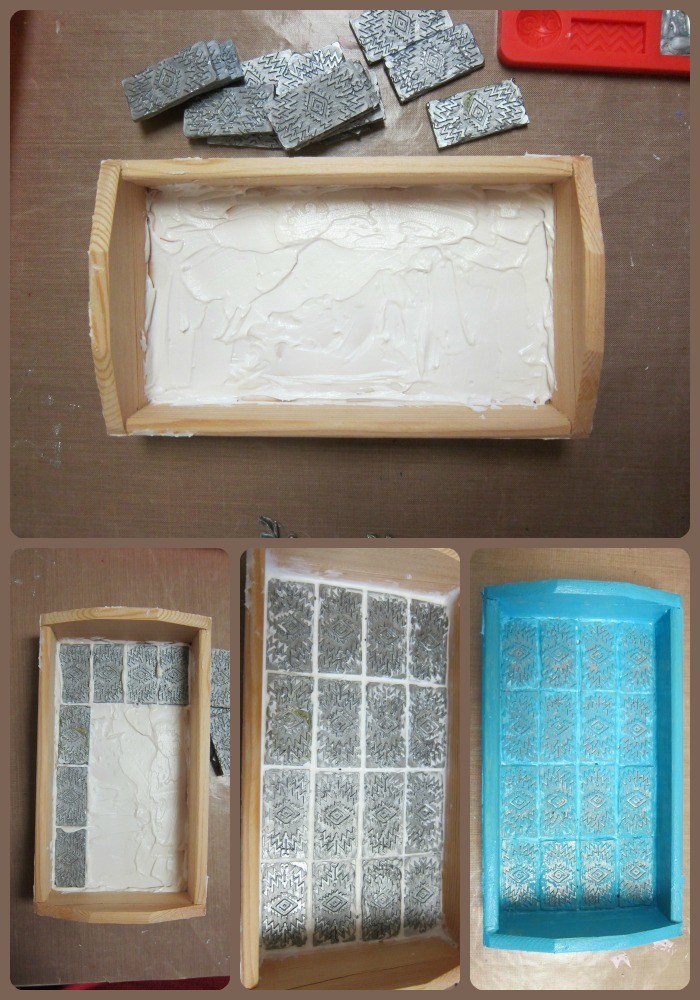
Step three: Spread collage clay over the base of the tray, and gently press the pattern squares into the clay, as if you were tiling a floor! Smooth out any excess clay. Set the project aside to dry.
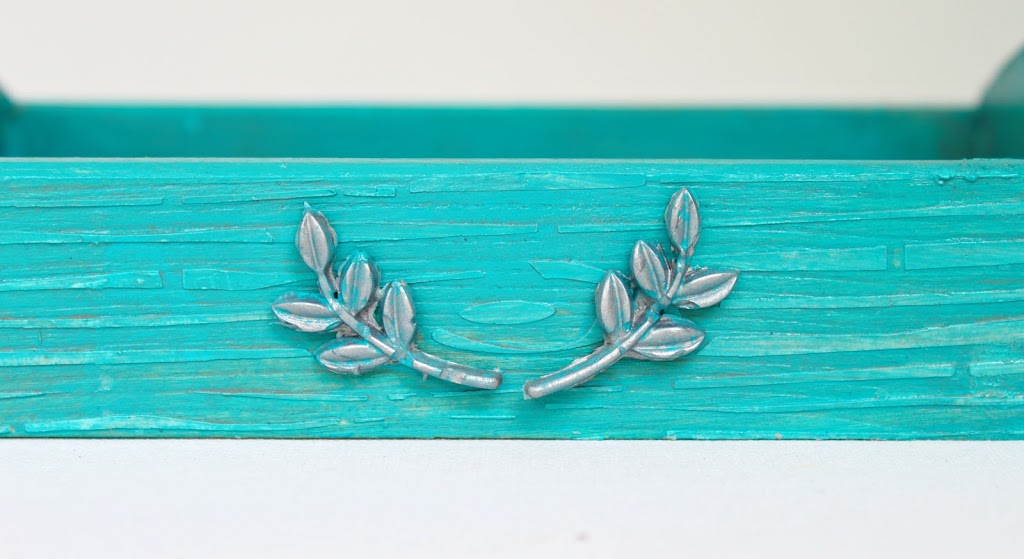
Step five: Paint the deer heads and leaves with turqouise paint, and wipe the paint back with a cloth. Use a tiny bit of collage clay to attach these items to the tray.
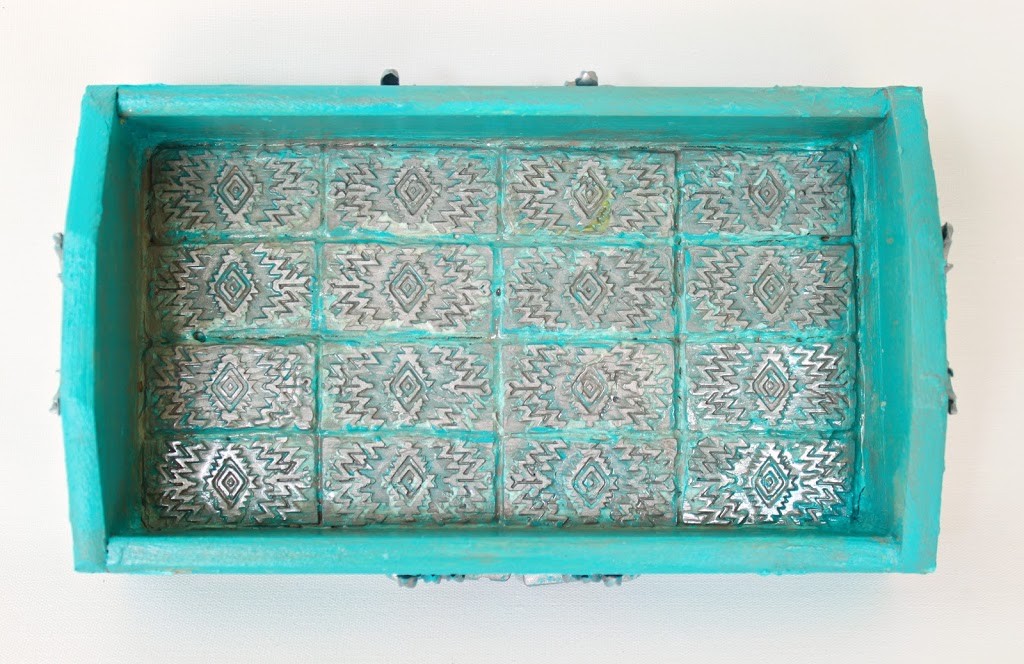
This tray looks great on my son’s bathroom counter. He uses it to hold his loose change and other small items. I love to play with the melts, clay, and stencils to create unique items! Have fun crafting and creating!
Leave a Reply